Two types of installation
Your copy of Preps software may be:
- Integrated with Prinergy Workflow software or Prinergy Evo software
- A standalone installation
Integrated installations
You do not need to perform the installation procedure on this page.
If your version of Preps 9.0 is integrated and supported with Kodak Prinergy Workflow 9.0, it will be automatically installed/updated in the Workshop directory when the installer is run on the client workstation. Preps 9.0 is also supported with Prinergy Evo 6.1.3 and later.
The templates, marks, resources, and printers folders will be located in the AraxiPreps volume on the Prinergy server. To convert legacy jobs and templates, run the Preps Template Migration Utility.
The PrepsPrinergy.cfg profile is used when launching Preps from Workshop. For information about modifying the configuration file settings, see Answer ID 72524 in your support portal (login required).
For more information about Preps integration into Prinergy Workflow software, see Answer ID 40933 in your support portal (login required).
Standalone installations
Use the procedure on this page to install Preps independently of Prinergy Workflow Software on the client workstation.
The templates, marks, resources, and printers folders will be located locally. To convert legacy jobs and templates, run the Preps Template Migration Utility.
The default profile will be used when launching Preps from a standalone installation. To migrate configuration settings, run the Preps Migration Utility.
Important: Do not attempt to overwrite or install Preps on Prinergy Workflow Clients on the AraxiPreps share of a Prinergy Workflow server.
To install Preps software:
- Log on to your computer as an administrator.
- If an existing copy of the Preps software is already installed:
- Store a backup copy of the existing Preps installation folder in another location.
- Ensure that the software is not running when you start the installation.
- Log on to Kodak Partner Place.
- On the Partner Place home page, select Service & Support > Prepress Software Downloads.
Search for Preps 9.x downloads, and download the Preps 9.0.0 Installer for your operating system to your workstation.
Browse to the location where you stored the installer file and double-click it.
The Installation Wizard appears.- In the Installation Wizard, follow the instructions.
Note: A computer restart may be required.
Due to security settings, you may encounter an error message when installing Preps on a Mac OS 10.x computer.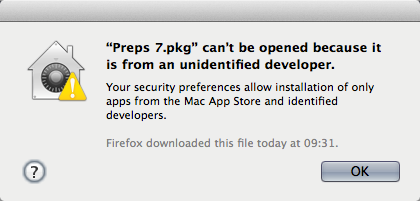
- If you encounter the error message, perform these actions:
- In System Preferences > Security & Privacy > General, click the lock icon and enter the administrator's password to unlock the settings.
- Set Allow applications downloaded from to Anywhere.
- If applicable, use the Migration Utility tool to copy previous configuration settings from a backed-up copy to the new installation folder.
See Migrating from an earlier version of Preps for more details. - License your Preps software in one of the following ways:
- Use a floating license provided by your Prinergy Workflow software, if available.
- Use the software licensing option.
See the Licensing pages for more details.
Preps and Adobe software components
Preps 9.0 includes version 10 of the Adobe PDF Library software for reading, modifying, and writing PDF documents. To use the Adobe PDF Library instead of the Preps internal PDF engine, add this setting to your Preps Profile:
-Use_PPT_PDFLIB:YES