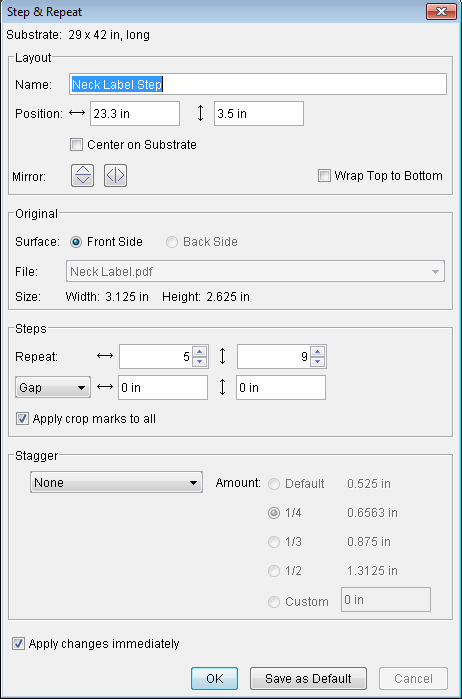
Note: If you used Save as Default and Apply changes immediately in a previous activity, this information will be remembered for the next Step and Repeat that you create. As you continue to make changes, the Step and Repeat will update with each change that you make.
- With
Neck Label.pdfselected, perform one of the following actions:- Right-click and select Step & Repeat.
- From the Object menu, select Step & Repeat.
In the Layout section of the Step & Repeat dialog box, enter the following information:
Name:
Neck Label Step
Position:
Horiz: 23.3 in. (592 mm)
Vert: 3.5 in. (90 mm)
In the Steps section, enter the following information:
Repeat:
Horiz: 5
Vert: 9
Gap:
Horiz: 0
Vert: 0
Apply crop marks to all
Select the check box
- In the Stagger section, select None.
- Select the Apply changes immediately check box.
- Click OK.
- Click the Bleed tool
 to see the bleeds that need attention.
 - From the Object menu, select Resolve Rectangular Bleeds.
NoticeCAL_Quadtone_6-color.pdfautomatically resizes itself in relation to the newly added Neck Label step-and-repeat layout. This is because when the mark was edited, the placement was specified to anchor to the layout. - To deselect the Bleed tool, click the Selection tool
 .
.