Build a job template
- If it is not already open, start the Pandora software.
- Perform one of the following actions:
- From the File menu, select New.
- In the Pandora toolbar, click the New icon
 .
.
From the Edit menu, select Preferences.
On the Die Settings tab, change the Snap Artwork to Die preference to Use Vector Dieline from Artwork.
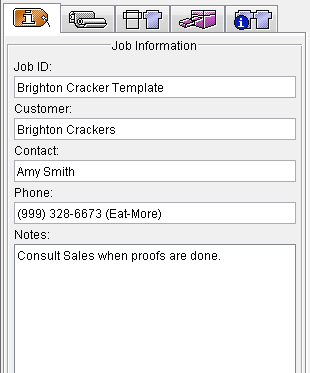
In the job properties view, select the Job Information tab and enter the following information:
Job ID:
Brighton Cracker Template
Customer:
Brighton Crackers
Contact:
Amy Smith
Phone:
(999) 328-6673 (Eat-More)
Notes:
Consult Sales when proofs are done.
- From the Window menu, select Show ShopMap Palette.
- Drag the following resources from the ShopMap palette into the layout view:
- Substrate: 32 in. x 40 in. (812.8 mm x 1016 mm)
- Plate: 34 in. x 44 in. (863.6 mm x 1117.6 mm)
- Press: 2
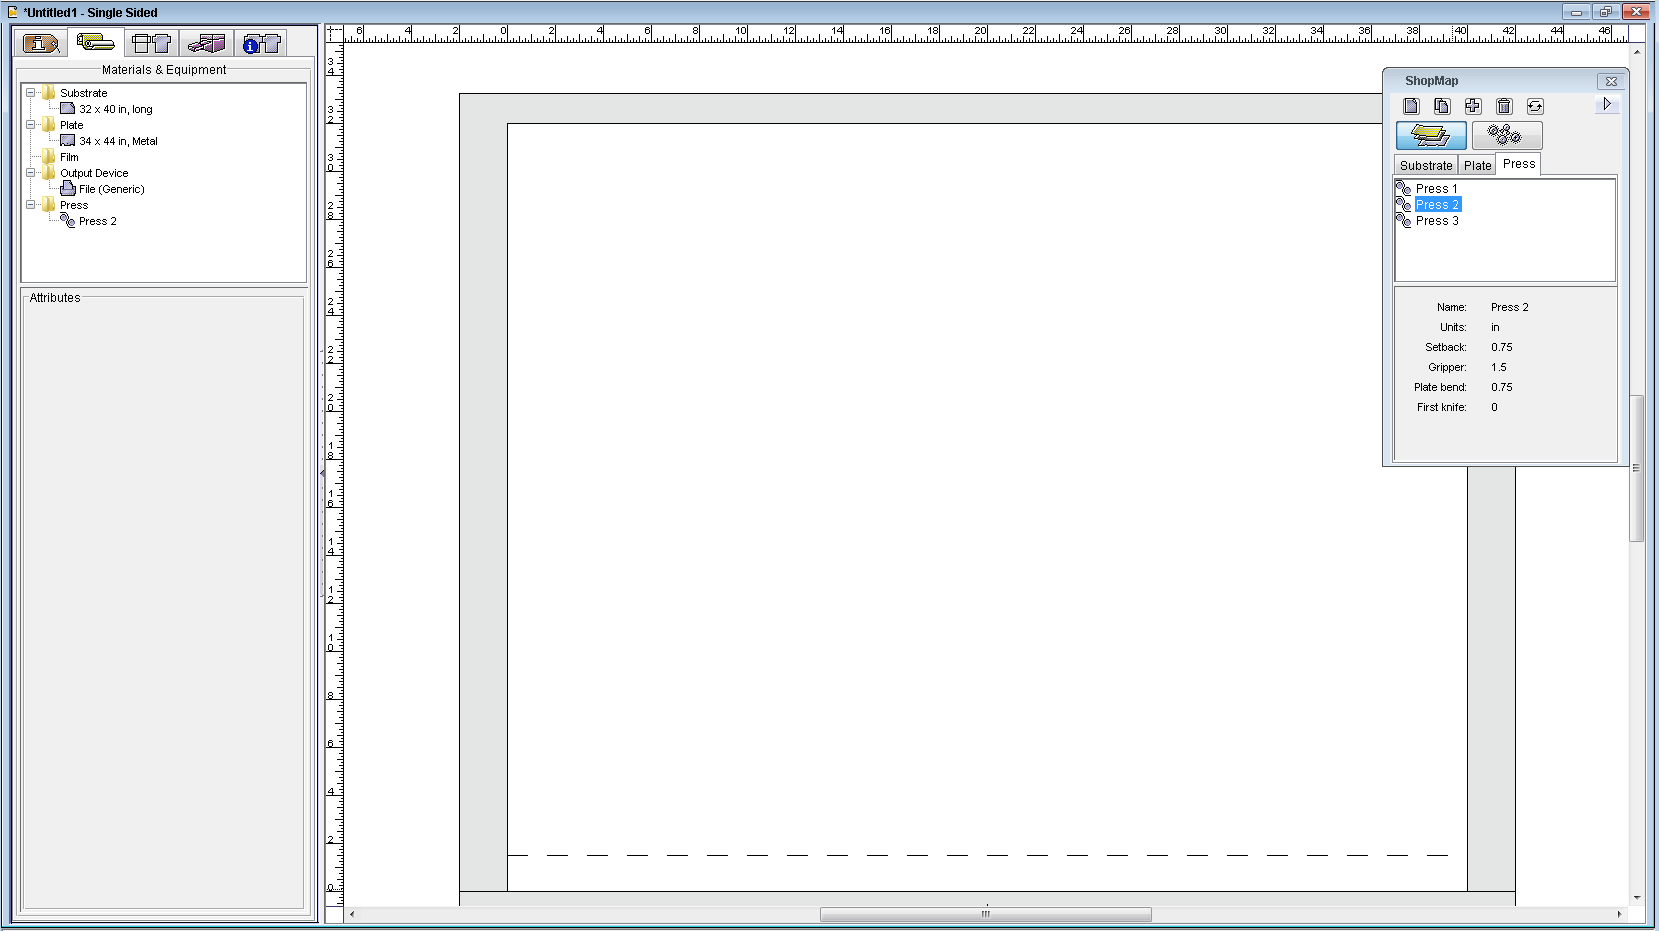
- Close the ShopMap palette.
- Find and open the
Brighton Cracker Boxfolder, select theCAD1.dxffile, and drag it to the Content tab.
Or, click the Import Die tool . In the Import Die dialog box, locate where you are storing the sample activity files, select
 Brighton Cracker Box > CAD1.dxf, and click Import (Windows) or Open (Mac).
The die appears on the layout. - With the die selected, from the Window menu, select Show Geometry Palette.
- In the Geometry palette, select the lower-left reference anchor. In the Y coordinate box, type
1.5 in.(38.1 mm) and press Enter. This places the die accurately to the substrate. Close the Geometry palette.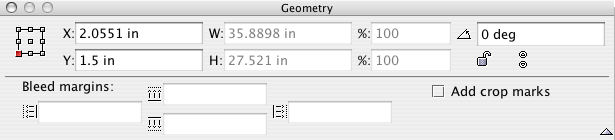
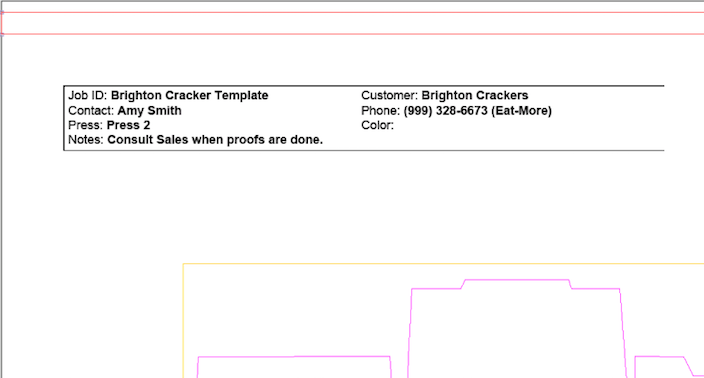
- From the Window menu, select Show Marks Palette. From the SmartMarks folder, select the mark named
CB_4-color.pdfand drag the mark onto the layout. - From the
Labelsfolder, select the mark namedLBL_Info_Box.pdfand drag the mark onto the upper-left corner of the layout. - Using the Zoom
 and Selection
  tools, position the mark accurately and then close the Marks palette.
 - From the View menu, select Fit In Window.
Save the job template
- From the File menu, select Save Copy As Template.
- View the automatic placement of the job template in Applications\Pandora\JobTemplates.
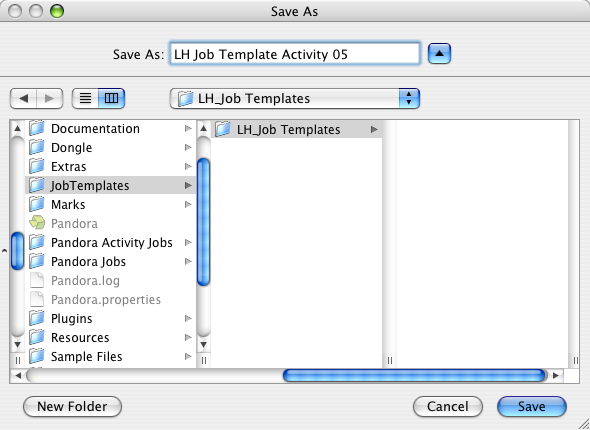
If for some reason Pandora doesn't automatically locate this folder, navigate to this location. This is the default location where the Pandora software is installed. The Job Templates folder is designed to store all job templates that are created in Pandora. If job templates aren't stored here, Pandora won't automatically recognize them when you create a new job. - In the Save As dialog box, click New Folder.
- In the New Folder dialog box, type:
<Your Initials>_Job Templates. - Click Create.
Pandora job template files can be stored in theJob Templatesfolder in Pandora, or in subfolders within theJob Templatesfolder. - Select the
<Your Initials>_Job Templatesfolder and in the Save As box, type:<Your Initials>_Job Template Activity 05
Click Save.
- Close the job.
A warning message appears:Untitled has been changed. Do you want to save changes?
Select Don't Save.