Page tree

Versions Compared

Key

  • This line was added.
  • This line was removed.
  • Formatting was changed.
Comment: Published by Scroll Versions from space PANTWK and version Pandora_Training_Working_8.4
Sv translation
languageen

Note: If you used Save as Default and Apply changes immediately in a previous activity, this information will be remembered for the next Step and Repeat that you create. As you continue to make changes, the Step and Repeat will update with each change that you make.

  1. Select the artwork in the layout view, if it is not already selected.
  2. Perform one of the following actions:
    • Right-click and select Step & Repeat.
    • From the Object menu, select Step & Repeat.
  3. In the Layout section of the Step & Repeat dialog box, enter the following information:

    Name:

    Soap Label Step

    Position:

    Horiz: 6.693 in. (170 mm)


    Vert: 0.5906 in. (15 mm)

    Wrap Top to Bottom check boxSelect

    When you select the Wrap Top to Bottom check box, artwork partially overhanging the top edge of the substrate is cropped at the substrate edge, and the cropped data is positioned along the bottom of the substrate so that no data is lost. The overhanging row still appears as an empty box that indicates where artwork will be cropped on output. Wrapping a step-and-repeat layout is used for certain types of gravure cylinders or flexographic sleeves that have no leading edge and are continuous.


  4. In the Steps section, enter the following information:

    Repeat:

    Horiz: 4


    Vert: 4

    Gap:

    Horiz: 0.5 in. (12.7 mm)

    Note: The vertical Distance and Gap options are disabled when Wrap Top to Bottom is selected, in order to equally space the objects around the cylinder.


  5. In the Stagger section, select the following options:

    Stagger:

    Staircase Up

    Amount:

    Default

  6. If it is not already selected, select the Apply changes immediately check box.
  7. Click OK.
    Notice the object is stepped and repeated, staggered, and wrapped in the layout view. 


Sv translation
languagefr

Remarque : si vous avez utilisé Enregistrer comme valeur par défaut et Appliquer immédiatement les modifications dans l'activité précédente, ces informations seront mémorisées pour votre prochaine création à partir d'une copie en répétition. Tandis que vous continuez à apporter des modifications, l'opération de copie en répétition est mise à jour après chaque modification que vous effectuez.

  1. Sélectionnez la maquette dans la vue Mise en page si cela n'est pas déjà fait.
  2. Effectuez l'une des opérations suivantes :
    • Cliquez avec le bouton droit de la souris et sélectionnez Copie en répétition.
    • Dans le menu Objet, sélectionnez Copie en répétition.
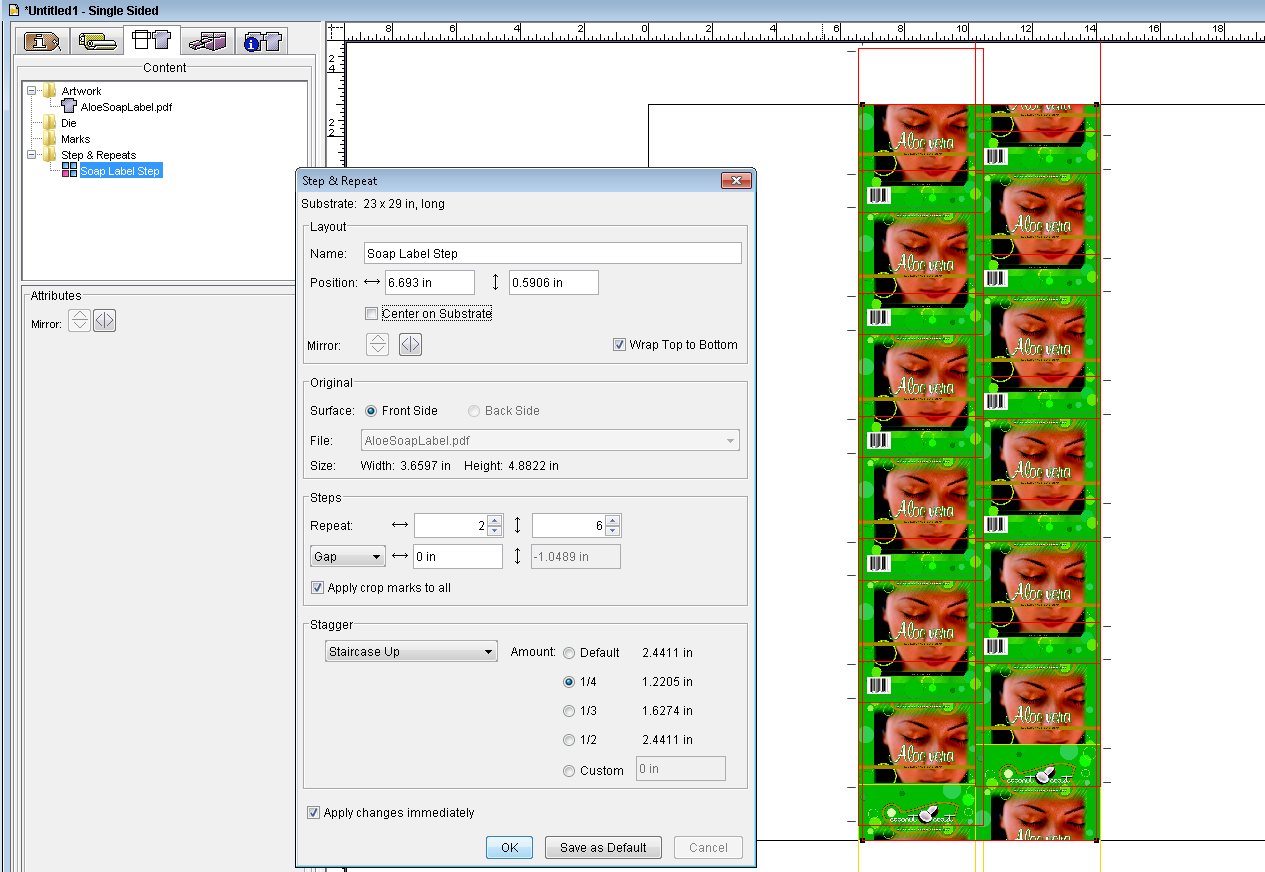
  3. Dans la section Mise en page de la boîte de dialogue Copie en répétition, saisissez les informations suivantes :

    Nom :

    Soap Label Step

    Position :

    Horiz. : 6,693 po. (170 mm)


    Vert. : 0,5906 po. (15 mm)

    Case à cocher Enrouler de haut en basSélectionner

    Lorsque vous cochez la case Enrouler de haut en bas, la maquette qui dépasse partiellement du bord supérieur du substrat est rognée. Les données rognées sont ensuite positionnées au bas du substrat pour qu'aucune donnée ne soit perdue. Les rangées qui dépassent apparaissent encore comme un champ vide indiquant l'endroit où les maquettes seront rognées en sortie. L'enveloppement d'une mise en page de copie en répétition est utilisé pour certains types de cylindres en creux ou de manchons flexographiques continus, sans bord supérieur.


  4. Dans la section Copies, saisissez les informations suivantes :

    Répétition :

    Horiz. : 4


    Vert. : 4

    Écart :

    Horiz. : 0,5 po. (12,7 mm)

    Remarque : les options Distance et Écart vertical(e) sont désactivées lorsque vous sélectionnez Enrouler de haut en bas, de manière à espacer les objets équitablement autour du cylindre.


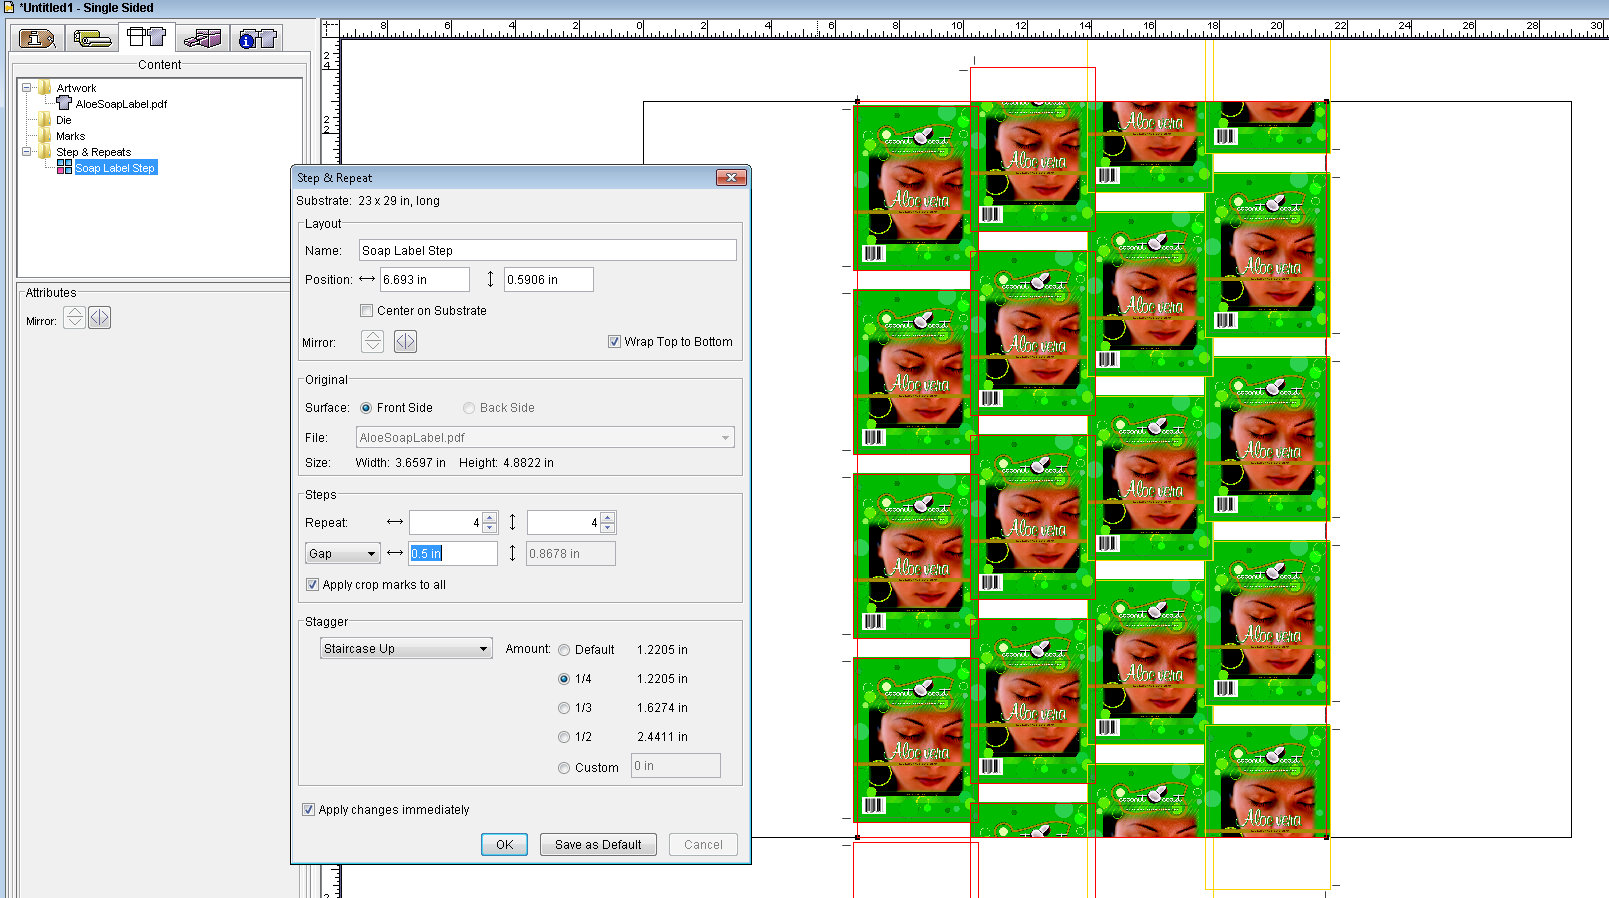
  5. Dans la section Décalage, sélectionnez les options suivantes :

    Décalage :

    Escalier supérieur

    Quantité :

    Par défaut

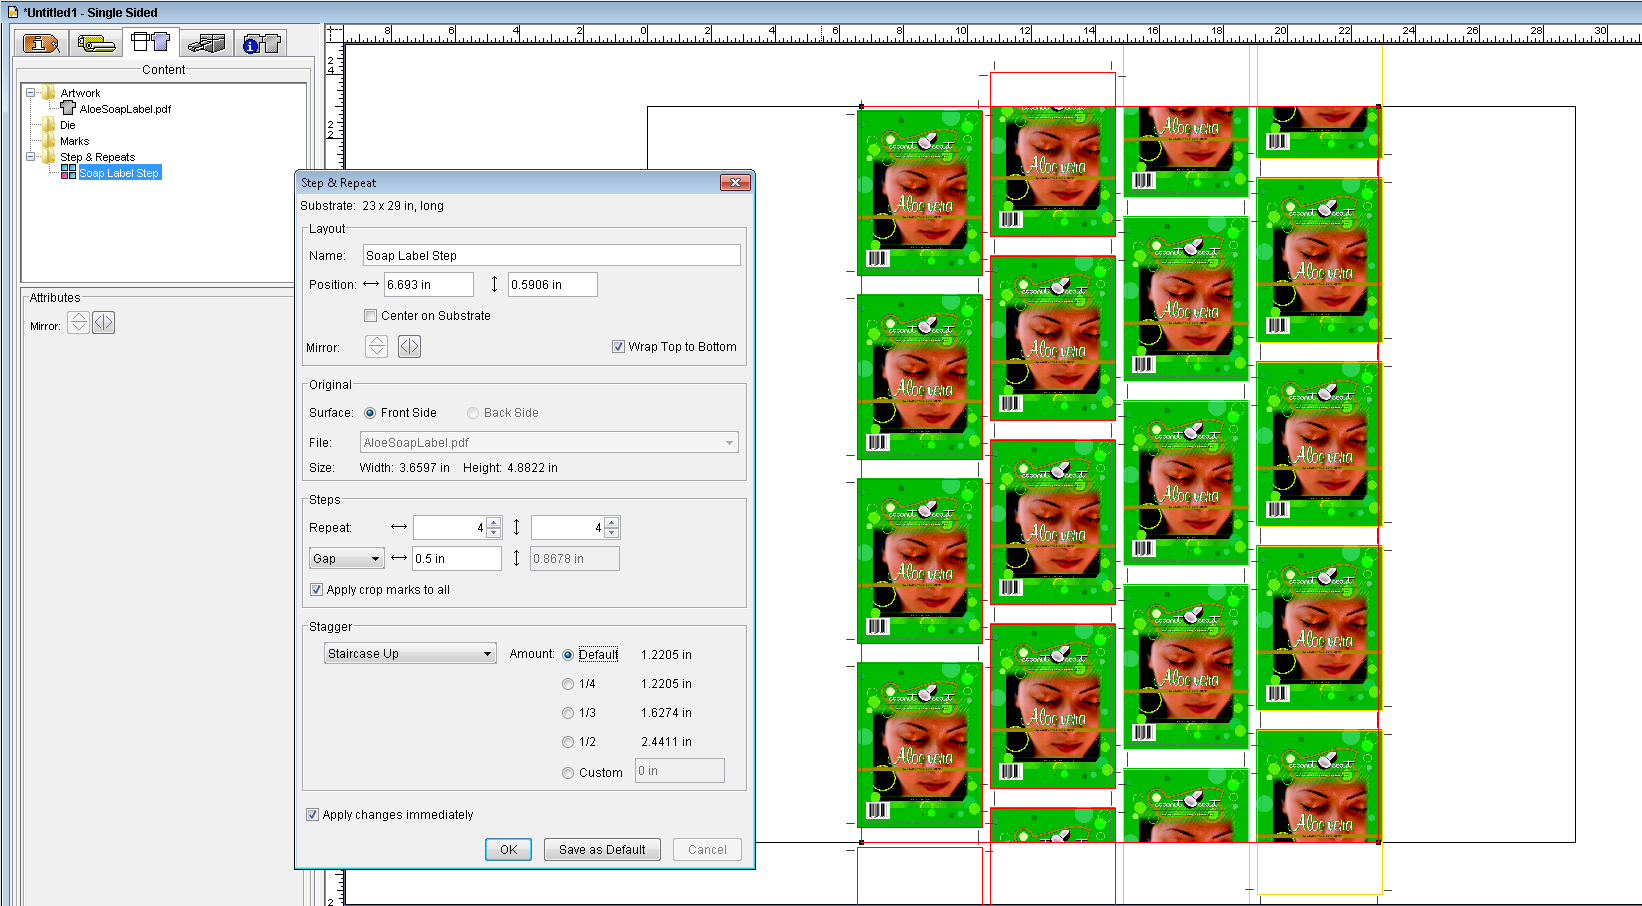
  6. Si elle n'est pas déjà sélectionnée, cochez la case Appliquer immédiatement les modifications.
  7. Cliquez sur OK.
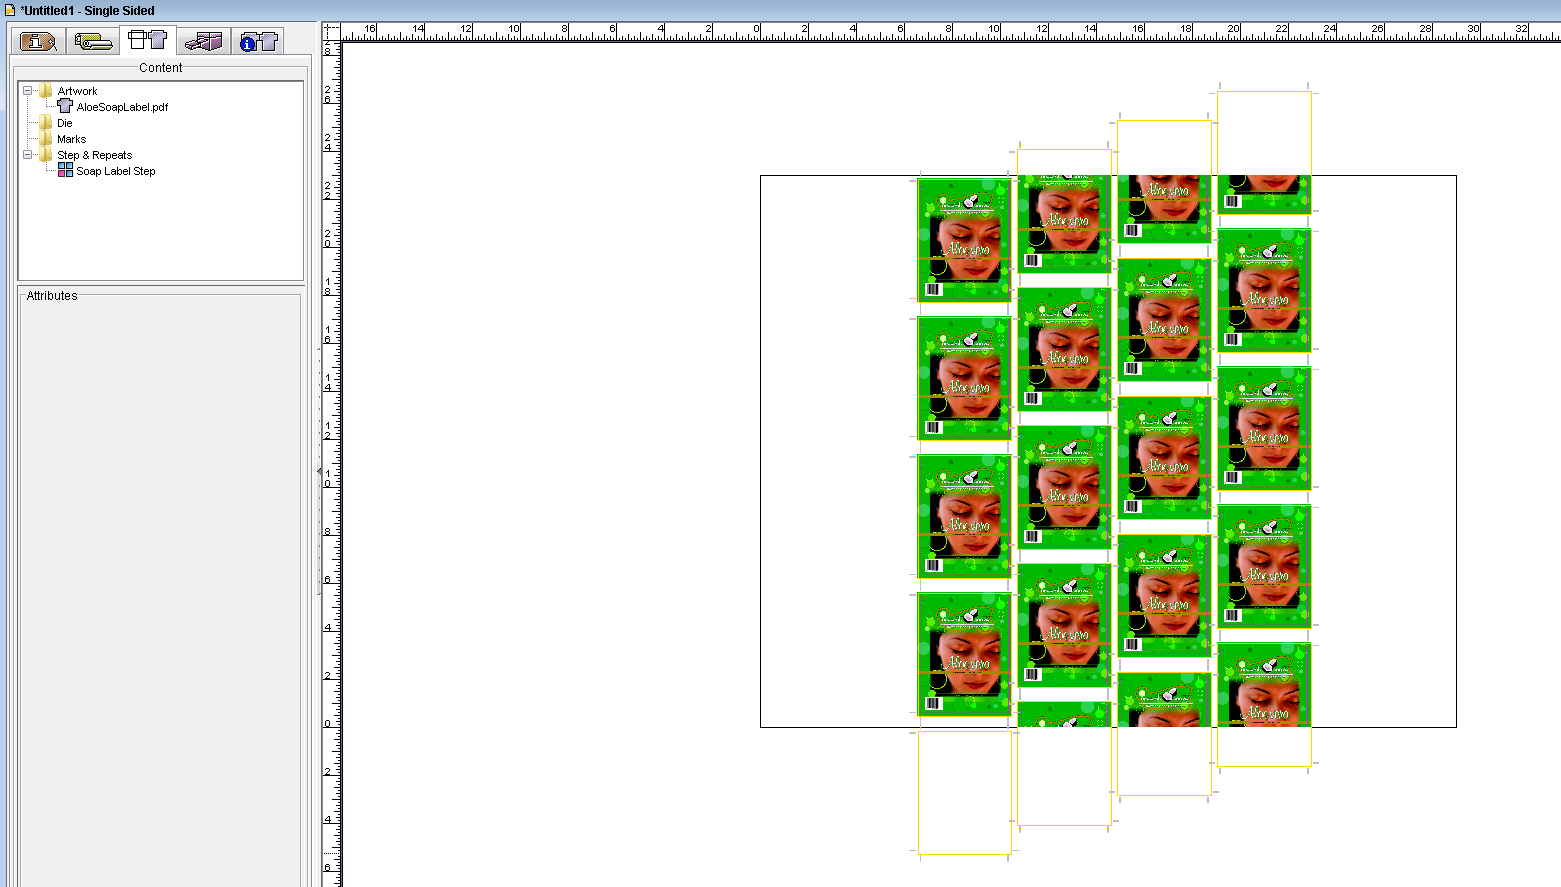
    Notez que l'objet est copié en répétition, décalé et enveloppé dans la vue Mise en page