Page tree

Versions Compared

Key

  • This line was added.
  • This line was removed.
  • Formatting was changed.
Comment: Published by Scroll Versions from space PANTWK and version Pandora_Training_Working_8.4
Sv translation
languageen
  1. Perform one of the following actions:
    • On the Marks palette, open the Pandora folder and double-click CAL_Quadtone_6-color.pdf.
    • Click CAL_Quadtone_6-color.pdf and then click Edit at the top of the Marks palette.
  2. In the Mark Settings dialog box, click Convert to SmartMark.
  3. Click New to make the selected mark appear in the Placements box.
  4. With the mark highlighted in the Placements box, under Anchored To, select Layout.
    In order for a SmartMark to know where it is positioned, you define a placement relative to the Substrate, Film, Plate, Die, LayoutArtwork, DieStation, or Step & Repeats.
  5. In the Mark section, choose the center point in the reference point diagram.
  6. In the Vertical section, select the Top position, and type an offset value of 1 in. (25.4 mm).
  7. In the Horizontal section under Position, select Left.
  8. In the Horizontal section under Type, select Stepped.
    Keep all other items at their default settings.
  9. Click Save As and browse to Pandora > Marks > User and click New Folder.
  10. Type SIS_Custom Marks XX_Custom Marks (where XX represent your initials) and click Create.
  11. Open the SIS_Custom Marks XX_Custom Marks folder and in the Save As box, type Custom_SmartMark and click Save.
  12. The new mark now appears as a SmartMark in the Marks palette in the SIS_Custom Marks XX_Custom Marks folder.
  13. Drag the new custom SmartMark to the layout.
    Notice the automatic placement of the mark. Because the mark placement is specified to anchor to the layout, it automatically places itself in relation to the artwork on the substrate. 


Sv translation
languagefr
  1. Effectuez l'une des opérations suivantes :
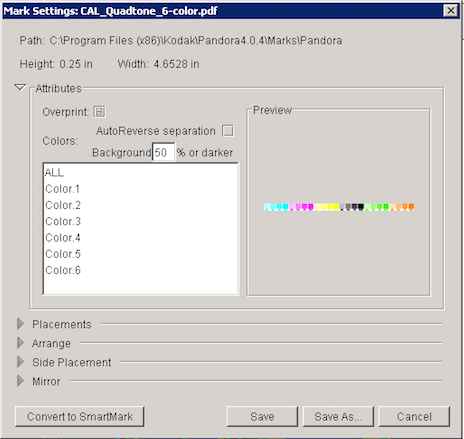
    • Sur la palette Repères, ouvrez le dossier Pandora et double-cliquez sur CAL_Quadtone_6-color.pdf.
    • Cliquez sur CAL_Quadtone_6-color.pdf puis cliquez sur Édition en haut de la palette Repères.
  2. Dans la boîte de dialogue Paramètres des repères, cliquez sur Convertir en repère SmartMark.
  3. Cliquez sur Nouveau pour faire apparaître le repère sélectionné dans le champ Positionnements.
  4. Mettez en surbrillance le repère dans le champ Positionnements, sous Ancré à, et sélectionnez Mise en page.
    Pour qu'un repère SmartMark connaisse sa position, définissez un emplacement par rapport au substrat, au film, à la plaque, à la découpe, à la mise en page, à la maquette, au poste de découpe ou à la copie en répétition.
  5. Dans la section Repère, choisissez le point central du schéma du point de référence.
  6. Dans la section Verticale, sélectionnez la position Haut et saisissez une valeur de décalage de 1 po. (25,4 mm).
  7. Dans la section Horizontale, sous Position, sélectionnez Gauche.
  8. Dans la section Horizontale, sous Type, sélectionnez Copié.
    Conservez les paramètres par défaut pour tous les autres éléments.
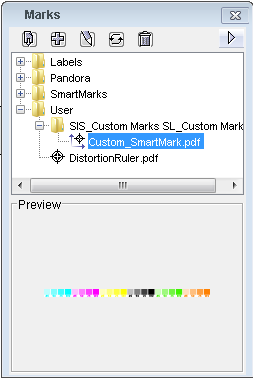
  9. Cliquez sur Enregistrer sous et accédez à Pandora > Repères > Utilisateur, puis cliquez sur Nouveau dossier.
  10. Saisissez SIS_Custom Marks XX_Custom Marks (XX représentant vos initiales) et cliquez sur Créer.
  11. Ouvrez le dossier SIS_Custom Marks XX_Custom Marks et dans le champ Enregistrer sous, saisissez Custom_SmartMark, puis cliquez sur Enregistrer.
  12. Le nouveau repère apparaît maintenant comme un SmartMark dans la palette Repères dans le dossier SIS_Custom Marks XX_Custom Marks.
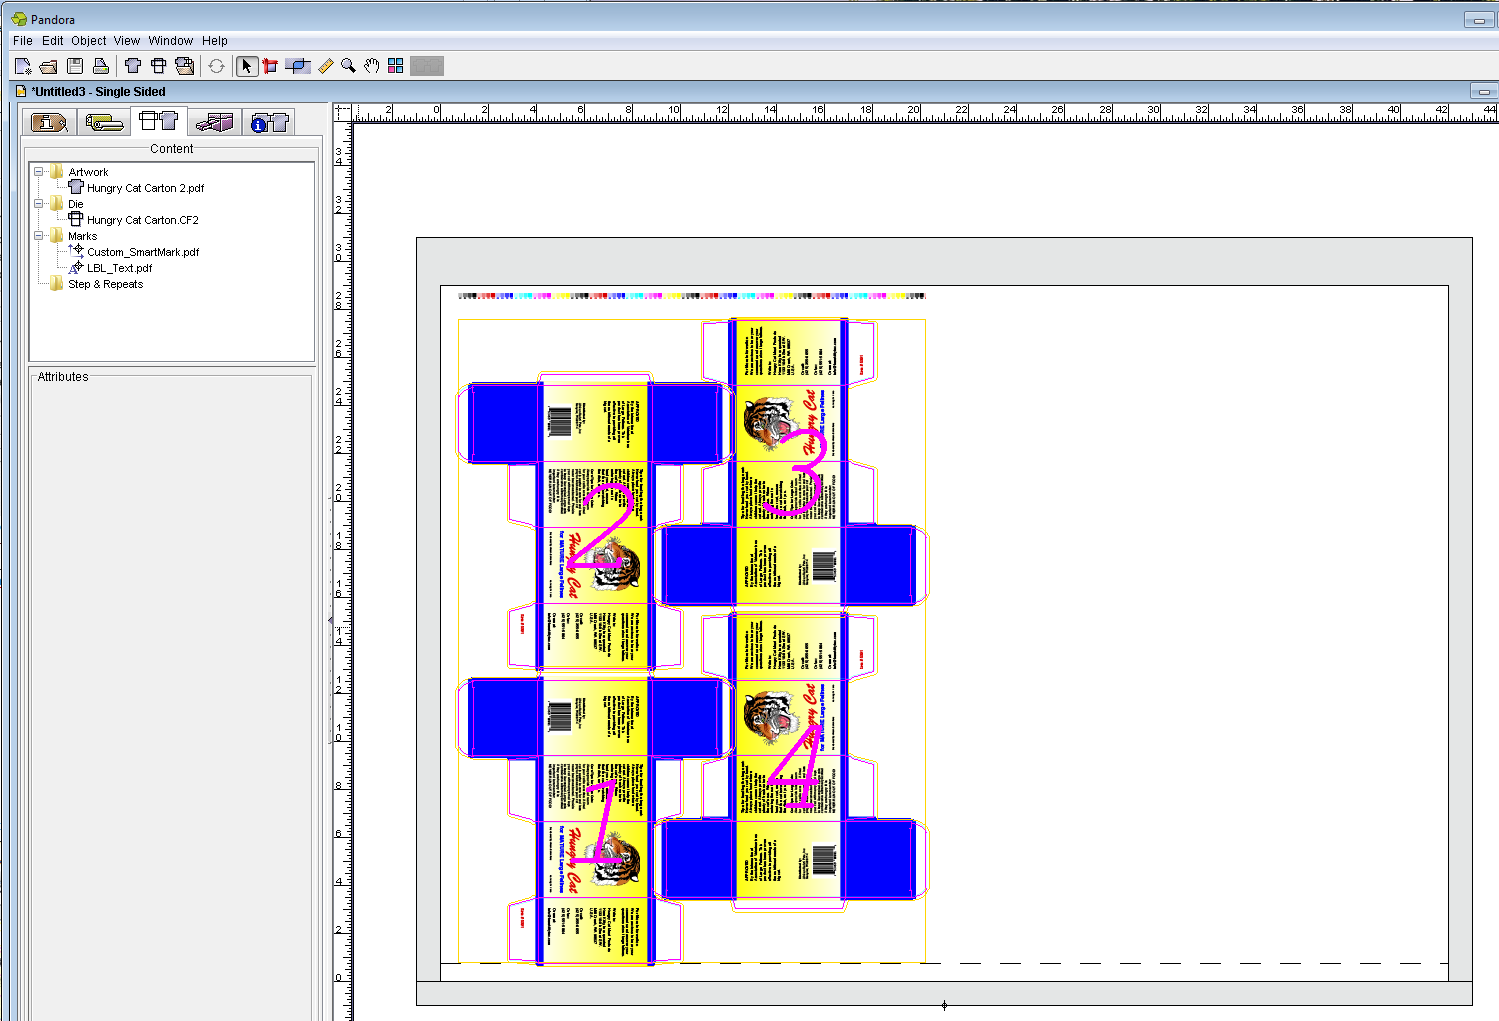
  13. Faites glisser le nouveau repère SmartMark personnalisé vers la mise en page.
    Notez le positionnement automatique du repère. L'emplacement du repère est défini comme ancré à la mise en page. Par conséquent il se place automatiquement par rapport à la maquette sur le substrat.