- Launch Adobe Illustrator and open the document you want to preview.
- In the Illustrator menu bar, go to the Window menu and select Prinergy > Eye > Preview.

When you launch the Preview function, the entire Preview window will appear gray. - Click the Preview icon or press the Update Preview icon. The preview progress bar appears and the system generates the preview image. After updating, all objects in the current Illustrator file appear in the Preview screen.
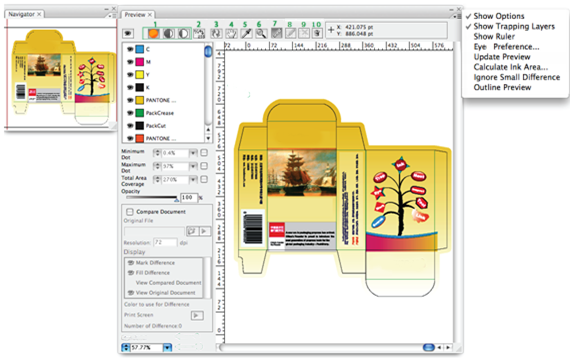
- Use the toolbar to:
- Select the preview mode (normal, negative, positive)
- Select the ink display method
- Update the preview
- Drag an object in the preview window
- Check the ink color of a selected point
- Zoom in or out
- Access measurement tools
- Draw or cancel a contrast area or delete a contrast result.
- Use the side menu to access various Preview options:
- Control what is displayed in the preview window (Show Options)
- Display or hide the trapping layer
- Activate a measurement operation for determining width, height, depth, and angle
- Select a densitometer mode for the eyedropper (Eye Preference)
- Update the preview
- Calculate an ink area
- Select and edit paths and compound paths (Outline Preview)
- Simulate registration errors that can occur during printing
- Use the left panel to:
- Toggle between showing or hiding the colors in the color list
- Set values for percentage of minimum and maximum dot
- Select the value of total area coverage
- Preview the dark areas in contrast to the light areas (Opacity)
- Compare files for visual differences
Overview
Content Tools