This type of position setting applies to rectangle marks, ellipse marks, gradation marks, text marks and image marks. Setting alignment points for the marks and the marked objects.
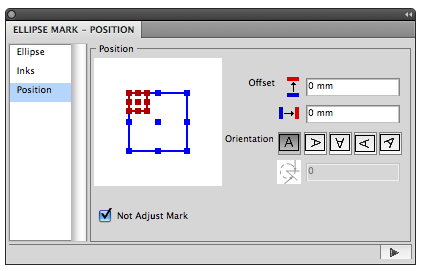
As shown in the image, the location setting dialog box contains two images. The red image represents the nine reference locator points of the mark's Bounding Box, and the blue image represents the nine reference locator points of the marked object's Bounding Box. You can use the mouse to select and drag the red image to align the reference point of the mark's bounding box with any reference point of the marked object's bounding box to control the mark and object's basic position relationship.
Offset
After setting the basic position relationship between the mark and the marked object, you can use Offset to set the exact position. The image shows the effect after setting vertical offset and horizontal offset. H represents the vertical offset, and W represents the horizontal offset. You can use formula to set the offset value.For variables and their meaning, see With Step in Ink Setting Type 2.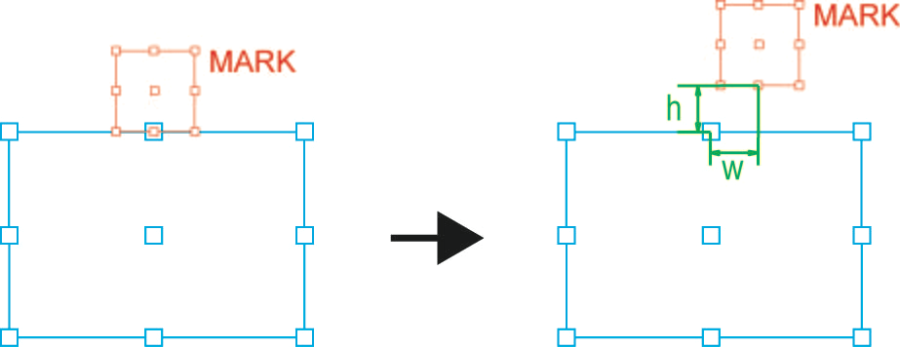
Orientation
Use the Orientation function to set the rotate angle of the mark. There are five options to choose from: 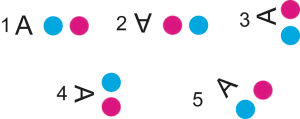
| 1 | Keep the mark in position without moving. |
| 2 | Rotate the mark in a 180-degree clockwise manner. |
| 3 | Rotate the mark in a 90-degree counterclockwise manner. |
| 4 | Rotate the mark in a 90-degree clockwise manner. |
| 5 | Custom allows any rotate angle to be applied to a mark. After choosing this option, the angle setting input box will appear. The desired rotation angle value of marks can be entered and applied. |
Not Adjust Mark
When this option is not selected, when marks overlap on another 1-up file's bleed area, the overlap part will be clipped:
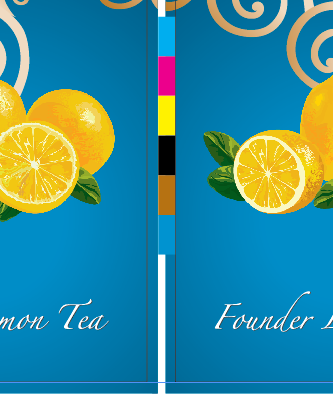
When Not Adjust Mark is selected, the overlap part won't be clipped:
