Create a rule by dragging an event and an action to the workspace in the Rule Builder tool.
When you drag and event icon and an action icon to the workspace, the icons are automatically linked with a line. Together, they make up a rule. To specify details about the action, double-click the line or the action and add instructions. The rule is then ready to use.
Create your first simple rule set.
- Open Rule Set Manager, and click New Rule Set.
Tip: To view information about an item on the Events, Flow, and Actions tabs, roll your mouse over the item until a tooltip appears, and then press F2. - In Rule Builder, drag an event from the Events tab to the blank workspace.
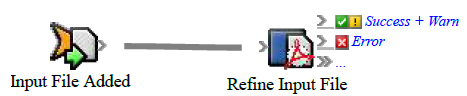
For example, in Prinergy Events > Input File Events, drag Input File Added to the workspace.
Note: To quickly find an event in Rule Builder, click the white space in the Events pane and type the name.
A rule appears consisting of the event that you added plus a red placeholder icon named Action.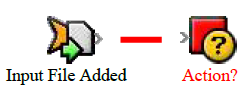
- Add an action to the rule:
- Click the Actions tab.
- Drag an action from the Actions tab to the placeholder icon.
For example, in Prinergy Actions > Input File Actions, drag Refine Input File to the Action icon.
The new action replaces the placeholder icon.
The connector is still red, which indicates that the rule needs more information before it will work (a required parameter is not set). For example, in the Refine Input File action, you must identify which process template it uses to refine the input files.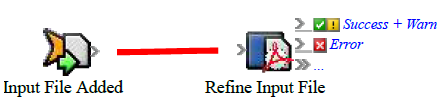
- Set the action parameters:
- Double-click the line between the event and action.
For example, click the Process Template Path parameter.
The icon appears.
 - In Rule Parameters Editor, click a row to set its parameters.
- Click .
- In the Parameter Value dialog box, select the value that you want to assign to the parameter.
For example, for the Process Template Path parameter, select 1stRef-Normz.
Note: If (Enter a Value) appears in red text beside the parameter name, it is a required parameter and you must set the value. - Click OK twice.
The connector changes from red to gray, indicating that all parameters are set.
- Double-click the line between the event and action.
- Click Save.
- In the Save Rule Set As dialog box, select a group folder, type a name (required) and a description (optional), and then click Save.
Note: You cannot save rule sets in system group folders—for example, Prinergy System or Sample Rule Sets. These folders are locked because the next RBA update will overwrite them.
If there is no available group folder, in the Save Rule Set As dialog box, click Create New Group. Type a name and click OK. Save the rule set in this new folder. - Close the rule set.
- Enable the rule set—see Enabling and disabling rule sets.
Prinergy automatically refines input files as soon as they are added.