There is no default template for EFI installed with Prinergy. Use the EFI software to create your own EFI JDF templates.
If you create a Fiery job ticket template (virtual printer) on the Fiery station for each digital press that will use the EFI Fiery digital front end, you can then convert these virtual printers to JDF templates that can be used to submit jobs from Prinergy Digital Print.
- Create a virtual printer in the Fiery software. For more information, see the Fiery Web site.
- Download the EFI Fiery JDF Express Tickets utility that converts this virtual printer to a JDF template from the Kodak services and support portal.
No installation is required for this utility. - Unzip the utility into any folder. The default subfolder name is:
FieryJDFExpressTickets1.0.0.9. - Start the utility by performing one of the following actions:
- Double-click the executable file
JDFExpressTickets.exe. - Create a shortcut on your desktop to start the utility. To do this, right-click
JDFExpressTickets.exefile, select Create Shortcut, and then copy the shortcut to the desktop.
- Double-click the executable file
After the utility starts, the JDF Express Tickets dialog box appears.

- Enter the server IP address or name by performing one of the following actions:
- In the ServerIP/Name box, type the IP address or name of the Fiery RIP that contains the virtual printer to be converted.
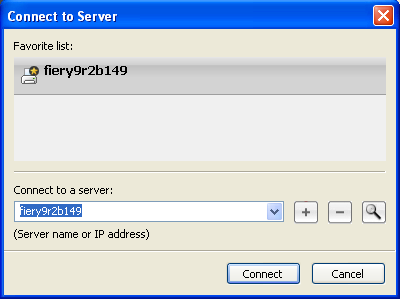
- Search for the RIP using the Search button. In Connect to Server dialog box, type the server name or IP and click + to add the RIP into the Favorite list. Or click the magnifying glass to search for the RIP. Click Connect to connect and exit the Connect to Server dialog box.
- Map a drive to
\\<PrimaryServerName>\DigitalPrintTemplatesand create a subfolder namedFiery. In the JDF Ticket Template Location, click the … button to browse to the mapped drive letter to store the converted JDF template. - Click the Create Template button to create the JDF template.
- (Optional) Click the Open button to open the JDF template destination to check on the created JDF templates.
Note: Click Clear to clear the context box. - Repeat to create additional JDF templates, if required.
- Copy these JDF templates into Prinergy. You can copy them to
C:\Prinergy\CreoAraxi\data\DigitalPrintTemplates, or if desired, create aFierysubfolder underDigitalPrintTemplates.
At runtime, when submitting a job to Prinergy Digital Direct, the operator selects one of these Fiery JDF templates. The operator can override those parameters that Prinergy allows to change (without using the DFE native job ticket editor)—namely, the quantity (JDF Amount) and the input PDF files to be sent.
The JDF template is sent to the Fiery controller via JMF submission. The Fiery controller consumes the JDF template and understands that it references a native virtual printer on the Fiery controller.
An example of an EFI Fiery job ticket
- <JDF xmlns="http://www.CIP4.org/JDFSchema_1_1" Activation="Active" DescriptiveName="VP4" ID="ID1" Status="Ready" Type="Combined" Types="DigitalPrinting" Version="1.3" xmlns:EFI="http://www.efi.com/efijdf" xmlns:jdftyp="http://www.CIP4.org/JDFSchema_1_1_Types" xmlns:xsi="http://www.w3.org/2001/XMLSchema-instance" JobPartID="JP1" NamedFeatures="FieryVirtualPrinter VP4">- <ResourcePool>- <RunList Class="Parameter" ID="RL1" Locked="false" Status="Available">- <LayoutElement> <FileSpec URL="http://www.efi.com/FJDF/Assets/Fiery_JDF_Getting_Started_Guide.pdf" /> </LayoutElement> </RunList> <DigitalPrintingParams Class="Parameter" ID="DP1" Locked="false" Status="Available" /> <Component Class="Quantity" ComponentType="FinalProduct" DescriptiveName="Digital Printing Output" ID="C1" Locked="false" Status="Available" /> </ResourcePool>- <ResourceLinkPool> <RunListLink CombinedProcessIndex="0" Usage="Input" rRef="RL1" /> <DigitalPrintingParamsLink CombinedProcessIndex="0" Usage="Input" rRef="DP1" /> <ComponentLink Amount="1" Usage="Output" rRef="C1" /> </ResourceLinkPool> </JDF>