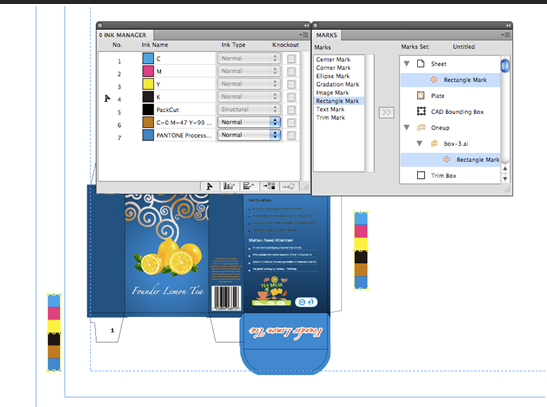
Ink setting type 1
This ink type setting applies to center marks, corner marks, and trim marks. The following example uses the corner mark to explain the process.
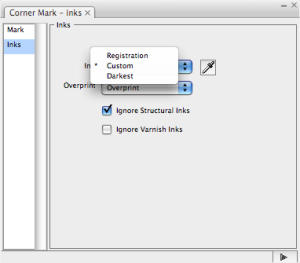
Inks
Select an Ink type
- Registration: Using registration color means that the mark will be reproduced using every ink in the file.
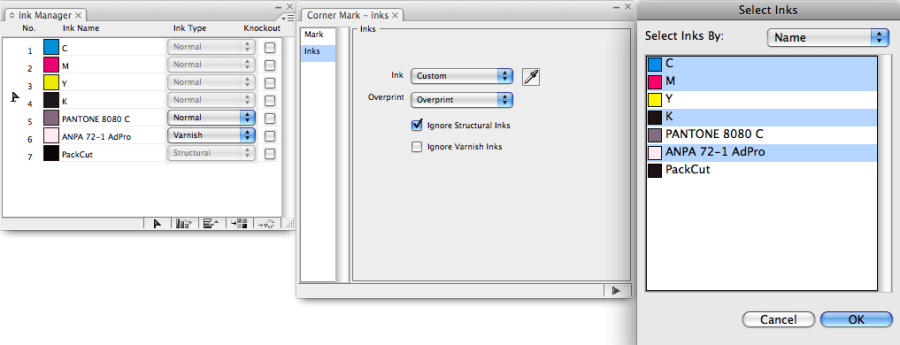
- Custom: Custom ink composition. You can Select Inks By number or name. The Number option means that marks use an ink with a defined number. For example, if the No.3 ink is specified, when the No.3 ink in the Ink Manager is converted from C to Y, the ink used in mark will change to Y. If the No.3 ink is deleted, mark will have no ink assigned to it.
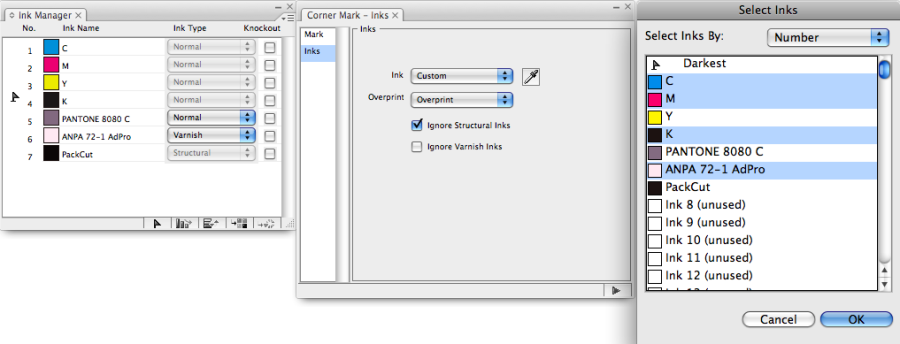
- The Name option means that marks use an ink with a defined name. For example, if the three C/M/Y inks are specified, the inks assigned to the mark change to the C/M/Y colors. If one of the inks is deleted, the mark will have no ink assigned to it.
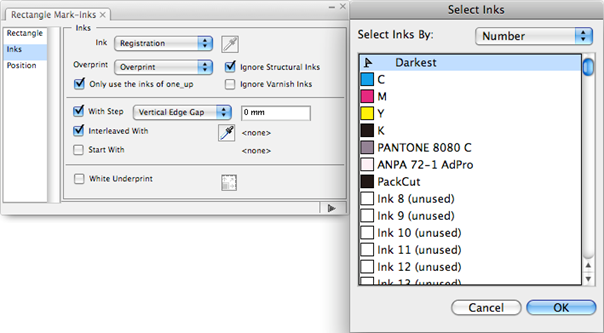
- Darkest: Use the darkest ink resident in the file as the mark's color. As shown in the image, K ink is the darkest ink in the current file.
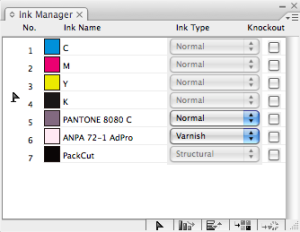
- Ignore Structural Inks: Structural inks will not be available to fill the mark. As shown in the image, after choosing to ignore structural inks, PackCut ink cannot be used for marks, because it is a structural ink.
- Ignore Varnish Inks: Varnish inks will not be available to fill the mark. As shown in the image, after choosing to ignore vanish inks, the ANPA72-1AdPro ink cannot be used for marks, because it is a varnish ink.
- Set Overprint fill type
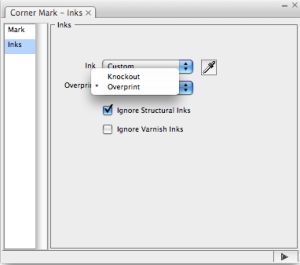
- Knockout: The fill type of the mark is knockout.
- Overprint: The fill type of the mark is overprint.
Ink setting type 2
This ink setting type applies to: rectangle marks, ellipse marks, and image marks with only one ink. The following example uses the Rectangle Mark to explain the process.
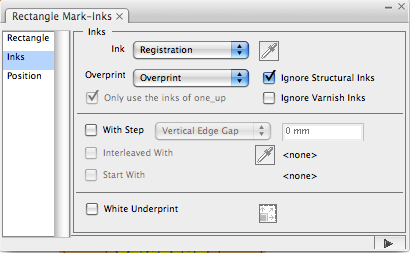
Use the information for ink setting type 1 to set an ink type, ignore specific inks, and set an overprinting type.
Arrangement
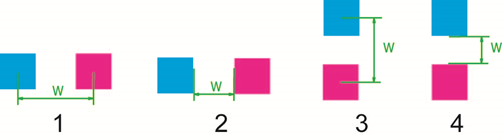
| With Step | When this option is enabled, four additional options appear. According to the parameter selected, the value entered in the text field will be applied to the rectangle mark. This value input supports formula mode. The formula mode includes intrinsic variable and custom variable. The list that follows this table indicates the meaning of the Intrinsic variables. This image illustrates the effect of selecting (1) Vertical Center Gap, (2) Vertical Edge Gap, (3) Horizontal Center Gap, and (4) Horizontal Edge Gap.
|
| Interleaved With | This option is available only if you select the With Step option. When you select Interleaved With, you must also select one interleave ink to use in the marking process. The interleave ink can be selected by name or by number.
|
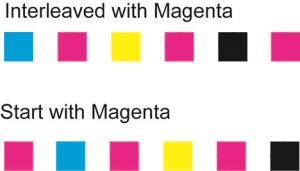
| Start With | This option is available only if you select the Interleaved With option. It allows you to choose whether or not to use the interleave ink as the starting ink for marking. The top image shows the effect of the mark interleaved with Magenta. The bottom image shows the effect of the mark started with Magenta.
|
Intrinsic variables for the With Step option:
- PW: Plate width
- PH: Plate height
- SW: Sheet width
- SH: Sheet height
- MW: Margin width
- MH: Margin height
OW[N]: Step & Repeat Guideline-Bounding Box width of No.[N] one-up file
OH[N]: Step & Repeat Guideline-Bounding Box height of No.[N] one-up file
OB[N]: Bleed width of No.[N] one-up file
C[N]: Column number of No.[N] one-up file
R[N]: Row number of No.[N] one-up file
CGW[N]: Center gap width of No.[N] one-up file
CGW[N]: Center gap width of No.[N] one-up file
CGH[N]: Center gap height of No.[N] one-up file
N: Sequence number of step&repeat one-up file
White Underprint
Selecting White Underprint will open the White Underprint Setting dialog box.

Select Inks: Click to open the Select Inks dialog box and select the ink you want to use. The selected ink will display on the interface.
Direction: Select the Expand or Reduce button. According to the edge space values entered, the created white underprint will be enlarged or decreased based on the current mark shape.
Fixed: If you select this option, the four edge spaces of the mark white underprint will be the same.
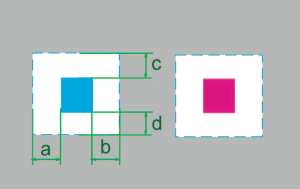
This image shows the enlarge effect of the white underprint.
Tint: Represent ink percentage of marks.
Ink setting type 3
This ink setting type applies to image marks with multiple colors.
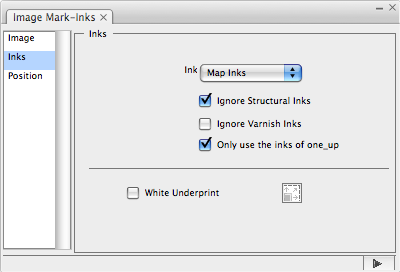
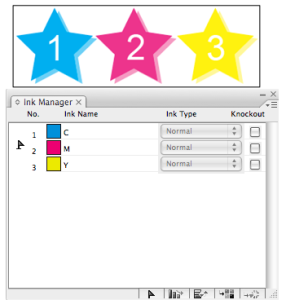
Map Inks: The inks used in the current file are mapped to the inks in the marks file. The example shown in the image is a mark file consisting of 3 stars. Star 1 is filled with C ink, star 2 with M ink, and star 3 with Y ink. With these marks, the ink sequence of the Ink Manager will be 1,C,2,M,3,Y.
In this example, the mark file is loaded into the new document. As shown in the next image, the ink sequence in the Ink Manager is 1,K,2,C,3,Pantone8925C. After using the Map Inks function to map Pantone8925C to 3, the three stars of the mark file will change to 1,K,2,C,3,Pantone8925C. 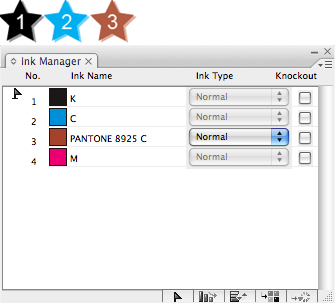
Save Ink Name: Use the ink with the same name to fill the added image mark. If there are some inks of the image mark file that do not exist in the current file, and then the objects in the image mark file which are filled by these inks will not be allowed to fill.
As shown in here, the three stars of the image mark file are individually filled with C, M, Y ink. 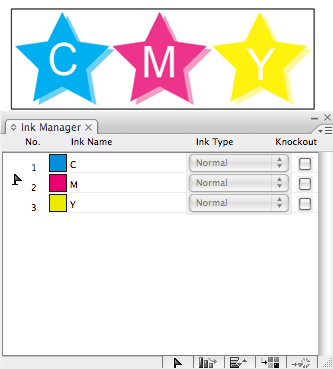
In this example, import this file as an image mark to the current file. As shown in the next image, there is no M ink in the current file, therefore only the objects which are filled with C and Y ink of this image mark will be shown in the current file. 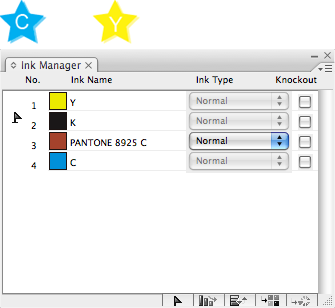
Ink setting type 4
This ink setting type applies to text marks.
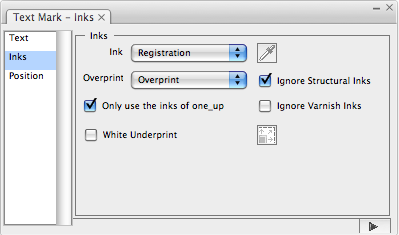
For information about the Registration, Custom, and Darkest settings, as well as the Ignore Structural Inks and Ignore Varnish Inks settings, see the the descriptions in Ink Setting type 1. For information about the White Underprint setting, see the description in Ink Setting type 2.
Ink setting type 5
This ink setting type applies to gradation marks.
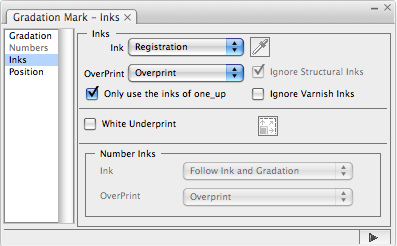
For information about the Registration, Custom, and Darkest settings, as well as the Ignore Structural Inks and Ignore Varnish Inks settings and Overprint, see the the descriptions in Ink Setting type 1. For information about the White Underprint setting, see the description in Ink Setting type 2.
Number Inks
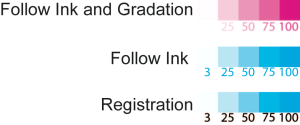
Follow Ink and Gradation: The ink and the dot percentage of the text are same as the marks. Follow Ink: The used ink of the text is same as the marks, but the dot percentage of the text is 100%. Registration: the text uses the registration color.
Ink setting type 6
NOTE: Only use the inks of oneup
This ink setting type is used to add Image Mark, Rectangle Mark, Text Mark and Trim mark to OneUp files on a layout file.
When only use the inks of oneup is selected, the Marks of the OneUp file are added according to the OneUp file's ink list, not to the layout file's ink list. Take Rectangle Mark as an example: the layout file contains seven inks except the Packcut and the PackCrease areas, but the OneUp file only contains six inks. Add Rectangles Mark to these two files, the effect when Only use the inks of oneup is selected is shown in the below picture,