- Login to your Azure subscription
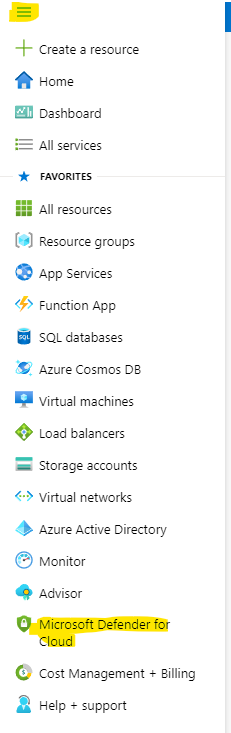
- In top left (Portal menu), select Microsoft Defender for Cloud
If Microsoft Defender for Cloud is not there, select All services and select from there 
Note: In previous version of Azure this Portal menu is already docked and Portal menu (3 bars) is not available)
3. In Microsoft Defender for Cloud, click on the Workload Protections:
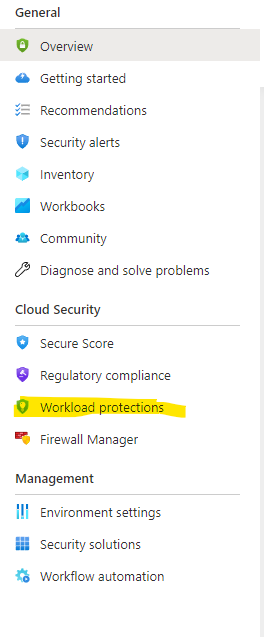
4. Then, click on Just in time VM Access
Note: all subscription VMs should be listed on main (right-side) menu
5. Check VM(s) needed access and click on Request access (on right – top of the VMs list)

6. On the Toggle column, click On server (Port 3389)
Note: the following steps assume that the access is given to user(s) for the internal (private) IP address or subnet ranges
7. Use My IP for Allow Source IP and click Open ports (bottom right)
8. Few seconds later these VMs servers will be available for RDP. Navigate to the VM, click connect – RDP and download the RDP file
9. Double-click the downloaded RDP file and enter credentials to connect.
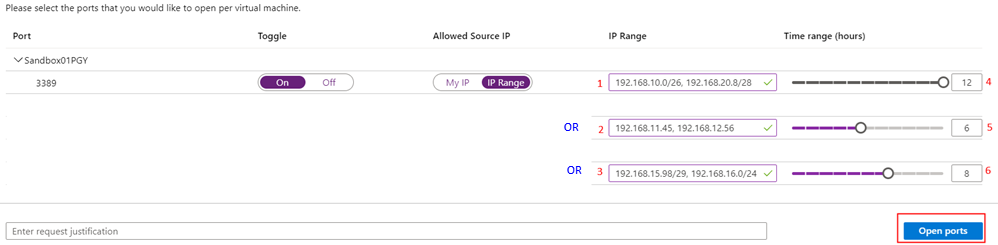
Explanation of IP ranges column:
It is not typically set this way, but for the purpose of (IP Range) usage, here is what allowed. You can have more than two entries per line separated by comma (","):
1 – Multiple different subnets
2 – Specific IP addresses
3 – Allows 6 IP addresses starting at .98. Entire (all 254 hosts) of different subnet.
Explanation of Time range (hours) Column:
Again, it is not typically set this way, but for the purpose of (Time range) usage
4 – Default range – this port will be open for the next 12 hours
5 – Open for next 6 hours only
6 – Open for next 8 hours only