Overview
This document outlines how to configure a point-to-site connection from a client computer that needs to interact with Prinergy running in an Azure VM.
Instructions are provided for both Windows and Mac clients.
Prerequisites
Point-to-site gateway configured with:
- tunnel type of IKEv2 and OpenVPN (SSL)
- SKU of VpnGw1 or better
Installation & Configuration
- Create root certificate and client certificates:
- Mac:
- Open Terminal (under Application→Utilities) and install openssl if it is not already installed.
Execute commands to create root certificate:
# Generate root private key
openssl genrsa -aes256 -out RootAzureVPN.key 2048

# Generate a root certificate valid for 5 years
openssl req -x509 -sha256 -new -key RootAzureVPN.key -out RootAzureVPN.cer -days 1825 -subj /CN=RootAzureVPN
- Mac:
Execute commands to create client certificate:
# Generate a certificate request
openssl genrsa -out clientCert.key 2048
openssl req -new -out clientCert.req -key clientCert.key -subj /CN=ClientAzureVPN

# Generate a certificate from the certificate request and sign it as the CA that you are.
openssl x509 -req -sha256 -in clientCert.req -out clientCert.cer -CAkey RootAzureVPN.key -CA RootAzureVPN.cer -days 1825 -CAcreateserial -CAserial serial

# Pack key and certificate in a .pfx (pkcs12 format)
openssl pkcs12 -export -out clientCert.pfx -inkey clientCert.key -in clientCert.cer -certfile RootAzureVPN.cer
- Windows 10 and Windows Server 2016:
- https://docs.microsoft.com/en-us/azure/vpn-gateway/vpn-gateway-certificates-point-to-site
- Note: 2016 theoretically should work but certificate could not be installed in Azure when tested previously
- The following commands are executed in Powershell in ‘Run as administrator’ mode
- Replace P2SRootCert and P2SChildCert with something appropriate for the site such as <SiteName>RootCert and <SiteName>ClientCert where <SiteName> is replaced with the actual site name.
Create a self-signed root certificate:
$cert = New-SelfSignedCertificate -Type Custom -KeySpec Signature `
-Subject "CN=P2SRootCert" -KeyExportPolicy Exportable `
-HashAlgorithm sha256 -KeyLength 2048 -NotAfter ((Get-Date).AddYears(5)) `
-CertStoreLocation "Cert:\CurrentUser\My" -KeyUsageProperty Sign -KeyUsage CertSign
IMPORTANT: `in each command line tells Powershell the command continues into next the line
Create a client certificate:
New-SelfSignedCertificate -Type Custom -DnsName P2SChildCert -KeySpec Signature `
-Subject "CN=P2SChildCert" -KeyExportPolicy Exportable `
-HashAlgorithm sha256 -KeyLength 2048  -NotAfter ((Get-Date).AddYears(5)) `
-CertStoreLocation "Cert:\CurrentUser\My" `
-Signer $cert -TextExtension @("2.5.29.37={text}1.3.6.1.5.5.7.3.2")
Check that at least the two generated/registered certificates are listed:
PS C:\> Get-ChildItem -Path "Cert:\CurrentUser\My"

Thumbprint                                Subject
----------                                -------
F3C3B23CDCBFC90AA606446966E2FAAD49B70AC5  CN=P2SRootCert
44E1451EE36DBCD82A1B752ECC854CBE0271C520  CN=P2SChildCert
- Export the root certificate from Certificate Manager (certmgr.msc). Options:
- No Private key
- Base 64 certificate (.cer) file
- Export the client certificate. Options:
- Include private key
- Personal Information Exchange - PKCS #12 (.PFX) format
- Select a secure password and write it down. It will be needed to install the client certificate in the client later.
- https://docs.microsoft.com/en-us/azure/vpn-gateway/vpn-gateway-certificates-point-to-site
- Install root certificate in Azure:
- Connect to the Azure Portal from the client where the certificates were generated from.
- Open the root certificate .cerfile in a TextEdit (Mac) or Notepad (Windows) and copy the parts between the -----BEGIN CERTIFICATE-----and -----END CERTIFICATE-----lines from the generated certificate.
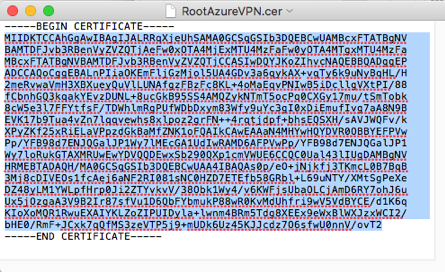
IMPORTANT: Be sure the editor you use does not alter the formatting of the content. - Navigate to VNET Gateway’s Point-to-site configuration in the Portal and add it to the root certificate list.
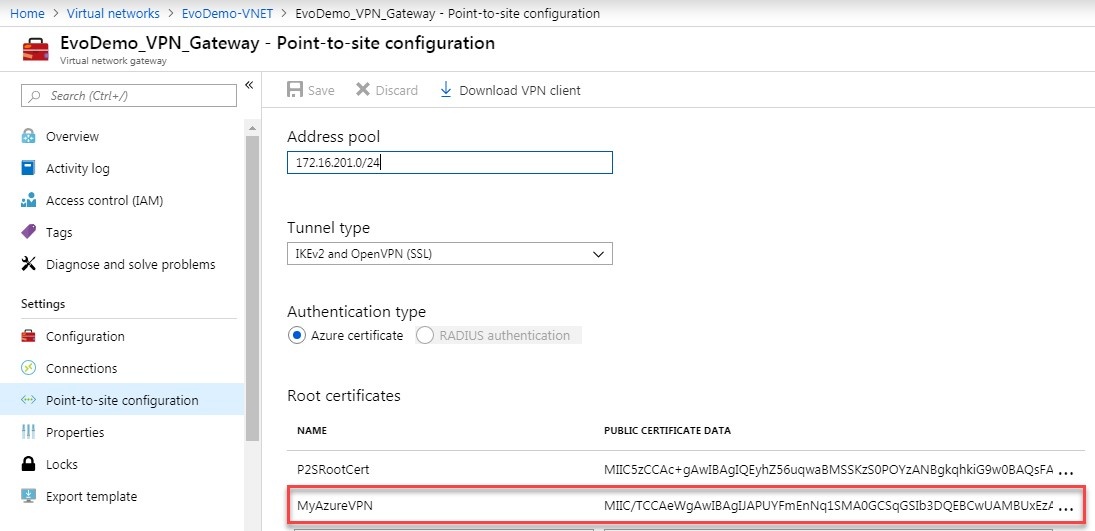
- Save the change.
- Install client certificate on the client – Windows & Mac: https://docs.microsoft.com/en-us/azure/vpn-gateway/point-to-site-how-to-vpn-client-install-azure-cert
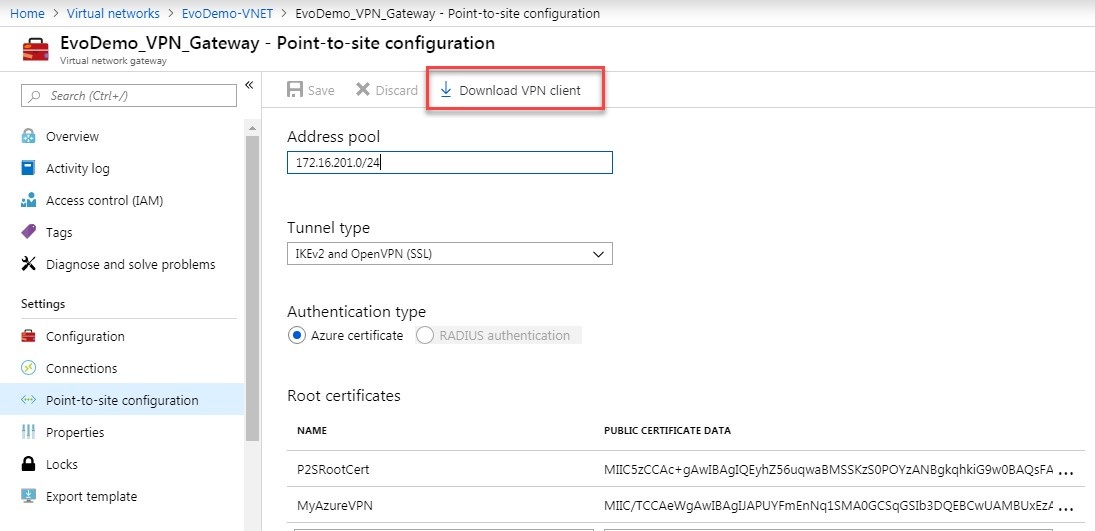
- Download VPN config from Azure Portal to client.
- Login to Azure Portal from the client
- Navigate to the VNET Gateway’s Point-to-site configuration
- Click the ‘Download VPN client’ button:
- Install VPN config on client:
- Mac:
- Windows:
- Optional: Add a host file entry with the primary servers private IP if you want to reference it by name from the client
- Mac:
- Launch the Terminal application found in Applications/Utilities
- Type: sudo nano /etc/hosts<Enter>
- Enter Administrator password when prompted and hit Enter
- Add an entry for the primary server – eg: 10.1.234.3 PrinergyPrimaryName
- Save the file: Control+O
- Exit nano: Control+X
- Mac:
- Windows:
- Edit C:\Windows\System32\drivers\etc\hosts
- Add an entry for the primary server – eg: 10.1.234.3 PrinergyPrimaryName
- Save the file
Using Kodak Workshop and other workflow software from the client
Important Note: Prinergy server Private IP address must be inserted in hosts file on each client (Windows or Mac) connected through Workshop
- Connect the Azure VPN if not already connected
- If Workshop is not already installed map a drive the Workshop installer on the Azure VM and install Workshop and related software
- Start Workshop.
- If it does not automatically find the primary server, enter the name or IP address
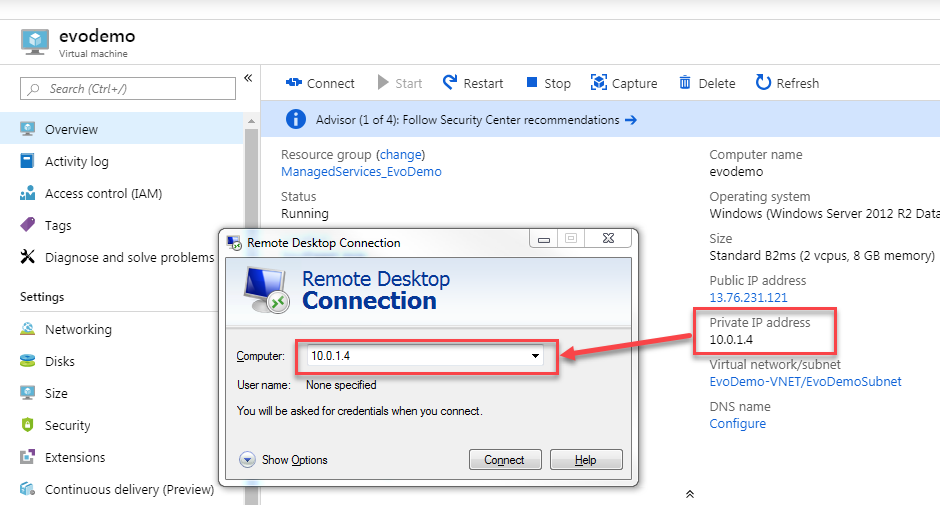
RDC to an Azure VM from the client
- Connect the Azure VPN if not already connected
- Login to Azure Portal from the client
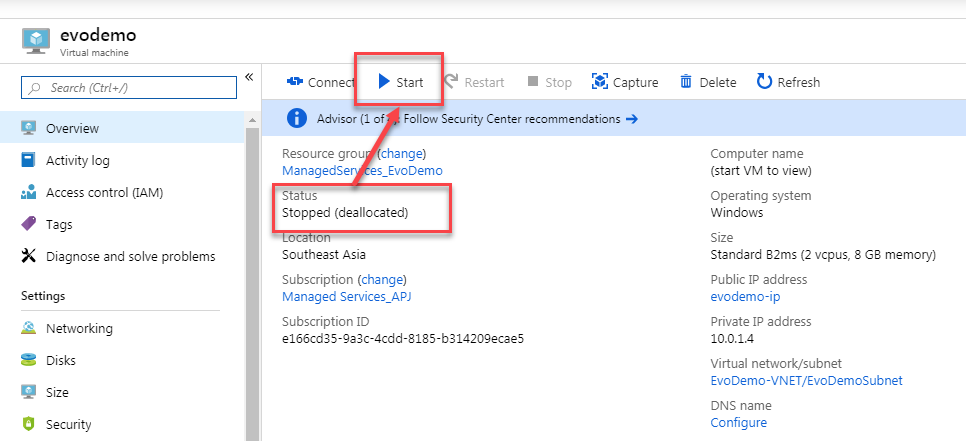
- Power on the VM if it is currently stopped:
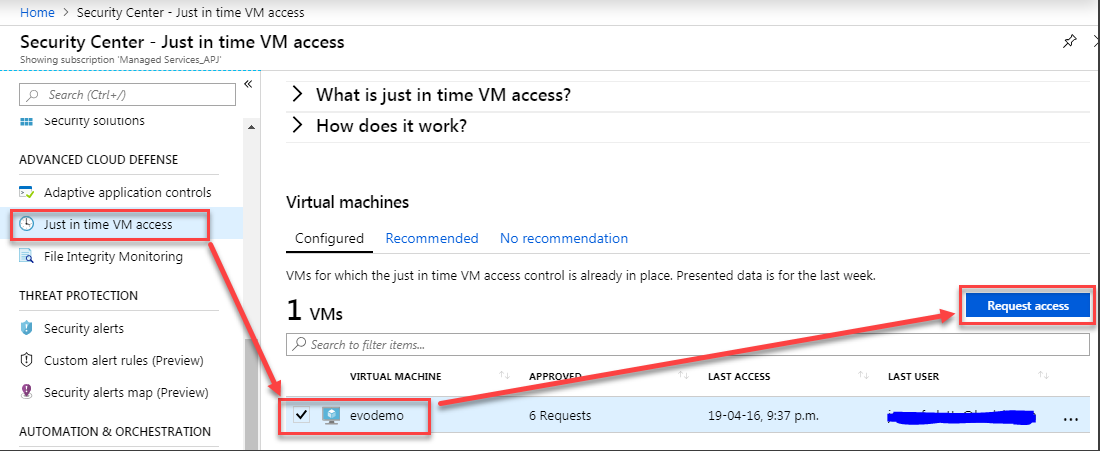
- From Security Center request ‘Just in time VM access’:
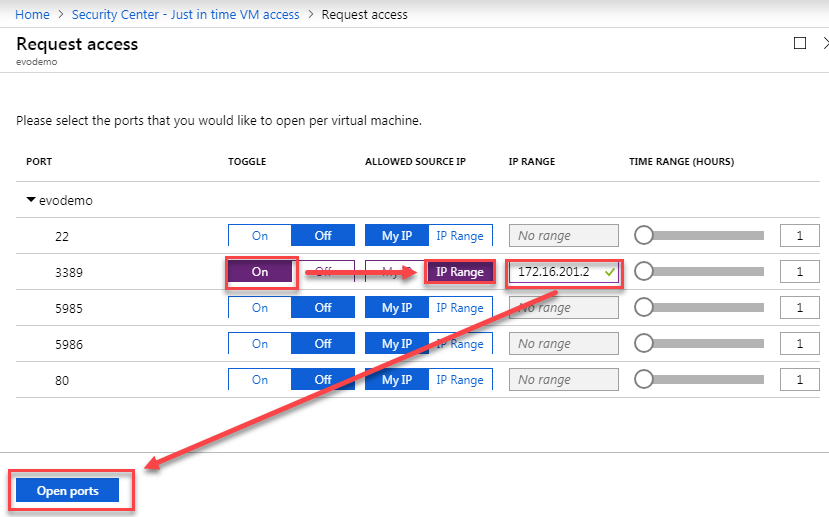
- Request access on port 3389 from the IP address assigned to your VPN connection:
- Remote Desktop to the VM using the internal IP address: