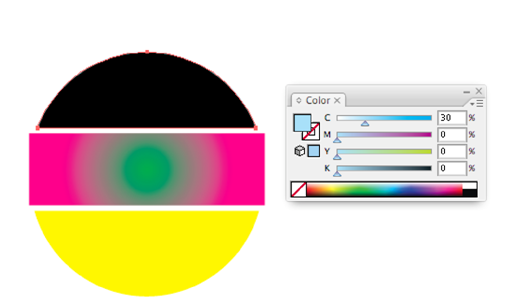
A Rich Black is created by adding another ink to a dark color (usually Black) to create a darker effect.
When the Rich Black objects are created on a separate layer, they will appear as a color overlay because they are overprint objects. However, by default, Illustrator doesn't preview overprints. To see what the Rich Black objects will look like when printed, use one of these methods:
- Use the preview functionality in the Prinergy Tools Eye Tool ( Prinergy > Eye > Preview).
- Use Illustrator's Separations Preview with Overprint Preview enabled.
- From the View menu, select Overprint Preview.
Note: Ink Manager must be updated before using this tool.
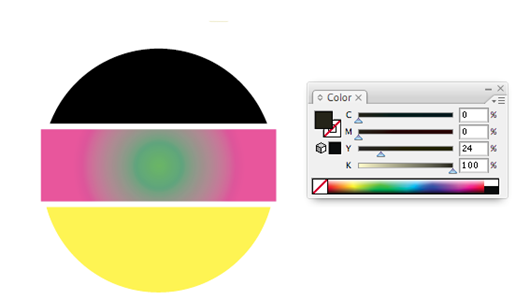
- Launch Adobe Illustrator and open the document requiring a rich black trap, such as the one illustrated here:
- In the Illustrator menu bar, go to the Window menu, and select Prinergy > Trap > Rich Black.
In the Rich Black dialog box, set the parameters for the Rich Black Trap.
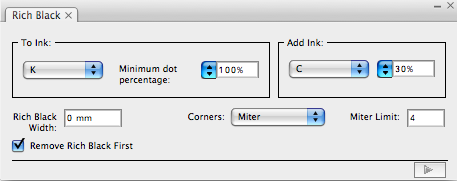
To Ink This parameter option sets the ink that is subjected to the Rich Black operation. The ink name displays on the menu and the ink percentage displays in the Minimum dot percentage option.
When the objects in the document contain the ink appearing in the menu of this option, and the ink percentage is greater than or equal to the set minimum percentage, then the Rich Black operation will proceed.Add Ink Specify the ink that will be added to create the rich black. Rich Black Width Use this parameter to set whether the second ink is spreading or choking and the width of the spread or choke. A positive number creates a spread, and a negative number creates a choke. Corners Set the corner-point shape of the trapping area. Options include:
- Miter (pointed) tip
- Round (rounded corner)
- Beveled (squared-off) tip
When choosing the Miter option, it is necessary to set a parameter for the Miter Limit.
Miter Limit Use this option to change the corner to a mitered (pointed) tip or to a beveled (squared-off) tip.
If the length value of the trapping area mitered tip is greater than Miter Limit value × Width of trapping area, it will result in a beveled tip. If not, the result will be a mitered tip.
After setting the parameters, click the execute button in the lower-right corner of the palette.
The system will automatically generate a 30%C under the 100% K. This object will be put on a separate Illustrator layer for easy modification or deletion.