- From the toolbar, select the StepRepeat tool
 .
. - In the layout view:
- Select the dummy artwork.
- Drag it to the right and up to create a Step and Repeat that is four across and two high.
- Release the mouse button.
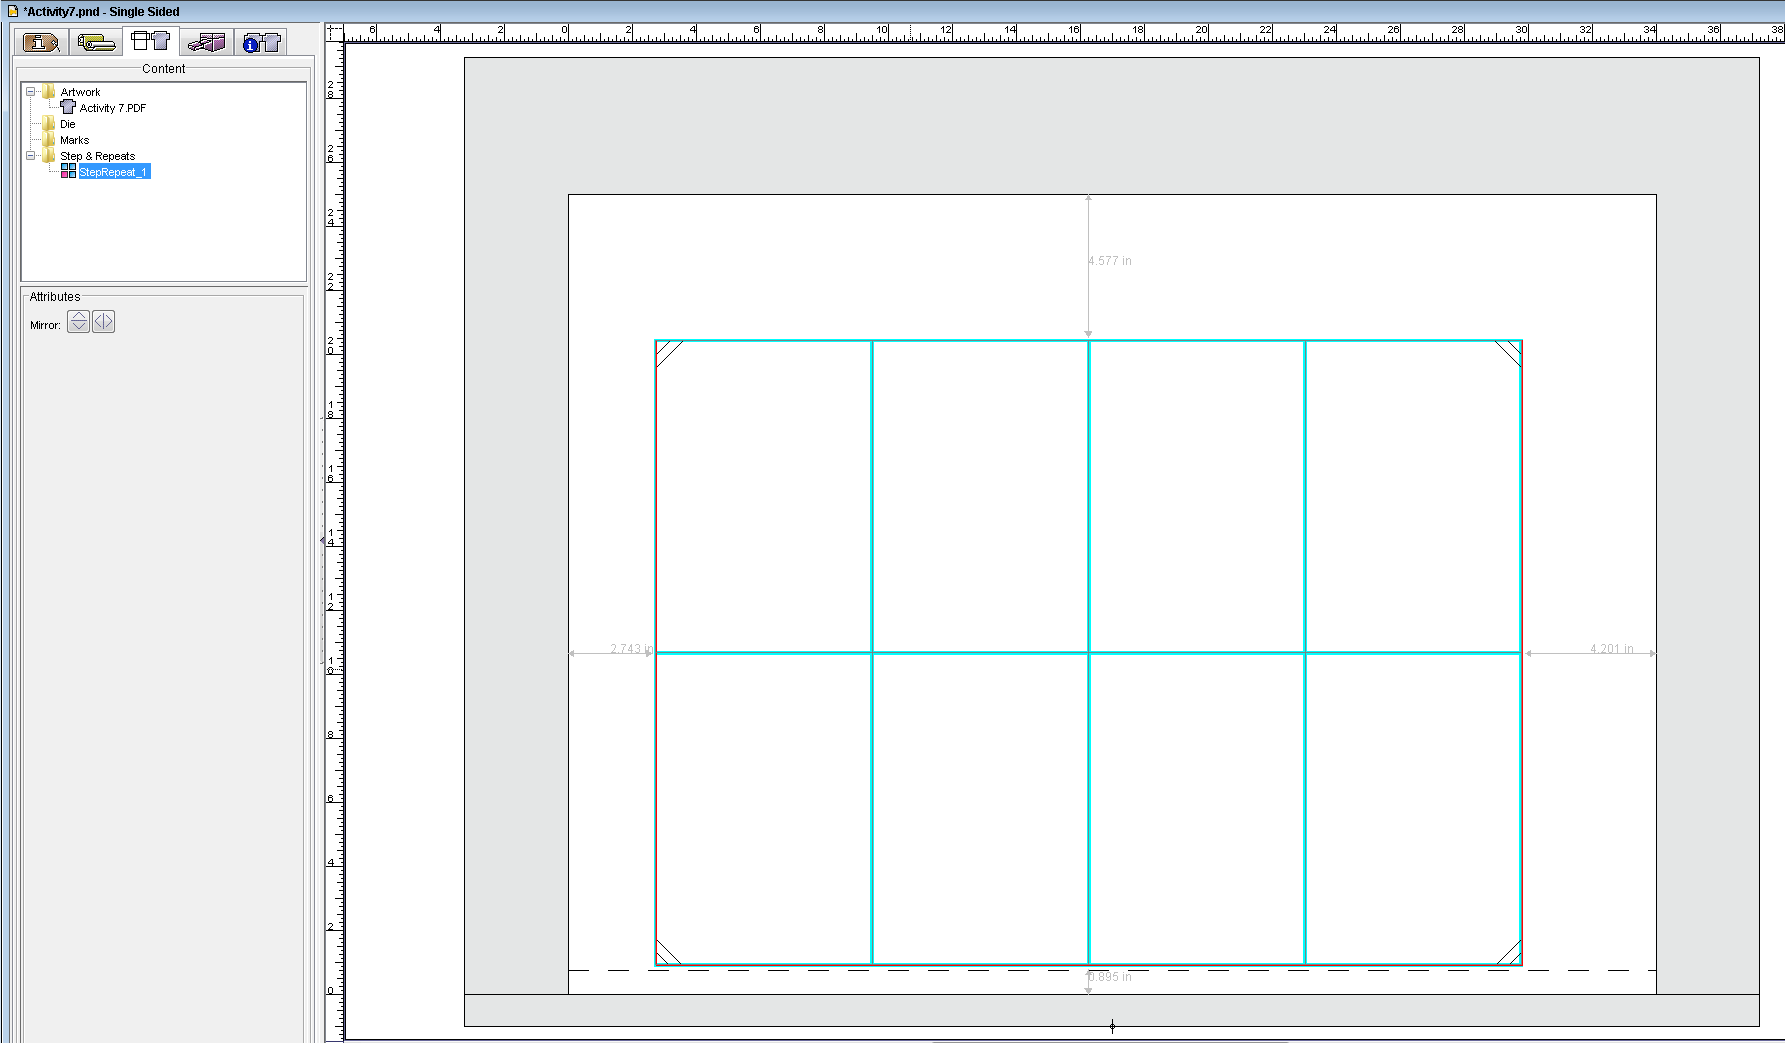
- From the toolbar, select the Selection tool
 .
. - To edit the distance between the dummy artworks, double-click the Step and Repeat in the layout view.
- In the Step & Repeat dialog box, locate the area called Steps.
This section controls the number of times the artwork is to be stepped and repeated horizontally and vertically on the substrate, the size of offsets that you may want to add to the artworks by specifying units of measure for Distance or Gap, and a check box that enables crop marks to be added to the artwork. In the Steps section, enter the following information:
Distance:
Horiz: 7.25 in. (184.2 mm)
Vert: 9.5 in. (241.3 mm)
Apply crop marks to all Select the check box - In the Step & Repeat dialog box, locate the section called Stagger.
This section enables you to specify the type of stagger and offset used to avoid the press or cylinder "bounce" that occurs when gaps in the layout cause dimples in the paper that do not properly accept ink. - In the Stagger section, select None.
- Select the Apply changes immediately check box to dynamically update the placements of the step-and-repeat in the layout view.
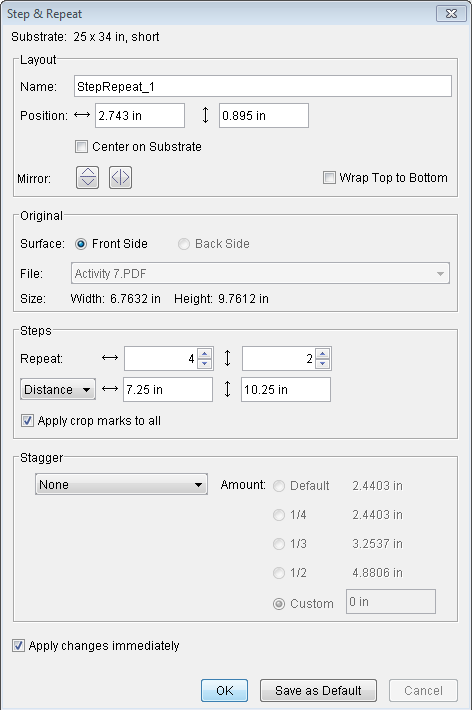
- Click OK.
Notice the object is stepped and repeated in the layout view. The step-and-repeat also appears as a single grouped object in the Content tab of job properties in the Step & Repeats folder.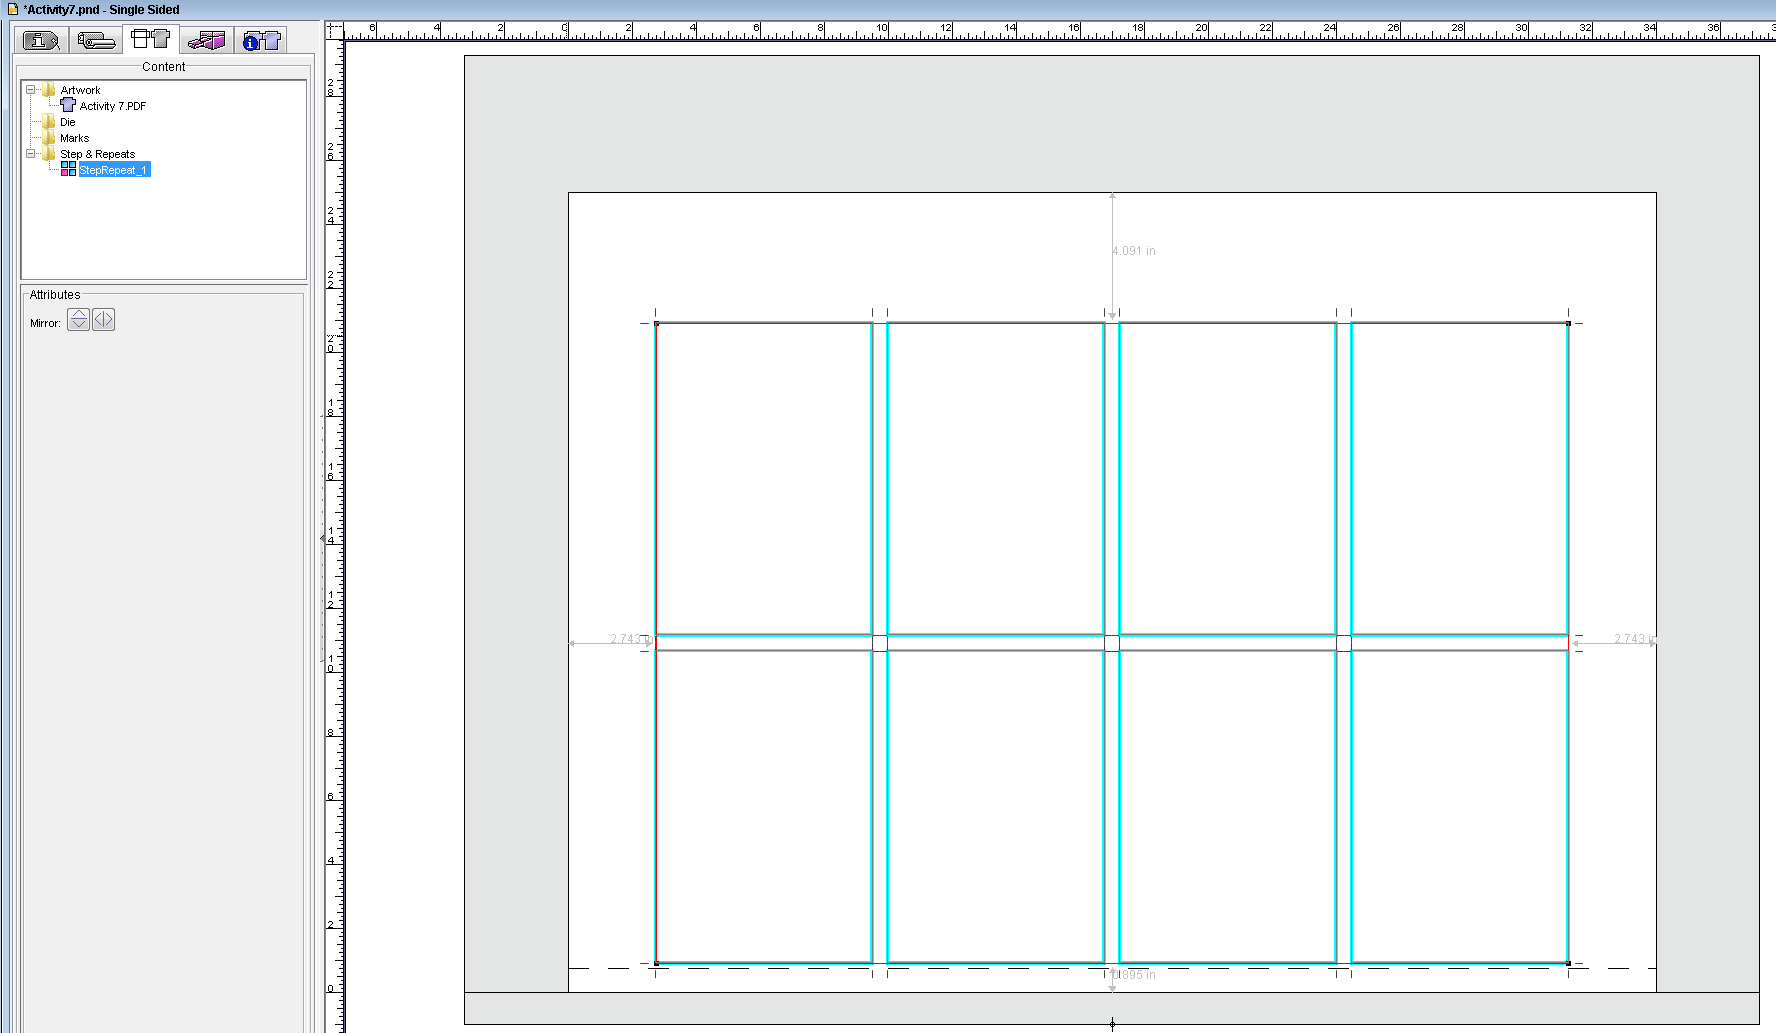
- From the Window menu, select Show Marks Palette.
- Open the SmartMarks folder and drag the following marks to the layout view:
CB_4-color.pdfCTR_Center_Cross.pdf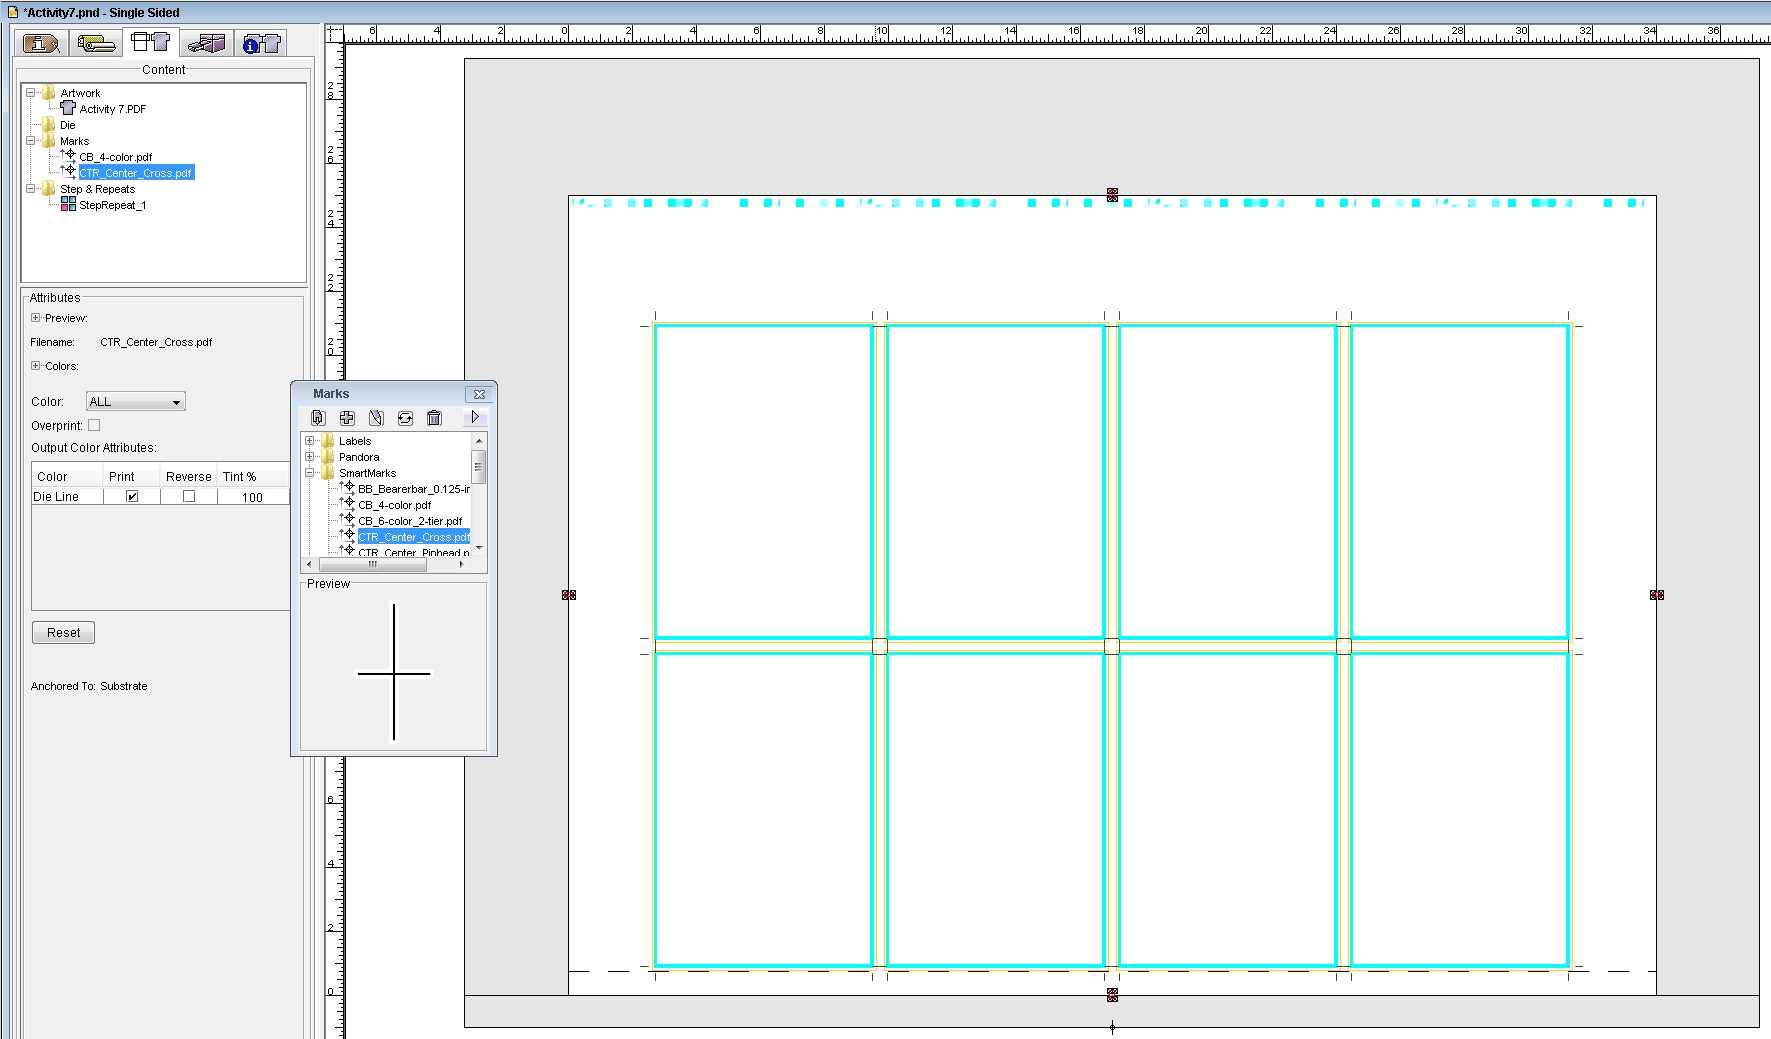
Note: If you set the die line color to Do not use in Marks, the marks will not show in the layout view until artwork is assigned to the Step and Repeat. You can enable this setting in the Preferences dialog box (Marks tab) or in the job properties view, Output Setup tab > Color Separations.
Overview
Content Tools