Générer un modèle de travail- Si cela n'est pas déjà fait, démarrez le logiciel Pandora.
- Effectuez l'une des opérations suivantes :
- Dans le menu Fichier, sélectionnez Nouveau.
- Dans la barre d'outils de Pandora, cliquez sur l'icône Nouveau
 Image Added. Image Added.
Dans le menu Edition, sélectionnez Préférences. Dans l'onglet Paramètres de découpe, remplacez la préférence Aligner la maquette sur la découpe par Utiliser la ligne de découpe vectorielle à partir de la maquette. Dans la vue Propriétés du travail, sélectionnez l'onglet Informations sur le travail et entrez les informations suivantes : ID du travail : | Brighton Cracker Template | Client : | Brighton Crackers | Contact : | Amy Smith | Téléphone : | (999) 328-6673 (Eat-More) | Remarques : | Une fois les épreuves terminées, consultez la section Ventes. |
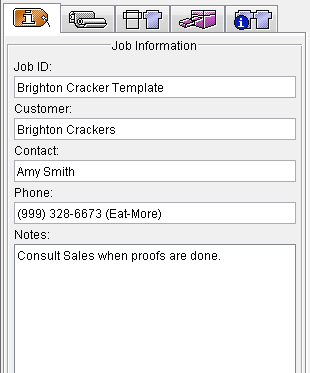 Image Added Image Added
- Dans le menu Fenêtre, sélectionnez Afficher la palette ShopMap.
- Faites glisser les ressources suivantes de la palette ShopMap vers la vue Mise en page :
- Substrate (Support) : 32 po. x 40 po. (812,8 mm x 1 016 mm)
- Plaque : 34 po. x 44 po. (863,6 mm x 1 117,6 mm)
- Presse : 2
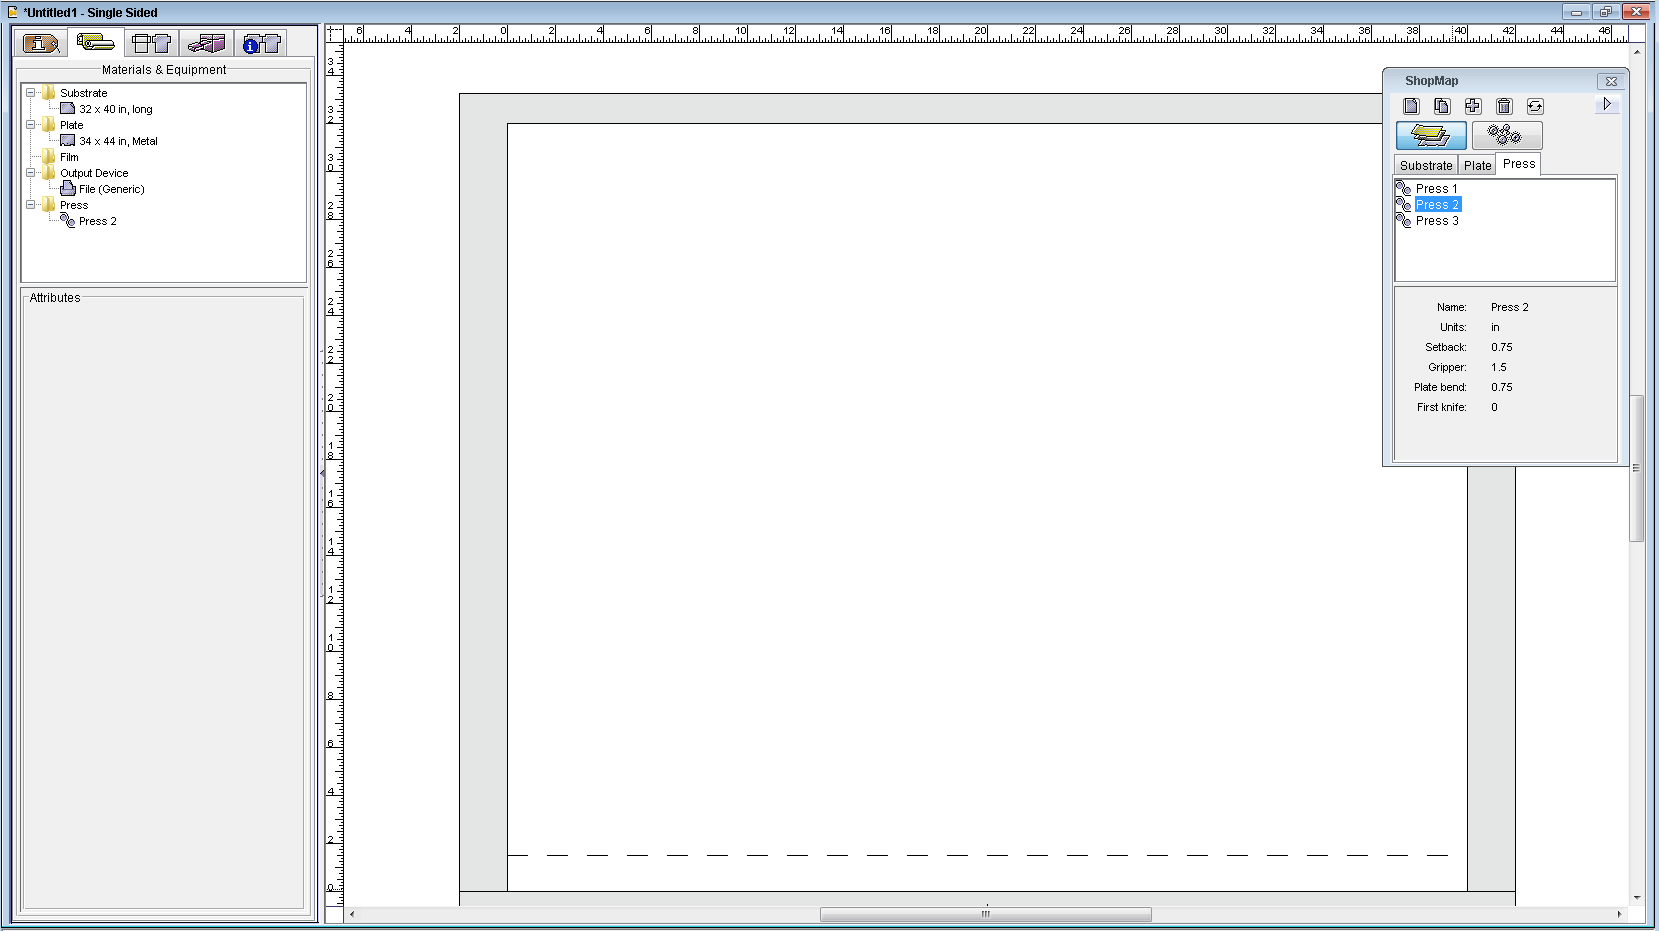 Image Added Image Added
- Fermez la palette ShopMap.
- Recherchez le dossier
Brighton Cracker Box et ouvrez-le. Sélectionnez le fichier CAD1.dxf et faites-le glisser vers l'onglet Contenu.
Ou cliquez sur l'outil Importer la découpe  Image Added. Dans la boîte de dialogue Importer la découpe, recherchez l'emplacement où vous stockez les fichiers d'activité échantillons, sélectionnez Image Added. Dans la boîte de dialogue Importer la découpe, recherchez l'emplacement où vous stockez les fichiers d'activité échantillons, sélectionnez Brighton Cracker Box > CAD1.dxf, puis cliquez sur Importer (Windows) ou Ouvrir (Mac).
 Image Added Image Added
La découpe apparaît sur la mise en page. - Une fois la découpe sélectionnée, sélectionnez Afficher la palette Géométrie dans le menu Fenêtre.
- Dans la palette Géométrie, sélectionnez l’ancrage de référence inférieur gauche. Dans le champ de coordonnée Y, saisissez
1,5 po (38,1 mm) et appuyez sur Entrée. La découpe est positionnée avec exactitude dans le substrat. Fermez la palette Géométrie.
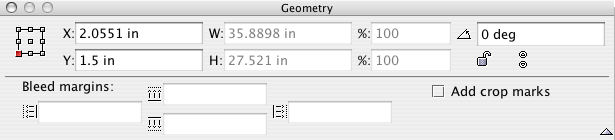 Image Added Image Added - Dans le menu Fenêtre, sélectionnez Afficher la palette des repères. Dans le dossier SmartMarks, sélectionnez le repère
CB_4-color.pdf et faites-le glisser sur la mise en page. - Dans le dossier
Labels, sélectionnez le repère LBL_Info_Box.pdf et faites-le glisser sur l'angle supérieur gauche de la mise en page. - À l'aide des outils Zoom
 Image Added et Sélection Image Added et Sélection  Image Added, positionnez le repère avec précision puis fermez la palette Repères. Image Added, positionnez le repère avec précision puis fermez la palette Repères. - Dans le menu Affichage, sélectionnez Ajuster à la fenêtre.
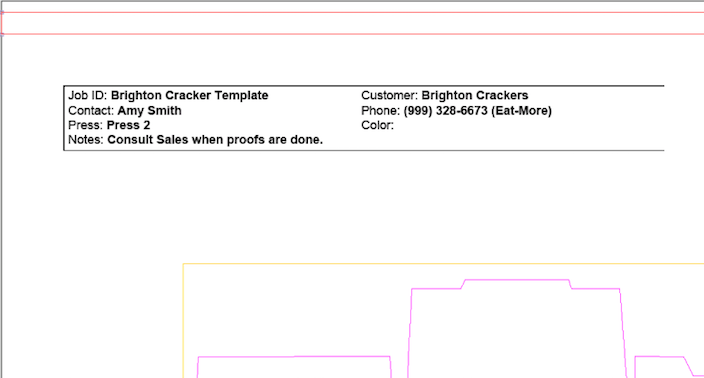 Image Added Image Added
Enregistrer le modèle de travail- Dans le menu Fichier, sélectionnez Enregistrer la copie en tant que modèle.
- Affichez l'emplacement automatique du modèle de travail dans Applications\Pandora\JobTemplates.
Si Pandora ne localise pas automatiquement le dossier, naviguez jusqu'à cet emplacement. Il s'agit de l'emplacement où Pandora est installé par défaut. Le dossier Modèles de travail est conçu pour stocker tous les modèles créés dans Pandora. Si certains gabarits de travaux ne sont pas enregistrés ici, Pandora ne les reconnaîtra pas automatiquement lorsque vous créerez un nouveau travail. - Dans la boîte de dialogue Enregistrer sous, cliquez sur Nouveau dossier.
- Dans la boîte de dialogue Nouveau dossier, saisissez ce qui suit :
<Your Initials>_Job Templates. - Cliquez sur Créer.
Vous pouvez enregistrer les fichiers relatifs aux modèles de travaux Pandora dans le dossier Job Templates dans Pandora ou dans les sous-dossiers du dossier Job Templates. - Sélectionnez le dossier
<Your Initials>_Job Templates, puis dans le champ Enregistrer sous, tapez : <Your Initials>_Job Template Activity 05
Cliquez sur Enregistrer.
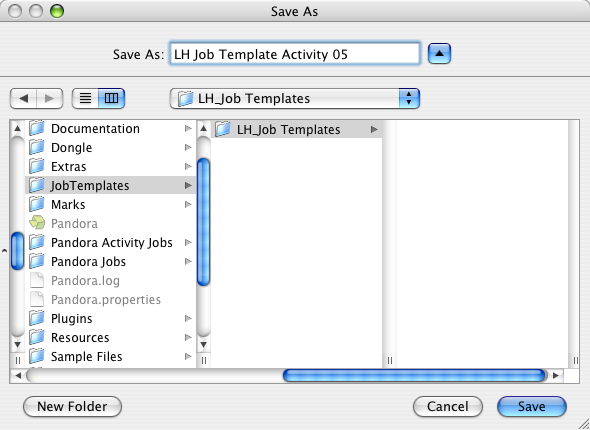 Image Added Image Added - Fermez le travail.
Un message d'avertissement s'affiche : Sans titre a été modifié. Voulez-vous enregistrer les modifications ?
Sélectionnez Ne pas enregistrer.
|