If the Cut Preferences > Label position > Include mask option is enabled, the cut label will be centered on the separation when you apply a cutting mask, and a message will advise that the cut label may fall outside the cut shape. You must use your own judgement to decide where to position the cut label. This activity uses the Lesson 8 files to demonstrate valid and nonvalid positions.
Place the cut label in a valid position
Set the Cut Preferences
- Select the Include mask check box.
- When the message appears, click OK.
- Set the Label position to Left.
- Click OK.
Create the layout
- Open the Lesson 8.cta file.
- Select Edit > Select > All.
- Right-click a separation, and select Apply external mask > with 0.0 mm margin.
- Browse to the Lesson 8 folder, and select Mask_Margin.p1_v0_Mask.TIF.
- Click Apply.
- Output the layout.
View the results
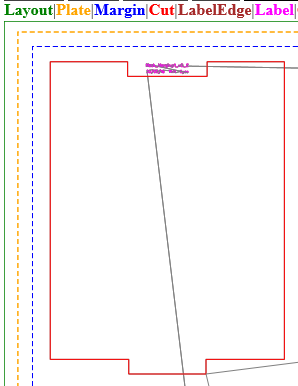
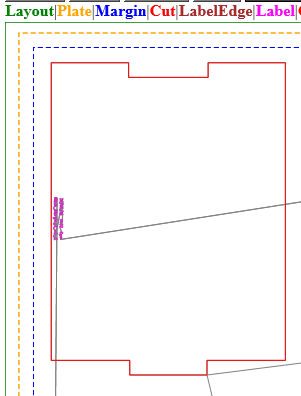
- View the HTML cut file. Notice the cut label is in a valid position, inside the cut area.
Place the cut label in a nonvalid position for the same layout
- In the Cut Preferences, change the Label position to Top.
- Click OK.
- Output the layout.
View the new results
- View the HTML cut file.
Notice that the cut label is in a nonvalid position outside the cut area.