Use the Gradation Mark dialog box to set the dot percentage of the gradation mark
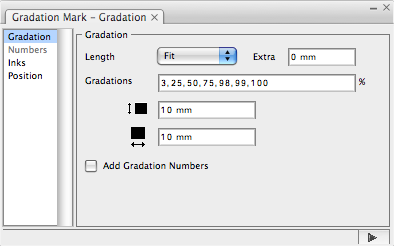
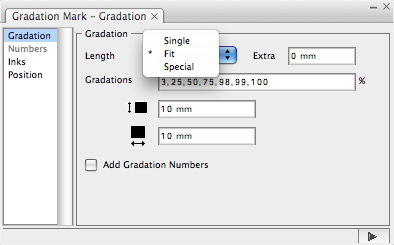
Gradation > Length: Select one option:
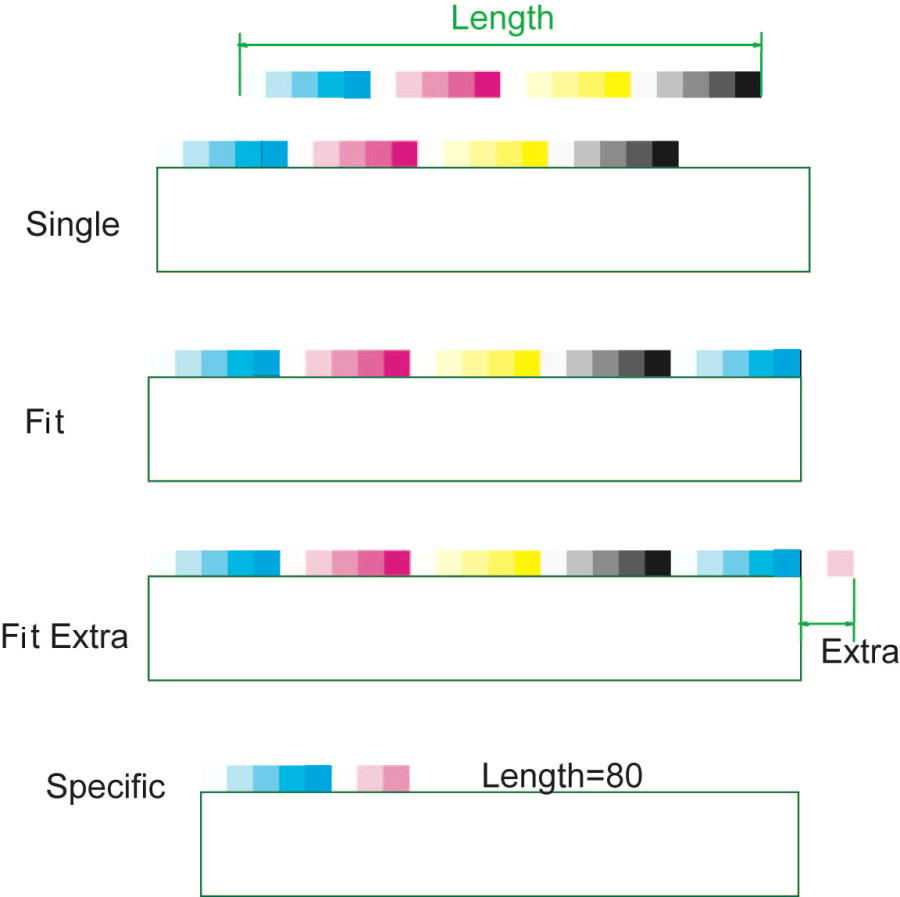
- Single: Use every ink drawing once.
- Fit: According to the location of the marks, adjust the length of the marks to be consistent with the length or width of the object that is going to be marked. After choosing the Fit option, the length of the gradation mark can be modified by choosing the Extra option. Fit length can be set with a formula.
- Special: Set a custom length. Special length can be set with a formula
Gradation > Gradations: Set every dot percentage of the gradation mark, with each dot percentage separated by a comma (,). The image on the left shows the effect after the gradation was set as: 3, 25, 50, 75, 100. The image on the right shows the effect after the gradation was set as: 3, 50, 100. 
Gradation > Size: Set every size of dot percentage of the gradation mark. The w and h (as shown in the following image) respectively mean width and height. You can use a formula to set the value. 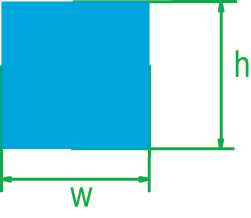
Gradation > Add Gradation Numbers: Add a number in front of every dot percentage color bar.
Use the Numbers dialog box to provide settings for the gradation numbers. 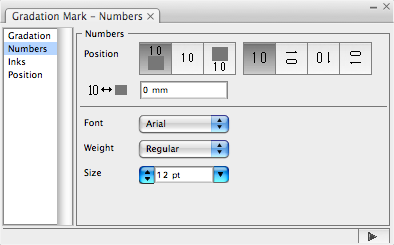
Position
There are three ways to set the location relationship between the number and the color bar:
![]() : The number and the color bar are center aligned (as shown in row 1 below).
: The number and the color bar are center aligned (as shown in row 1 below).
![]() : The number is at bottom of the color (as shown in row 2 below).
: The number is at bottom of the color (as shown in row 2 below).
![]() : The number is at the top of the color (as shown in row 3 below).
: The number is at the top of the color (as shown in row 3 below).
When the number is at top or bottom of the color, use this dialog to adjust the distance between the number and the color bar (as shown in row 4):
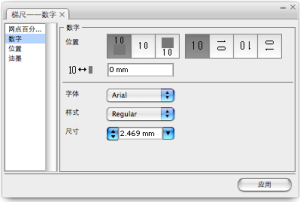

Number Orientation
![]() There are four ways to set the number orientation:
There are four ways to set the number orientation: 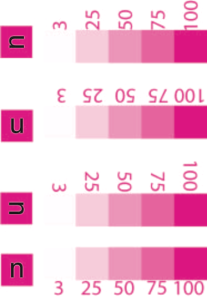
- Font: Set the font of numbers.
- Weight: Set the type of numbers.
- Size: Set the size of numbers.