When printing on metal or transparent material, a white ink is necessary to create a white background. This acts as a neutral base that allows the other inks printed on top to have the correct appearance. Depending on the parameters you set in the White Underprint dialog box, the system automatically adds a white underprint to the area. This object will be put on a separate Illustrator layer for easy modification or deletion.
When the White Underprint objects are created on a separate layer, they will appear as a solid overlay because they are overprint objects. However, by default, Illustrator doesn't preview overprints. To see what the White Underprint objects will look like when printed, use one of these methods:
- Use the preview functionality in the Prinergy Tools Eye Tool ( Prinergy > Eye > Preview).
- Use Illustrator's Separations Preview with Overprint Preview enabled.
- From the View menu, select Overprint Preview.
Important: The Ink Manager must be updated before using this tool.
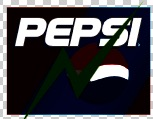
- Launch Adobe Illustrator and open the document requiring a white underprint operation, such as the one illustrated here:

- In the Illustrator menu bar, from the Window menu, select Prinergy > Trap > White Underprint.
In the White Underprint dialog box, set the parameters for the white underprint.
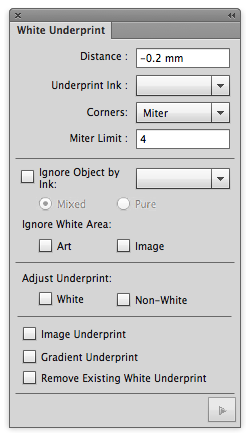
Distance Sets the width of the spread or choke of the underprint. Type a positive value to execute the underprint in spread format. Type a negative value to execute the underprint in choke format. Underprint ink Select the ink used for the underprint. Corners Set the corner-point shape of the trapping area. Options include:
- Miter (pointed) tip
- Round (rounded corner)
- Beveled (squared-off) tip
When choosing the Miter option, it is necessary to set a parameter for the Miter Limit.
Miter Limit Use this option to change the corner to a mitered (pointed) tip or to a beveled (squared-off) tip.
If the length value of the trapping area mitered tip is greater than Miter Limit value × Width of trapping area, it will result in a beveled tip. If not, the result will be a mitered tip.
Ignore Ink This parameter means that the underprint will not be executed when the object's ink color is selected.
Ignore object which contains ignore ink: the underprint will not be executed when the object selected contains ignore ink;
Ignore object which only contains ignore ink: the underprint will not be executed when the object selected contains only ignore ink.Ignore White Area in Art If an art object's CMYK value is 0 and this check box is cleared, the art object will also be included in the white underprint effect.
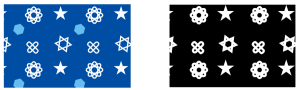
If the check box is selected, the white underprint effect will not occur for this art object. The image shows the effect of selecting this check box. The center area that has no inks will not generate a white underprint.
Ignore White Area in Image If a raster image object's CMYK value is 0 and this check box is cleared, this art object will also be included in the white underprint effect. If this check box is selected, the white underprint effect will not occur for this raster image object. The image shows the effect of selecting this check box. The center area that has no inks will not generate a white underprint.

Adjust Underprint Adjust Underprint is used to create an "On-Center" effect for the white color block and non-white colorblock of the underprint's border.
White
The distance of underprint is a negative value. You can get a pull back underprint effect when the graphic includes a white color object (CMYK=0) and the distance from the white color object to the border of the underprint is greater than the set value of underprint, you will get an "On-Center" underprint, as shown below .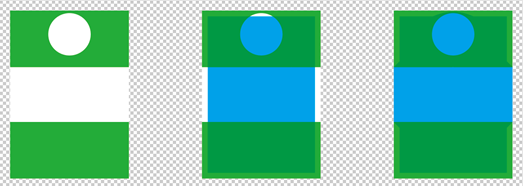
Non-White
The distance of underprint is a negative value. you can get a shrink underprint effect. when the graphic includes non-white color objects and the distance from the non-white color object to the border of the underprint is greater than the set value of underprint, you will get an "On-Center" underprint, as shown below (left to right: Original, White check box cleared, Non-White check box selected).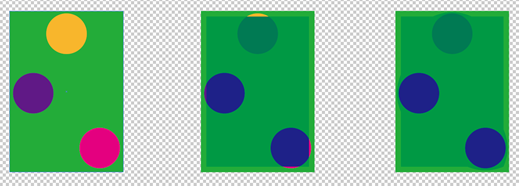
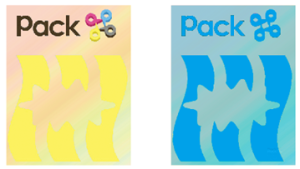
Image Underprint For images with Alpha channel and Opacity Mask, the Image Underprint setting can preserve the original opacity effect and the underprint will be image.
Gradient Underprint See the Gradient Underprint section below. After setting the parameters, click the execute button in the lower-right corner of the palette.
Gradient Underprint
Note: Multilayer gradient or overprint objects cannot support the gradient underprint function.
To get the gradient underprint effect, the gradient objects must meet one of the following three conditions:
| The gradient has a white-color (CMYK=0) stop point. |
|
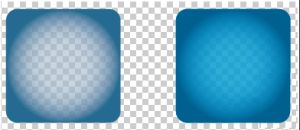
| The stop point of the gradient has opacity and there is no color under the gradient. |
|
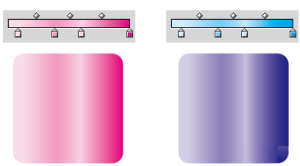
| All stop points of gradient are the same and have a singe ink except their ink percentage. |
|

The processing principle of Gradient underprint is as follows:
- When the outside of a gradient object has another object, even if the distance of the underprint is a negative value, the gradient will also spread.
- If the gradient object is on top of a non-gradient object, the gradient object will extend to the non-gradient object.
The image on the left is the original. The image on the right shows the gradient effect.
- For two overlapped and adjacent two gradient objects, the upper gradient object will spread.
The image on the left is the original. The image on the right shows the gradient effect.