What is the Prinergy Object Screen Manager?
The Prinergy Object Screen Manager is a tool you can use to define screen information such as ink type, dot shape, angle, screen ruling, and printing method forspecific objects in an Illustrator file. When you use the Prinergy Tools Output PDF... function, screening information will be saved in the exported PDF and can be automatically applied as Document Screening when output in Prinergy. Printing Method is an optional tag which can be used to encode Advanced Flexcel NX Tags apply advanced Flexcel NX screening in Miraclon TIFF Assembler Plus. (Advanced Flexcel NX Tags are covered in detail in Miraclon TIFF Assembler Plus documentation.)
Key points to remember about applying Object Screening:
- You must press Update after opening a file for the first time, to populate screen parameters in the UI. If you do not hit Update first, screening will not be properly saved for each Object.
- Each of the 3 main parameters Screen, Angle and Dot Shape must be entered for each instance. If one parameter such as "Dot Shape" is left as None, output in Prinergy will fail with an "Invalid Screening" message.
- You must use the Prinergy Tools Output PDF... function to embed Object Screening into the Prinergy input PDF.
- Important note about matching screen angles
- You must keep in mind that Prinergy Output treats angles in object/document screening differently than angles in Prinergy Process Templates. You must adjust object/document screen angles if you wish to match Prinergy screening.
- Historically, Prinergy has assumed that embedded object/document screening was being specified in PostScript applications that calculated angles based on 0 at 3 o'clock and measured counter-clockwise. Prinergy, on the other hand, has always used a coordinate system that sets 0 set at noon and measures clockwise.
- What this means is that if you wish to match object/document screening with Prinergy screening, you must adjust the screen angles being specified in Prinergy Tools.
Sample angle translations to match Object/Document (PostScript) Screening to Prinergy Process Template Screen Angles
ColorObject/Document
Screen AnglePrinergy
Screen AngleC 75 15 M 15 75 Y 90 0 K 45 45
To apply Object Screening:
- Open the Adobe Illustrator file in which you want to set object screen parameters.
- From the Adobe Illustrator Windows menu, select Prinergy Tools > Screen Tool > Prinergy Object Screen Manager.

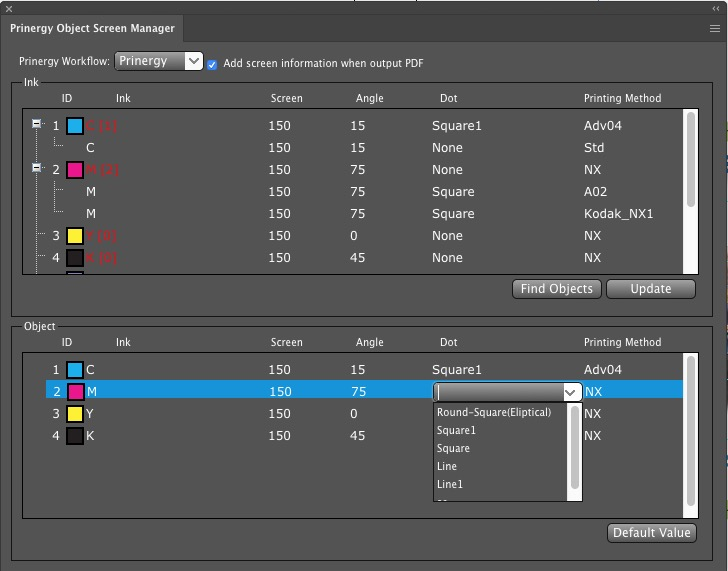
The Prinergy Object Screen Manager dialog box opens: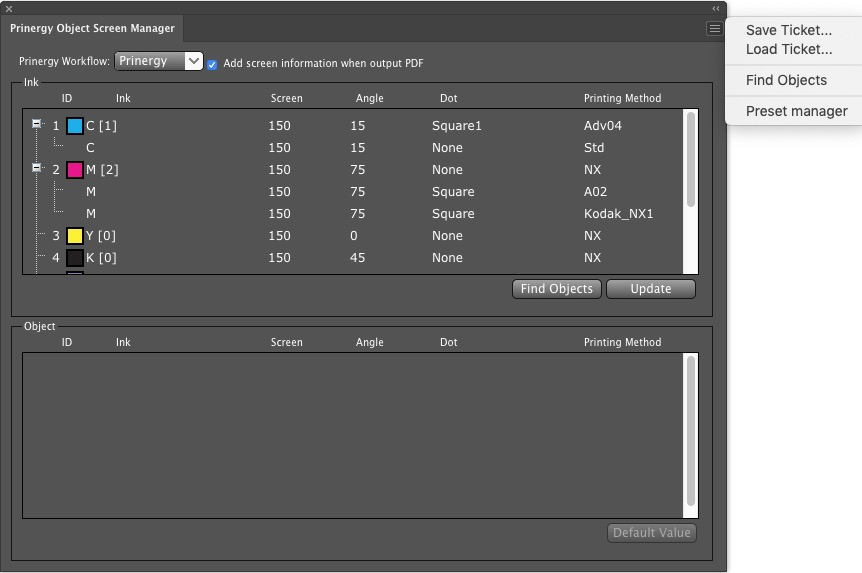
- To read current information about the inks used in the file, click Update. You must always use Update when you open a new file or change an existing file, or Object Screening will not be applied to any object.
Select a specific object in the file, and in the Ink section Prinergy Object Screen Manager dialog box, select each ink and set the desired parameters for Screen (Frequency), Angle and Dot Shape. If you want to have the screening tags recognized at output, the three main parameters of Screen, Angle and Dot Shape must be supplied. If any parameter is left as None, output in Prinergy will fail with an Invalid Screening message.
Ink
Displays the inks in the selected objects.
Screen
(Required parameter) Set the line frequency for the selected ink.
Angle
(Required parameter) Set the angle for the selected ink.
Dot Shape
(Required parameter) Sets a dot shape for the selected ink. The Dot Shape parameter must be a standard Prinergy or PostScript dot shape, or must be correctly defined in the Prinergy XmpMapping.csv file.
Printing Method
(Optional parameter) Specify a printing method for the selected ink, or input your own parameter.
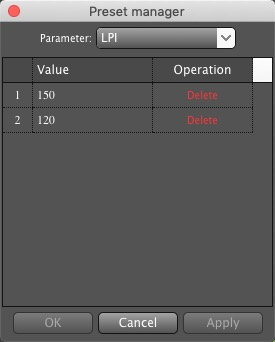
You can create a new setting by entering numbers or names directly, or you can choose an existing setting from the drop-down menu. If you enter a setting for the first time, it will be remembered as a User Preset and added to the drop-down menu for each parameter.
You can edit or delete User Parameters by launching Preset Manager from the Options menu in the top right-hand corner of the Object Screen Manager. Default values for Screen, Angle, Dot, and Printing Method are provided as system settings and cannot be deleted. User Parameters can be deleted by clicking Delete in the Operation column for the value.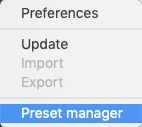
- In order to write screening parameters into the output file, you must use the Output PDF... function under Basic Tools. If you use the native Illustrator Save As to output a PDF for input into Prinergy, it will not contain embedded screening tags. Also, confirm that the Add Screen information when output PDF is checked at the top of the Object Screen Manager tab. If the check box is cleared, the output PDF file will not contain any screening information.
- To find objects in a file that match the screening information, select multiple objects, using Shift/Alt + mouse click. Or, select all objects using the Ctrl + A shortcut and click Find Objects. For grouped objects, if one or more objects in the group meets the selected screen information, the whole group will be selected.
Note: Find Objects cannot support Non-printable layers, hidden layers, or hidden objects. - In the Object section, set the screening parameters for selected objects.
- Use the Adobe Illustrator selection tool or direct selection tool to select specific objects. The objects list will update automatically. When you click an object, the list displays all inks.
- The default screen parameters for Object are the same as in the Ink section. If necessary, reset the Screen (line ruling), Angle and Dot Shape of inks. Or click Default Value to use the values selected in the Ink section.
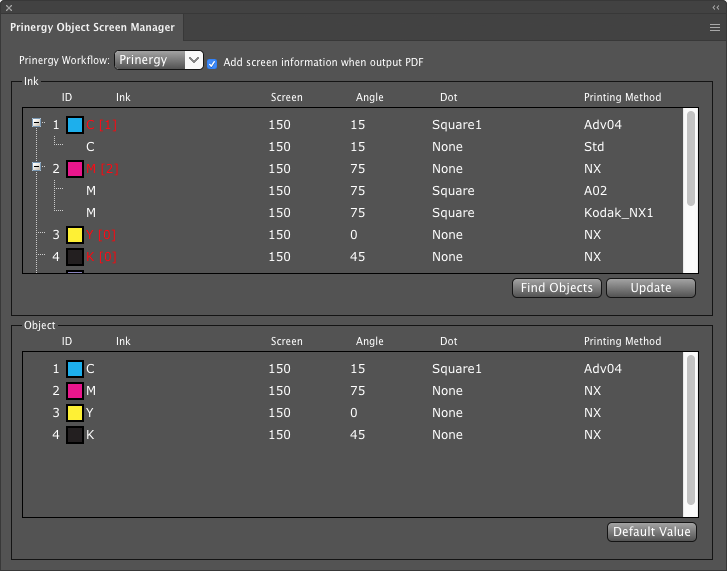
The ink list will show nested ink listing information when different objects with the same ink have been defined with different parameters. The number inside the brackets represents the number of different sub-ink settings for the same ink.
You can click the + beforeInk ID to expand all sub-inks and view their parameters, but parameters can't be edited in the Ink panel. If you wish to edit the parameter of a sub-ink, you must select the sub-ink, click the Find Objects button, then select and edit the parameters of the sub-ink in the Object panel.
- You can save all the parameters you have applied to inks in a file by saving a Parameters Ticket. The ticket can be used to restore previous settings, or can be loaded into a different file to apply the same settings. To save a ticket, select Save Ticket from the Options menu at the top right-hand corner of the dialog, select a save path, and save it in SD format.
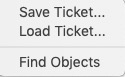

You can later import a saved ticket by selecting Load Ticket. - To save out a file containing the Object Screening tags, you must usePrinergy Tools > Basic Functions > Output PDF... from the Windows menu, and confirm that the Add screen information when output PDF check box is selected. If you use the native Illustrator "Save As" option to output to PDF, Prinergy Tools Object Screening information will not be preserved.
Use of the XmpMapping.csv file to specify Advanced Prinergy Screening with Object Screen Manager.
Object Screening can be used to automatically apply Prinergy Advanced Screening such as Maxtone CX, Maxtone FX and Maxtone SX. This functionality works together with an XmpMapping.csv file found on a Prinergy Server at C:\Prinergy\CreoAraxi\data\XMPTags. This configuration file allows you to apply document screening that requires additional parameters that cannot be specified by standard document screening tags. Standard document screening only allows users to specify Line Frequency, Angle and Dot Shape, and only a limited number of standard Adobe dot shapes are allowed. The XmpMapping.csv file allows you to create a DotShape name that will be used as a key to supply the other parameters required by advanced screening, such as highlight size.
A sample line in the XmpMapping.csv file that could be used to specify Maxtone SX screening is:
SXR3X3,Maxtone SX,Maxtone SX CMYK 15-45-0-75,Round1,3x3
You would specify the name SXR3X3 as the Dot Shape, and this would apply the actual Prinergy dot shape name (Round1) and specify a Maxtone SX stochastic highlight size of 3x3 pixels. Whenever changes are made to an XmpMapping file on a Prinergy system, you must restart all Prinergy JTPs in Prinergy Administrator, to allow the changes take effect.