Colored areas can be made up of a mixture of process inks that overprint each other. Registration problems can cause a noticeable “color edge” if lighter inks extend beyond the edge of a darker ink. To avoid this unwanted edge, it is necessary to use a Keepaway Trap to choke the lighter inks back from the edge of objects.
The goal of this activity is to use the Prinergy Tools Keepaway function to trap a file.
Task 1: Apply Keepaway Trapping to a file
- Launch the Adobe Illustrator application.
- Open this document:
 Keepaway.ai
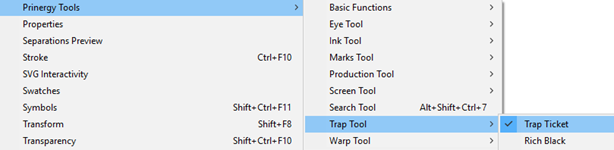
 - In the Illustrator menu bar, from the Window menu, select Prinergy Tools > Trap Tool > Trap Ticket.
- In the Trap Ticket dialog box, click the new trap ticket option
 .
. - Select the Keepaway Setting tab.
- In the Keepaway Width setting, type
0.205 mm. - To create the Trap Ticket, in the Ticket Name, type
Keepaway. - In the Illustrator menu bar, from the Window menu, select Prinergy Tools > Ink Tool > Ink Manager.

- To update the inks in the Ink Manager dialog box, click the update ink list icon
 .
. - In the Adobe Illustrator menu bar, from the Window menu, select Prinergy Tools > Trap Tool > Auto Trapping.
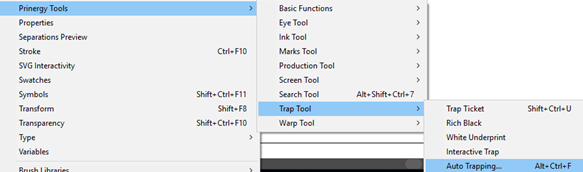
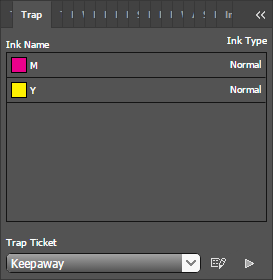
- In the Trap dialog box, from the Trap Ticket list, select the Keepaway trap ticket that you created earlier.
- Click the Trap button:

If no objects have been selected, a message window will appear asking if you want to select all objects.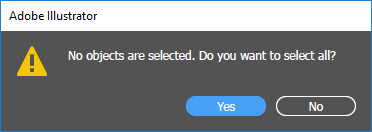
To apply trapping to the entire file, click Yes.
After trapping, a new trapping layer will be automatically generated, and the dialog box of the trapping color pairs will appear. When this dialog box appears, the automatic trapping has finished and you have applied keepaway trapping to the file.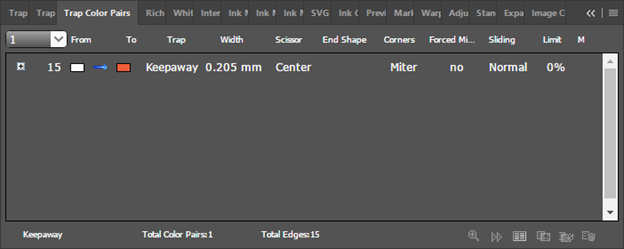
Task 2: View the trapped objects
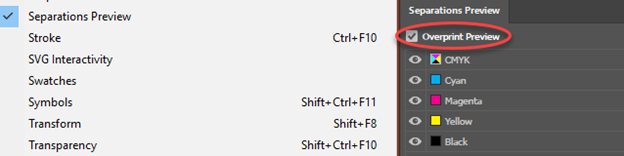
To view the trapped objects, in the Illustrator menu bar, from the Window menu, select Separations Preview with Overprint Preview turned on. If Overprint Preview is not enabled, Keepaway traps will appear as a white border on objects.