You need to gang two advertisement cards (from two existing Prinergy jobs) onto one press sheet. To manage last minute edits, the page data for each card is to be aliased from the existing Prinergy source jobs.
Using page aliases lets you better manage many types of edits. If a change is made to a source page, the page alias associated with the source page is automatically updated with the change.
Important: Page aliases can be created using Preps imposition software, Pandora software, and other supported imposition file types. For the purposes of this activity, Preps imposition software will be used.
Note: For the purposes of this activity, tasks 1 to 6 are included to create the source pages that will be aliased. In a realistic prepress environment, these jobs would already exist on your Prinergy system.
Page aliases are helpful if ganging or combining multiple jobs or parts of a job onto a single press sheet. A page alias is essentially a pointer to an original source page in another job. If the original source page changes, the page alias will be updated automatically.
Identifying source pages and page aliases
If you use Preps to gang Prinergy pages, page aliases—instead of copies—are created in the ganged job to assist in managing edits.
Page aliases are links to original source pages, and provide many benefits compared to copies. Page aliases are created when a populated imposition is imported into a Prinergy job from Preps.
Benefits of page aliases
Page aliases provide the following benefits:
- Page aliases save file space because pages are not duplicated.
- Page edits are easily managed—for example:
- If a page's contents are updated, when output, the alias automatically picks up the latest updates of the original. There's no need to duplicate the update content to the alias.
Note: This benefit applies to simple updates (text/object changes). Other changes, such as color conversions or geometry changes could invalidate the existing ganged imposition. In this case, you would need to re-create the imposition. - If the approval status of a page changes, it is reflected in both locations.
- If a page's contents are updated, when output, the alias automatically picks up the latest updates of the original. There's no need to duplicate the update content to the alias.
- History entries about ganged pages are logged in both the source job and the ganged job.
- Source and aliased job and page names are cross-referenced in the History entries and Get Info dialog box.
- On refine, each page is tagged so that if you copy it to a different location before ganging it, the source job and source page can still be identified when it is imported into Prinergy in a ganged layout.
- Custom fields can be added to page aliases.
Note: A detailed report of ganged press sheet usage by source job is available with Prinergy Business Link software.
Important: Be aware that making changes to a page alias also affects the source page.
Limitations of page aliases
Page aliases are not available for:
- Pages that are re-refined after ganging—If you re-refine a page after it has been ganged, but before the gang layout has been imported, the ganged layout will fail to import into Prinergy. Therefore, ensure that page content is stable before ganging.
Some page changes might invalidate an existing ganged layout, such as number of inks or geometry changes. In this case, you'll likely need to re-build your gang imposition.
- Other imposition software—If you use imposition software other than Preps to gang pages, page aliases might not be created. Using non-Preps applications to build gang jobs and aliases has not been tested. The pages assigned to the impositions may be registered as input files, and may require a refine.
- Impositions populated within Prinergy—If, without using Preps, you add more than one instance of a page to an imposition within Prinergy, the pages are duplicated in the imposition.
Use an external imposition application
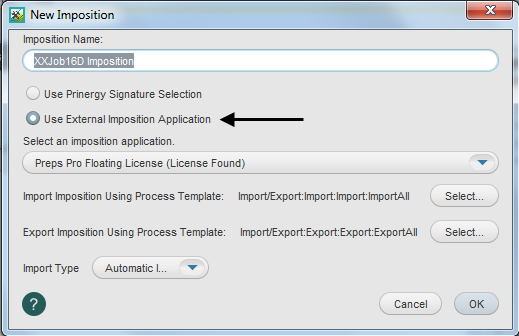
In this activity, rather than using Signature Selection, we are going to use the Use External Imposition Application option in the New Imposition dialog box, and create the imposition in Preps.
The Preps Full Access option (licensed), enables you to start Preps from within Prinergy Workshop, and to have full functionality of Preps Pro.
This option allows you to create and edit Preps templates, which are automatically imported into Prinergy when you print to an Adobe Job Ticket or a JDF file from Preps. Essentially, the license allows for the automatic transfer of files between the Preps imposition software and a Prinergy Workshop job.
Full access Preps Pro can be made available via Prinergy's Floating License Manager (FLIM) so that you do not need a dongle for every workstation that runs Preps. For example, when you buy two copies of this Preps software for your Prinergy system, Preps can be used at any Prinergy client as long as the total number of copies in use at one time does not exceed two.
Preps software
Preps software is included with Prinergy.
Configure the imposition applications
Before starting to work with Preps, make sure that the imposition applications have been configured in Prinergy via Tools > Configure Imposition Applications. The way the imposition applications have been configured has a direct result in the imposition choices and/or results you will get in the activities in this lesson.
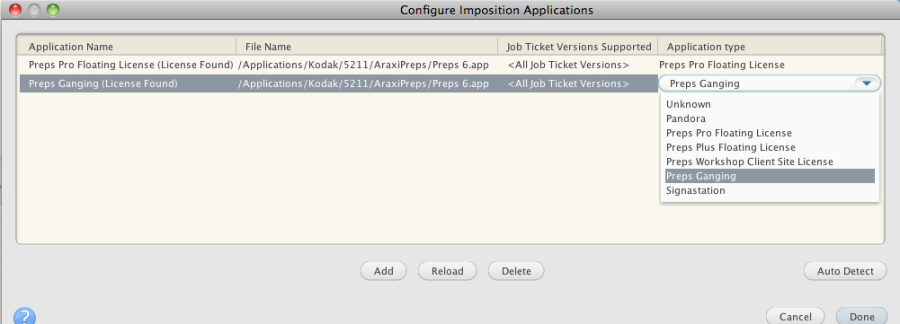
Note that both line items are pointing to the same location.
If the Application type is Preps Pro Floating License, you will get a blank page workflow in Preps. You will get a page count, but will not see the actual files.
If the Application type is Preps Ganging, you will get the actual pages from the job, but there are special circumstances:
- There must be a page set defined.
- There must be pages assigned to that page set.
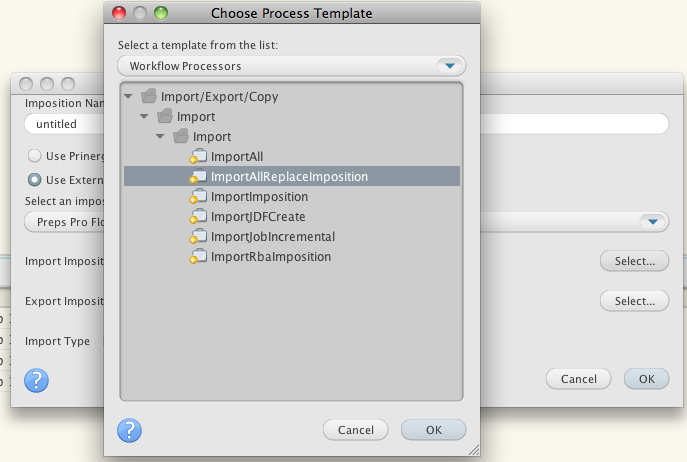
If condition 2 is not met, Prinergy will not even launch Preps! Also, if you select Preps Ganging and then combine with pages from another job (like page aliasing), unless you change the settings in the Choose Process Template dialog box from Import > ImportAll to Import > ImportAllReplaceImposition, the file will fail on import.
- Create a source job
- Copy an input file to the job folder
- Add and refine an input file
- Create a second source job
- Copy an input file to the job folder
- Add and refine an input file
- Create a populated imposition
- Identify page aliases
- Identify source pages
- Edit a source page
- View an edit in an aliased page
Create a source job
- In Job Finder, right-click your main group , and choose New Job.
- Type the job name
XX_Page_Aliases(where <XX> represents your initials). - Click Create
Copy an input file to the job folder and add input files to the job
- From your workstation, locate:
Prinergy Activity Practice Files / Act_16_Signature Selection_Aliases / Input File - Restore Job Manager.
- Open the
Input Filesfolder. - Drag the
Preps Brochure.pdfto the Job Manager's Input Files area. - In the Add Input Files dialog box that appears, under Options, click Select and select the 1stRef-Normz refine process template.
- Click OK.
Your file is copied to theUserDefinedFoldersfolder. - In the Start Process dialog box, click OK to start the Refine process.
- Minimize XX_Page_Aliases.
Create a second source job
- In Job Finder, right-click your main group, and choose New Job.
- Type the job name
XX_Page_Aliases_A(where <XX> represents your initials). - Click Create.
Copy an input file to the job folder
- From your workstation, locate:
Prinergy Activity Practice Files / Act_16_Signature Selection_Aliases / Input File / Print Buyers Guide.pdf - Copy the
Print Buyers Guide.pdffile. - Restore Job Manager.
- Right-click the XX_Page_Aliases_A job folder icon in the lower left corner of Job Manager. Select Open Job Folder in File Browser.
- In the
XX_Page_Aliases_Afolder, openUserDefinedFolders. - Paste the
Print Buyers Guide.pdffile intoUserDefinedFolders. - Close the job folder.
- Minimize the Job Manager window.
Add and refine an input file
- Right-click the Input Files pane and choose Add Input Files.
- In the Add Input Files dialog box, click the Job Folder button and locate:
UserDefinedFolders/Input Files/ Print Buyers Guide.pdf. - Click the Add Selected button to add the file to the Files to Add list.
- In the Options section of the Add Input Files dialog box, select the Process Selected Files Using Process Template check box. and use the process template: Refine > Refine > 1stRef-Normz.
- In the Add Input Files dialog box, click OK.
- In the Start Process dialog box, click OK.
- Minimize XX_Page_Aliases_A.
Create a populated imposition
- In Job Finder, right-click your main group (XXMainGroup) and choose New Job.
- Type the name
XX_Page_Aliases_B(where <XX> represents your initials). - Click Create.
- From the File menu in Job Manager, choose Create New Imposition.
- In the New Imposition dialog box, enter a name for the imposition, for example,
XX_Page_Aliases_A Imposition(where XX represents your initials). - Select the Use External Imposition Application option. Click OK.
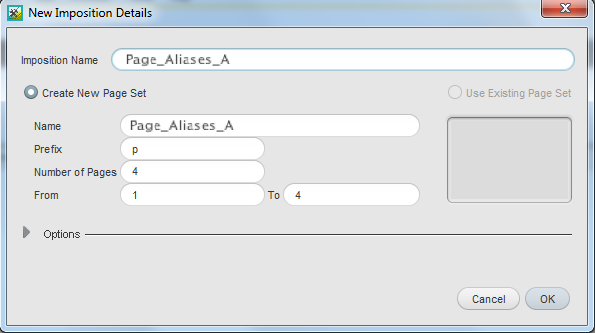
- In the New Imposition Details dialog box, in the Number of Pages box, type 4 and click OK. Preps software automatically opens.
- In Preps, select File > Add Files.
Note: Alternatively, in the Files pane, you can click the + (plus) icon. - Browse to the Jobs folder on <server>
J Drive / XX_Page_Aliases / System /Subpages. - Select the refined pages that are part of XX_Page_Aliases:
- Preps Brochure.p2.pdf
- Preps Brochure.p3.pdf
- Click Add Selection.
Note: You can add all the artwork files contained within theSubpagesfolder by double-clicking theSubPagesfolder. Otherwise you will have to do this action twice to make sure to get both required files. - In the Choose a File dialog box, navigate to the following PDF pages:
Jobs on <server> J drive / XX_Page_Aliases_A / System / SubPages - Select the refined pages that are part of XX_Page_Aliases_A:
- Print Buyers Guide.p1.pdf
- Print Buyers Guide.p4.pdf
- Click Add Selection.
Note: You can add all the artwork files contained within theSubpagesfolder by double-clicking theSubPagesfolder. Otherwise you will have to do this action twice to make sure to get both required files. - View the files added to the File List.
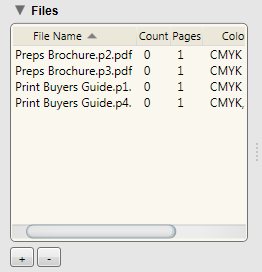
- Make sure that you are in the Pages view.
- Drag the artwork from the Files list to the Pages list in the order needed.
- Change to the Press Runs view.
- Display the Layouts pane.
- Navigate to Folding Pattern Templates > US > Letter Perfect.tpl.
- Select 4page Wturn.
- Right-click 4 page Wturn and select Add to Press Run.
- View the selected signature under the Press Runs List view.
- With the Press Run selected, open the Media pane and double-click Press Sheet Size to add it to the Press Run.
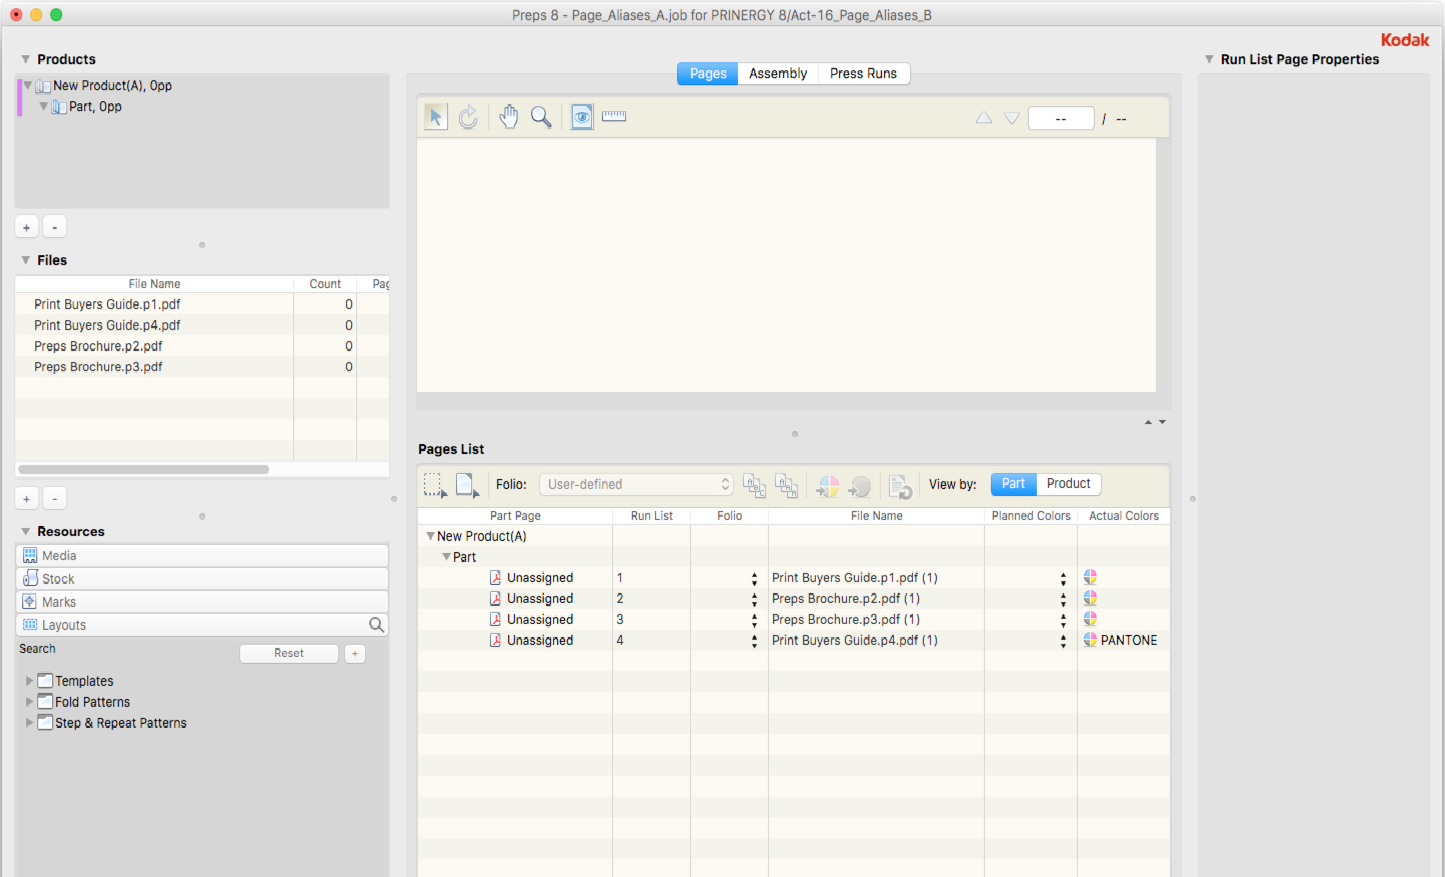
- From the File menu, choose Save and Return to Prinergy.
The populated imposition plan is automatically imported into your XX_Page_Aliases_B job.
Identify page aliases
- In Workshop, view the page aliases in job XX_Page_Aliases_B.
Note the icon representing the page aliases.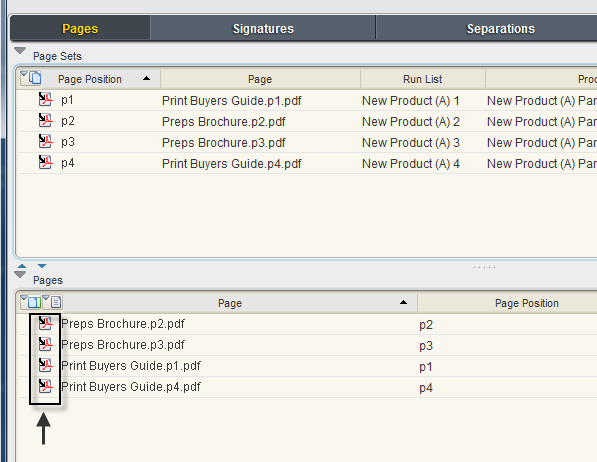
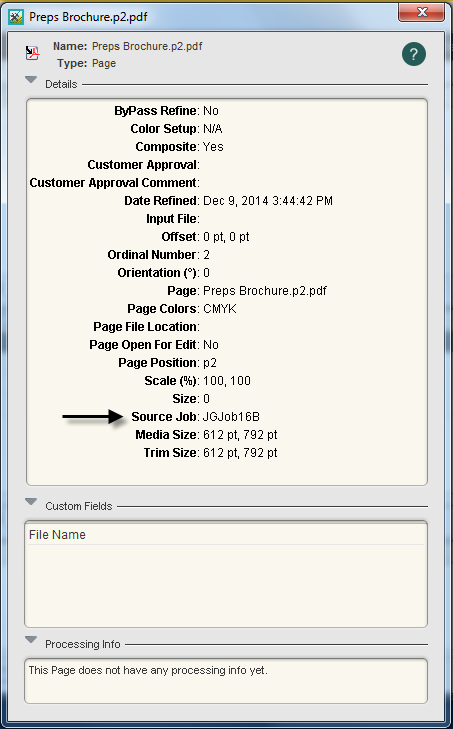
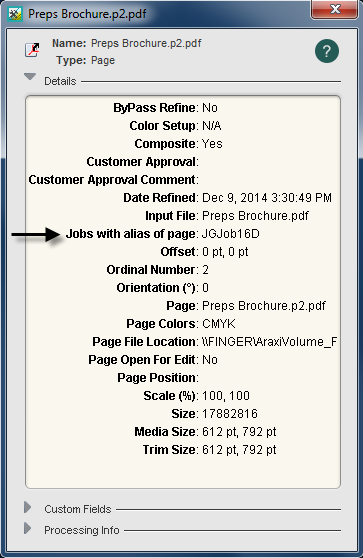
Page aliases aren't original source pages. Instead, page aliases point to hires original files located in another job. If the original hires files change in the originating source job, the page aliases will also reflect the changes. - Right-click
Preps Brochure.p2.pdfand select Get Info. - View the name of the source job. The aliased page identifies the name of the originating source job. In this example, the source job is XX_Page_Aliases.
- Close Get Info.
- Minimize XX_Page_Aliases_B.
Identify source pages
- Restore XX_Page_Aliases Job Manager.
- From the View menu, select Refresh.
- Select the Pages pane.
Note the icon representing the source pages used by the page aliases.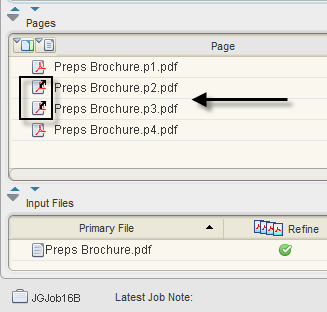
- Right-click
Preps Brochure.p2.pdfand select Get Info. - View the name of the Jobs with alias of page. This identifies the job aliasing the source page. In this example, the job using the page alias is XX_Page_Aliases_B.
- Close Get Info.
- This information is also displayed in the History entries for both the source job and the job using the aliased pages.
Edit a source page
- In the Pages pane of XX_Page_Aliases, open
Preps Brochure.p3.pdfusing the Acrobat software. - From the Tools menu in Acrobat, select: Advanced Editing > TouchUp Object Tool.
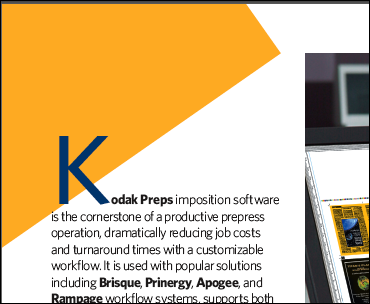
- Using the TouchUp Object tool, select the yellow textured object in the top left corner of the page. Click Delete.
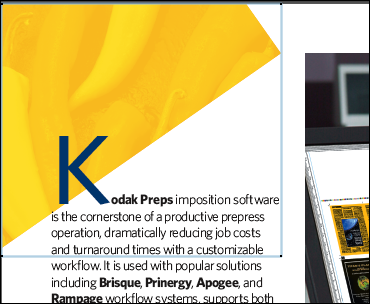
- The yellow textured object is removed, exposing a solid orange object below.
- From the File menu, select Save.
- Close the
Preps Brochure.p3.pdfpage. - Minimize XX_Page_Aliases.
View an edit in an aliased page
- Restore XX_Page_Aliases_B Job Manager.
- Select the Signatures view.
- In the Imposition Plans pane, right-click XX_Page_Aliases_B and select: Imposition Output > Virtual Proof > Virtual Proof.Imposed.600
- In the Start Process dialog box, click OK.
- In the Imposition Plans pane, right-click XX_Page_Aliases_B and select Open VPS files
- View the imposition in Prinergy VPS software. Make a note of the edited page in the imposition.
- Close Job Manager for jobs:
- XX_Page_Aliases
- XX_Page_Aliases_A
- XX_Page_Aliases_B