You use the same Preps templates for multiple jobs. Based on the type of work you produce, you aren't required to create new signature templates often. Your imposition workflow is mostly based on the use of pre-created templates.
- Create a job
- Copy an input file to the job folder
- Add and refine the input file
- Create a new imposition
- Select imposition details
- Assign PDF pages to a page set
- Proof the imposition using Prinergy VPS
Create a job
- If it is not already open, start Prinergy Workshop.
- In Job Finder, right-click your main group, and choose New Job.
- Type the job name
XX_Siganture(where <XX> represents your initials). - Click Create.
- Minimize the Job Manager window.
Copy an input file to the job folder and add input files to the job
- From your workstation, locate:
Prinergy Activity Practice Files / Act_16_Signature Selection_Aliases / Input File - Restore Job Manager.
- Open the
Input Filesfolder. - Drag the
Product Guide.pdfto the Job Manager's Input Files area. - In the Add Input Files dialog box that appears, under Options, click Select and select the 1stRef-Normz refine process template.
- Click OK.
Your file is copied to theUserDefinedFoldersfolder. - In the Start Process dialog box, click OK to start the Refine process.
Create a new imposition
- From the File menu, choose Create New Imposition.
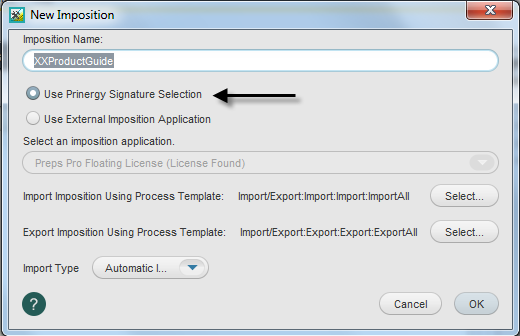
- In the New Imposition dialog box, type the imposition name
XXProductGuide(where <XX> represents your initials). - Select the Use Prinergy Signature Selection option.
- Confirm that the following import and export process templates are selected:
- Import/Export:Import:Import:ImportAll
- Import/Export:Export:Export:ExportAll
- Import Type: Automatic Import
- Click OK.
Select imposition details
- View the New Imposition Details dialog box.
- Select the Create New Page Set option and set the number of pages:
- Number of Pages = 16
- Select the following binding style and template:
- Saddle Stitched
- Folding Pattern Templates > US > Letter Saddle.tpl > 16 page SW
- Click Add
- In the signature description section, select the line that reads as follows:
Sig Index = 1
Template = Letter Tutorial Saddle
Signature = 16 page SW
Page = 1 - In the Target Device list, select Press Sheet Size.
- Click OK.
The imposition is automatically imported into your XXJob16A job.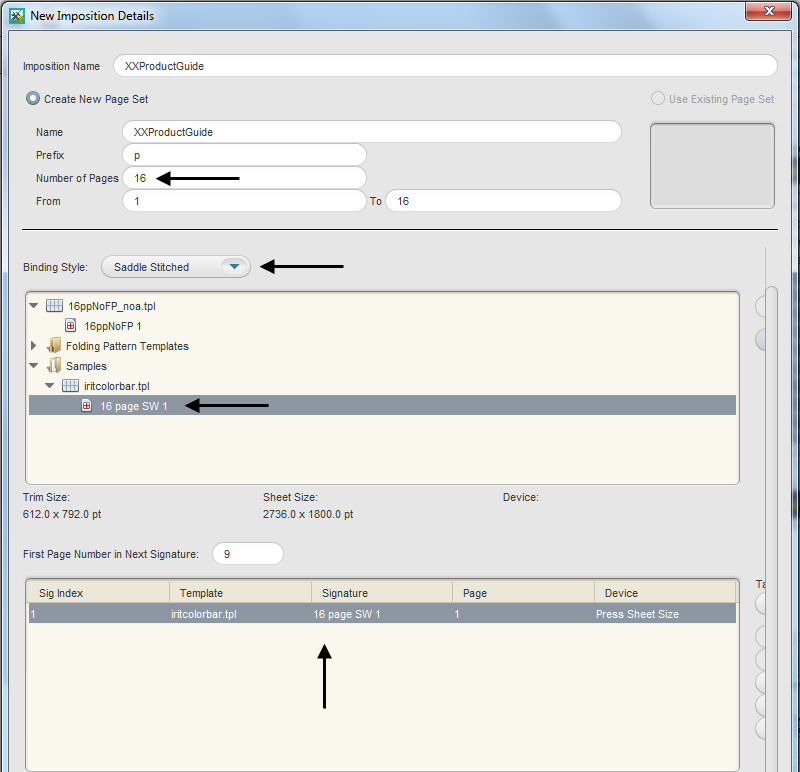
Assign PDF pages to a page set
- In the Pages pane, right-click
Product Guide.p1.pdfand choose Select All Pages. - Right-click any selected PDF page and select Assign Page to Position.
- Verify that the each PDF page is correctly assigned to the appropriate page position in the imposition plan. Click OK.
Proof the imposition using Prinergy VPS
- Select the Signatures view.
- Right-click Signature 1: 1 and select: Imposition Output > Virtual Proof > Virtual Proof.Imposed.600.
- Right-click Signature 1: 1 and select Open VPS files.
- At the completion of the proof process, quit Prinergy VPS.
- Close XX_Siganture Job Manager.