It must be emphasized that it is not recommended practice to use a bump curve created in the target curve. If for some reason you decide to use the bump curve method, then you must set a minimum dot size in the Prinergy or Prinergy Evo output process templates equivalent to the minimum dot value.
Use the following procedure to limit the minimum dot value only if you are using a bump curve created with a target curve. Do not use this procedure if you are using a current curve bump method.
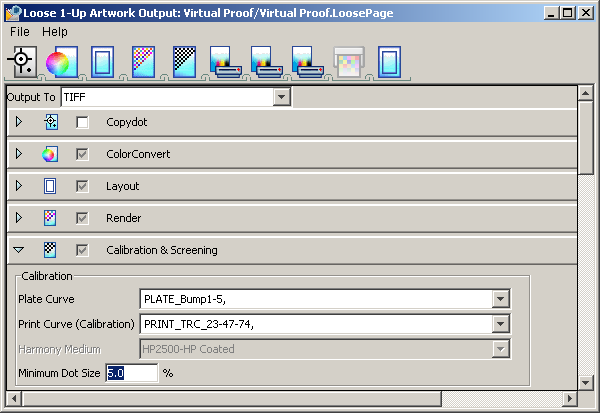
Setting the minimum dot value when the bump curve is in target
- Start by entering the Harmony bump curve value in the Minimum Dot Size box. In theory, this should clip off all values below the bump curve value.
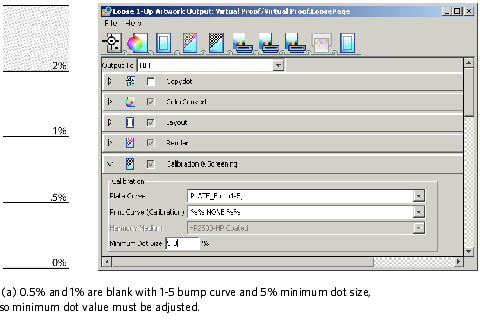
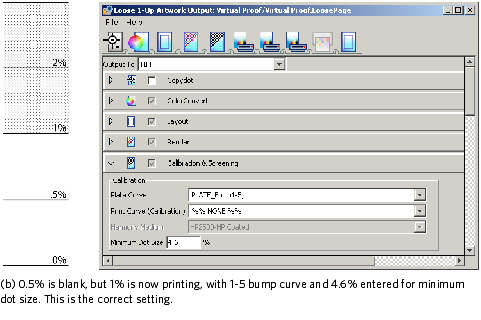
In actual practice, Harmony does some rounding of the underlying bump curve data. Depending on the frequency, Prinergy or Prinergy Evo may also apply a small amount of rounding to the output values. For this reason, you may need to adjust the value in the Minimum Dot Size box. - Select the bump curve and enter the same value for the minimum dot size. Output the test target and inspect the 0.5% and 1% patches. The 0.5% area should be clear, but there should be a dot in the 1% patch (and it should measure the bump amount value). If the 1% patch is also clear, reduce the number in the Minimum Dot Size box, and output again.
Adjusting minimum dot