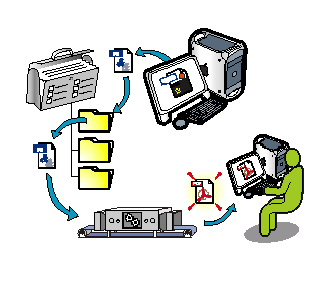
Step 1: Create a job
A job is a unit to organize work, including all the elements that you want to print. To work on a publication, you must create a job using the Prinergy Workshop.
When you create a job, Prinergy Workflow Packaging Automation Expansion Pack creates a job folder and database entries for tracking the job. Creating a job, you must choose the server and volume where it will be stored. Once a job is created, you cannot move it to any other volume. To move a job or pre-job to another volume or server, you must export or copy it.
Step 2: Add input files
Input files are those files received from your customer (the print buyer) that make up the content of the publication being printed. Once you have created a job, you can add input files to the job from any server or disk that Prinergy Workflow Packaging Automation Expansion Pack can read. You must add input files to the job before Prinergy can begin processing them.
Step 3: Refine input files to PDF file
Refining is a key Prinergy process. In addition to converting your files to PDF, it can perform preflight, copydot handling, color converting, trapping, thumbnail generation, and more, depending on your licensed options. You must refine your files before you can produce quality output in Prinergy.
Refined files also include embedded fonts and images, so you do not have to manage the fonts and images of refined files.
Step 4: Proof refined 1-up artwork
Following the refine process, the refined 1-up artwork PDF file can be proofed for content before the step and repeat stage. Loose 1-up artwork proofs can be generated as either hard proofs (printed to an output device, such as a laser printer) or soft proofs (images displayed on a monitor). With the Virtual Proofing System software you can:
- View separations
- Zoom in on specific content
- Turn on trim lines
- Check measurements
Step 5: Step and repeat 1-up artwork
A layout plan provides layout information for 1-up artworks in a job. To add layout plans into your Prinergy job, import the layout files.
Integrating Layout Software
If you often edit or create layout plans after you have created a Prinergy job, you can speed up the task of working with layout software by integrating it with Prinergy.
Step 6: Create Step-and-repeat output
Following the step-and-repeat process, you can output a step-and-repeat proof, checking for accurate placement of artworks in the layout before the final output stage. Layout proofs can be generated as either hard proofs (printed to an output device such as a plotter) or soft proofs (layout displayed on a monitor).
With the Virtual Proofing System software you can:
- View the step-and-repeat layout (imposed proof only)
- View backups of surfaces (imposed proof only)

Step 7: Create final output
Following the approval stage of a layout proof, the final output stage can begin. Final output can be to film or to plate, based on output requirements. Final output is generated by an output process template in Prinergy, which can contain customized specifications to meet the needs of various types of final output requirements.
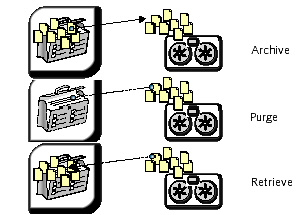
Step 8: Manage completed job elements
Once you have finished a job, archive the job files and then purge them to save disk space. If you need the files later, you can retrieve them. Alternatively, you can also copy a job to retrieve an archived job.
Archiving, purging, and retrieving of job files is controlled by archive, purge, and retrieve process templates. Generally, you archive and purge job files after the job is printed, although you can do so at any time.