You can change and generate traps using the Simplified or Detailed trapping dialog boxes available with PDF Trap Editor.
- Perform one of the following actions:
- In PDF Trap Editor, click the Trap Page
 button.
 - Select items in the PDF file and click the Trap Selection
 button.
- In PDF Trap Editor, click the Trap Page
- In the trapping dialog box, select either the Simplified or the Detailed view.
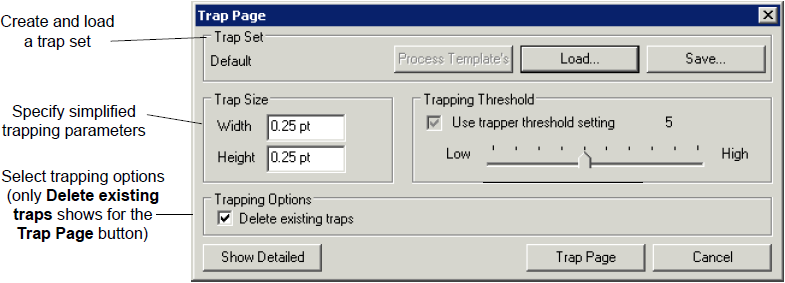
Each trapping dialog box includes three main sections—Trap Set, Trapping Parameters, and Trapping Options. The Trapping Options section is different for trapping a selection or trapping a page. - In the simplified Trap Selection dialog box, you can use the following parameters:
- Trap Size
- Trapping Threshold
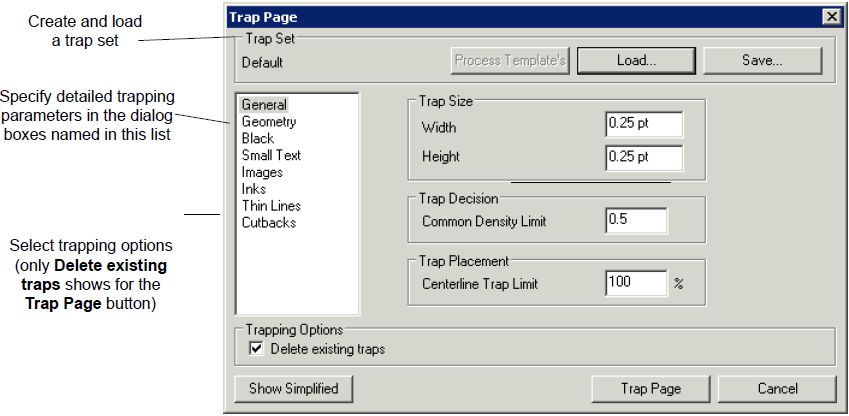
- With a detailed Trap Selection dialog box, you can use the following parameters.
- General: select trap size, trap decision, trap placement
- Geometry: select trap trimming, line join style, miter limit, three-color joins
- Black: select black width scaling, trapping for inks of certain intensities, overprinting
- Small Text: select small colored text scaling, small black text overprinting
- Images: select image-object, image-image, trap direction, resolution, bitmap processing
- Inks: select colorant type, neutral density, step limit, color scaling, treat as black, minimum relative step limit, colorant order
- Thin Lines: select split-line traps for strokes, overprint black strokes.
- Cutbacks: select to create a trap where multi-colored objects border with white areas of the page. This prevents mis-registration artifacts from being visible along white edges and helps keep knockout (reversed) text from filling in.
See Also
Optimizing your workflow with trap sets
Changing the number of traps generated
Setting up your own trapping parameters