- Log on to the Dynamic Print Planning Console with the following credentials.
Type the URL that was provided to you by Kodak as part of the activation process:- Tenant: <TenantName>
- User: <Username>
- Password: <Password>
- Tenant: <TenantName>
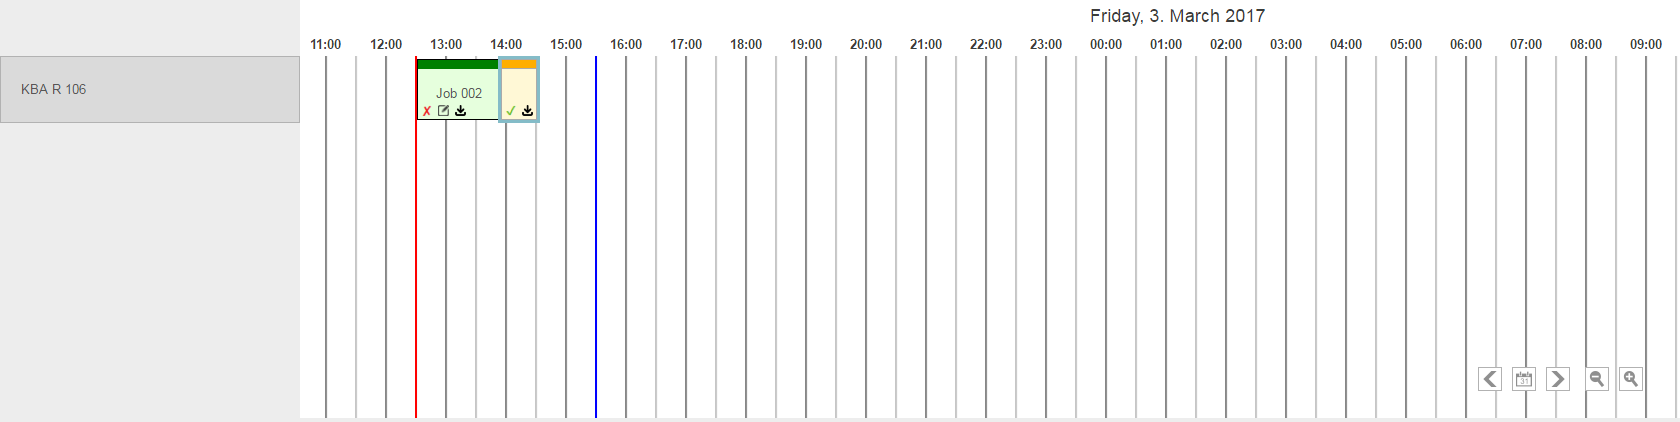
- Open the Workspace that you sent your pages to, and verify that new products were added to the Products list.
Note: The check boxes next to the products that are sent from Prinergy are selected. - Select the relevant products that you want to add to the layout planning.
- Click the Planning tab.
- Click the Start button to start calculations.

- When the calculation process is complete, in the Planning area, select the new created job.
- In the Printjob viewer area, review the imposition preview, and click the Approve button.
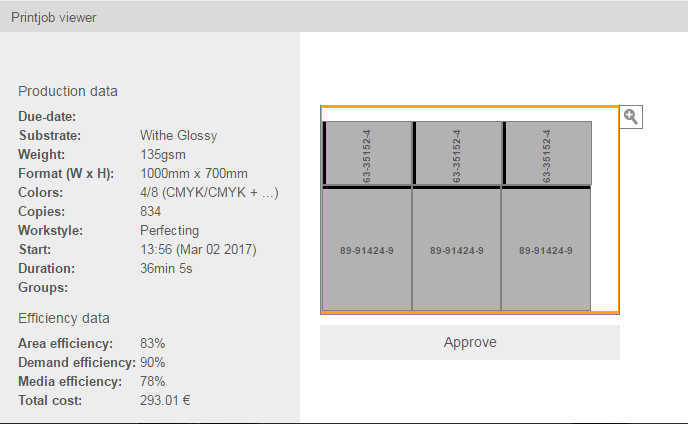
- In the Confirmation message, select Yes.
The job display color turns to green and a JDF file is created.
The JDF file is automatically downloaded to the smart hot folder in the Prinergy server. - Go to Prinergy. A new job is created in the
Ganged Layoutsgroup on Prinergy, and the JDF is imported to this job.
In the new job, page aliases are pointing to the original refined pages. - In Job Finder, you can now view the new created job and send the layouts to production.
Note: The name pattern of the new job is:DPP_<DateApprove>_<TimeApprove>_<sP1JobLabel>.jdf.
Example:DPP_20072017_103324_Job 003
Overview
Content Tools