Create a user account for each person who will use Prepress Portal.
Requirements: Your customer role must include the Manage Access right and the View Users right.
- On the home page, click Administration.
- In the Administration area, click Users.
In the Users area, in the Customer list, select the required customer.
Click Create Customer User or click a customer user name.
Tip: To edit your own account, click your name on the toolbar.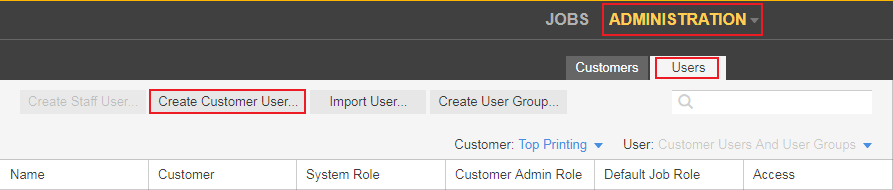
The Create Customer User window appears.
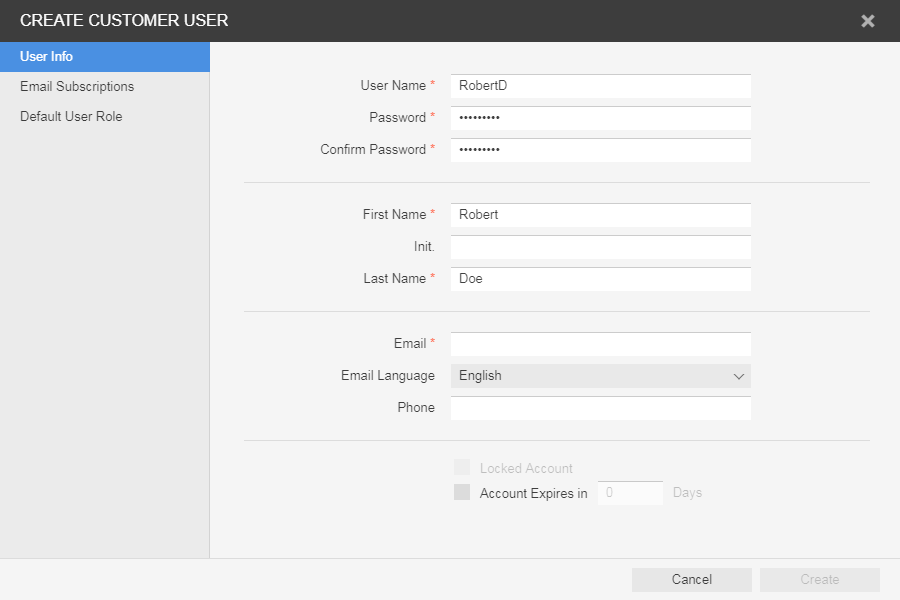
- In the Create Customer User or Edit Customer User window, perform any of the following actions:
| In | To create or edit | Do this |
|---|---|---|
| User Info | The logon credentials | a. In the User Info area, type the user name, password, the first name and last name of the user, and the user's contact information. Note: Due to security reasons, users are prevented from changing their own email address. Contact the system administrator if the email address change is required. b. To change an existing password, click Change Password, and type the current and new passwords. |
| Account status | If an account has been locked out because the wrong password was used X' number of times, clear the check box to enable the user to log in. | |
| The account expiry | If you want the user to have a temporary account, select the Account Expires In _ Days, and type the number of days in the box. | |
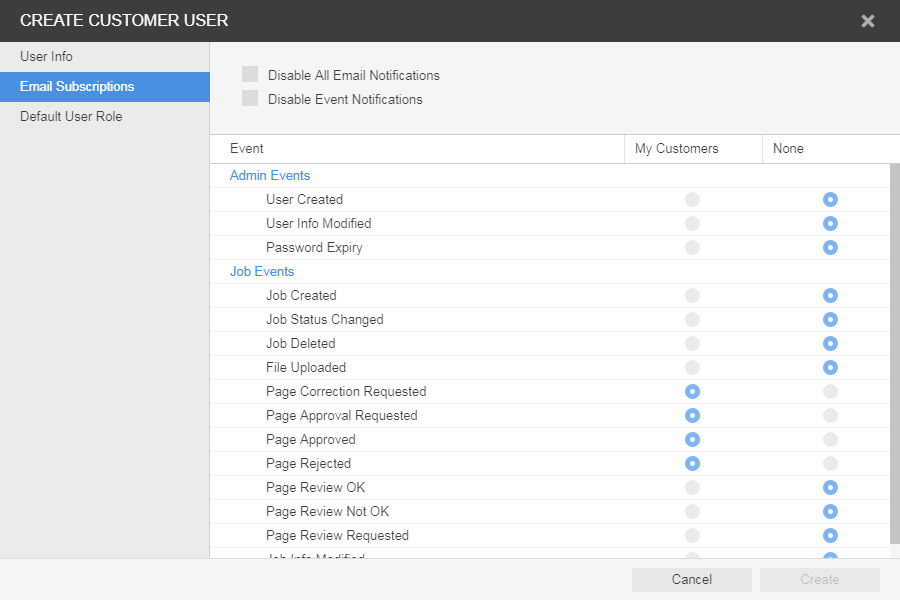
| Email Subscriptions | E-mail notifications | Specify whether the user should receive any e-mail notifications at all (directed or event-based), by selecting or clearing the Disable all Email notifications and the Disable Event Notifications check boxes.
|
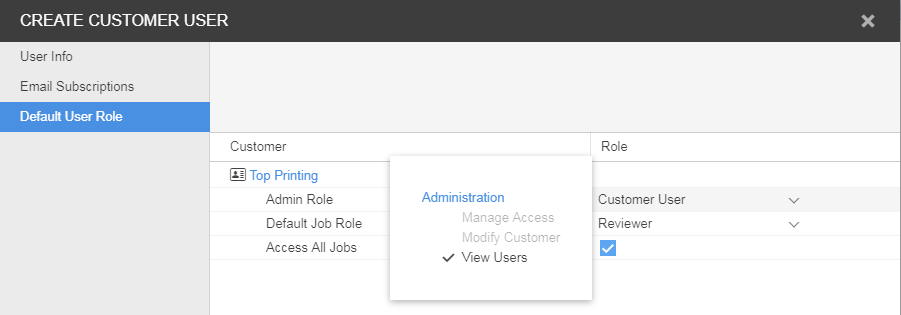
| Default User Roles | Roles | Locate the type of role you want to change/assign and in the list of available roles, select the appropriate role for the user. Select the appropriate roles for the user.
Note: You cannot edit your own roles. |
| Access to jobs |
|
6. Click Create.
Note: The Create button is enabled only when all the required boxes have information supplied.
Note: New and forgotten password users are required to reset their password during first login. Enter your username and pre-assigned password then click the Login button. Click the Change Password link to reset your password.
Creating user groups
You can also create user groups to streamline the process of setting job access and requesting user reviews when there are many people with different roles and responsibilities working on jobs.
For more information about creating user groups, see the InSite Prepress Portal User Guide.