You want to use a ColorFlow color setup as part of your Prinergy workflow. The selected color setup includes color characteristics for a press pool that includes Press A and Press B offset sheetfed presses.
The selected color setup will be used as part of the refine process and used as part of the proofing and final output processes.
 Identify a ColorFlow default color setup for a Prinergy job
A default color setup can be identified for a Prinergy job at the time the job is created, or afterwards. The default color setup provides all of the necessary color control elements for different processes in a Prinergy workflow, including the refine, loose page output, imposition output, and final output processes.
If you need to use a different color setup after a default color setup has been defined for a job, you can select a new color setup in the refine process template. Color setups selected in a refine process template will override the job's default color setup.
- Start Prinergy Workshop.
- In Job Finder, right-click your group (XXMain Group) and choose New Job.
- Type the name
XX_ColorFlow (where <XX> represents your initials). - In the Options section of the dialog box, select Job Attributes.
- In the Set Job Attributes dialog box, locate the ColorFlow area.
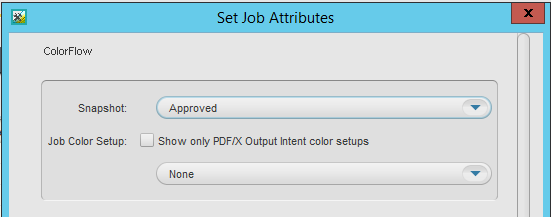
The ColorFlow job attribute defines a default color setup to be used as part of the job. The default color setup will provide color control elements to be used for various processes in the Prinergy workflow.
If required, the default color setup for a job can be changed during the refine process. - In the Default Color Setup list, select a color setup. For the purposes of this activity, select Sample Color Setup. The Sample Color Setup is shipped with the Prinergy system. Click OK.
A default color setup is a collection of several device conditions and color control elements (curves, device profiles, and DeviceLink profiles) that are required to match a common target on all reproduction devices.
When you refine a job's input files using a refine process template in which ColorFlow is enabled, the color setup that is assigned to the refined pages is either the default color setup for the job, or a different color setup depending on how the refine process template is configured. - Click Create.
- Minimize the Job Manager window.
 Copy an input file and imposition plan to the jobs folder
- From your workstation, locate:
Prinergy Activity Practice Files / Act_24_ColorFlow - Copy the I
nput File and Impositions folders. - Restore Job Manager.
- Right-click the XX_ColorFlow job folder icon in the lower left corner of Job Manager. Select Open Job Folder in File Browser.
- In the
XX_ColorFlow folder, open UserDefinedFolders. - Paste the
Input File and Imposition folders into UserDefinedFolders. - Right-click inside the
UserDefinedFolders window and select New Folder. - Name the folder
Final Output. This folder will be used later in this activity. - Close the job folder.
 Add and refine an input file using the default color setup
The default color setup is embedded at a PDF page level during the refine process. If you want to change the default color setup following the refine process, you must re-refine the job's input file(s) again using a different color setup identified in a refine process template.
 Create a refine process template
The following describes how to create a refine process template that enables the ColorFlow software and identifies a color setup.
- From the Tools menu, choose Process Template Editor.
- Right-click the Refine group, and choose New Process Template Group.
- Name the group
XXRefine Group (where <XX> represents your initials). - Right-click XXRefine Group and choose New Process Template.
- In the process template window, clear the Trap and Thumbnail check boxes.
- Open the ColorConvert section.
- Locate and select the Enable ColorFlow option. This option will use the ColorFlow software every time the refine process template is used.
When you enable ColorFlow, the Snapshot and Color Setup lists become available.
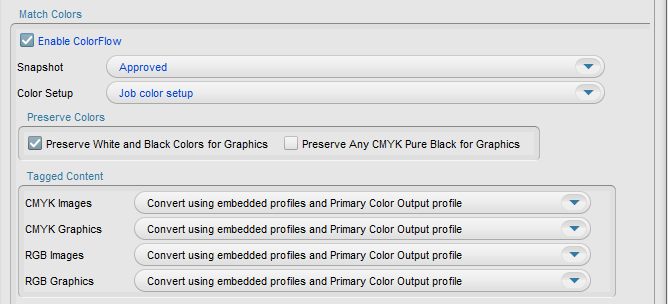
- Verify that the Snapshot selection is Approved.
A ColorFlow snapshot captures the state of the entire color database, making its elements available to a Prinergy workflow. By default in Prinergy Workflow, the currently approved snapshot is used. Only one snapshot can be in the approved state at any time. - In the Color Setup list, select the job's default color setup <Job_ColorSetup>.
The Color Setup lists all color setups that are associated with the Approved Snapshot. In this case, the <Job_ColorSetup> is the equivalent to the default Sample Color Setup identified at the time the job was created.
The color setup selected in this process template will always be used by input files refined using this process template. - From the File menu, select Save.
- Name the process template
XXCF Refine Template (where <XX> represents your initials). - Click the Create Process Template button.
- Close the refine process template.
- Close Process Template Editor.
 Add and refine an input file using the default color setup
The following describes how to refine an input file using the ColorFlow enabled refine process template. As part of this process, you will verify that the correct color setup was used.
- In Job Manager, right-click the Input Files pane and choose Add Input Files.
- In the Add Input Files dialog box, click the Job Folder button and locate:
UserDefinedFolders/Input Files/ Wells Brochure.pdf. - Click the Add Selected button to add the file to the Files to Add list.
- In the Options section of the Add Input Files dialog box, select the Process Selected Files Using Process Template check box. and use the process template: Refine > XXRefine Group > XXCFRefineTemplate.
- Click OK.
- In the Start Process dialog box, click OK.
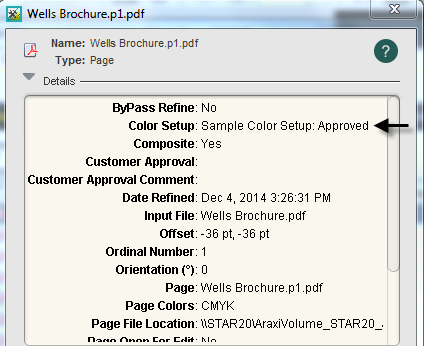
- In the Pages pane, right-click any refined PDF page and select Get Info.
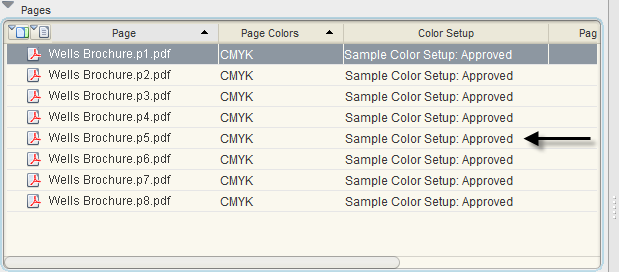
- In the Get Info dialog box, make note of the Color Setup used. In this example, the color setup used is the default color setup (Sample Color Setup) identified at the time the job was created.
- Close the Get Info window.
- From the View menu, select Visible Columns.
- In the Visible Columns dialog box, select Color Setup. Click OK.
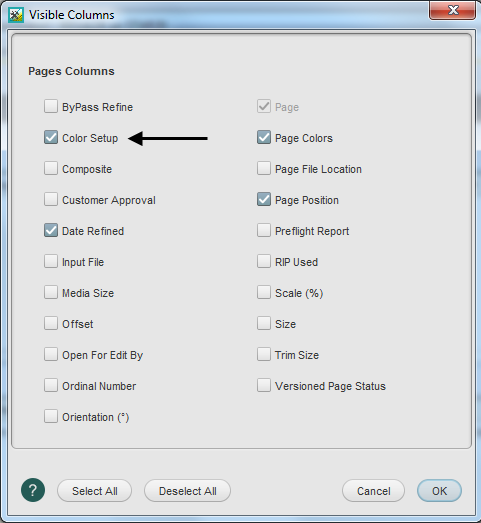
- In the Pages pane, view the color setup associated with each PDF page.
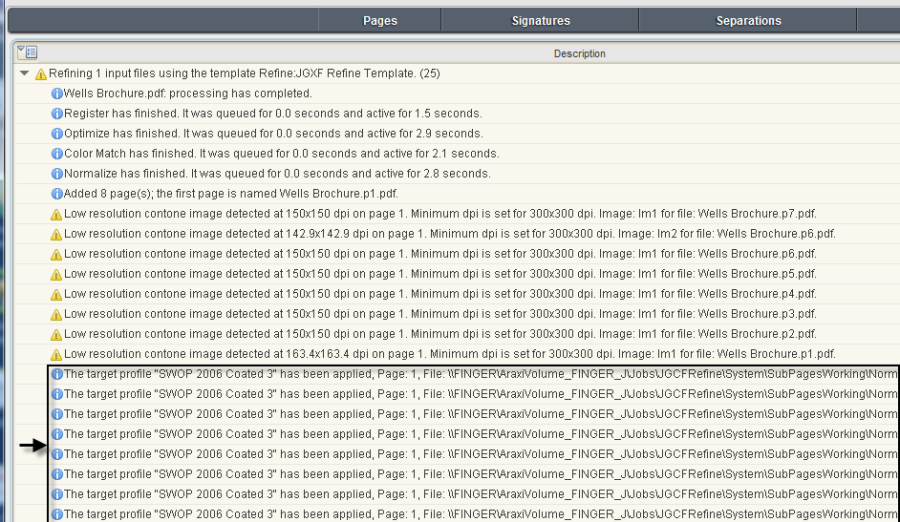
- Select the History view. Make note of the details associated with the default Sample Color Setup.
 Impose PDF pages and change color setup
- Select the Pages view.
- From the File menu, choose Import Imposition.
- In the Import Imposition dialog box, click the Job Folder button and locate:
UserDefinedFolders / Imposition / Wells.jdf. - Click Import.
- In the Start Process dialog box, click OK.
- In the Pages pane, select all PDF pages. Right-click any selected PDF page and choose Assign Page to Position.
- Verify that each PDF page is assigned to the appropriate page set position.
- Click OK.
- Select the Signatures view. View the imposed imposition plan.
 Scenario change
The sheetfed press that the job was intended to run on (Press A) requires maintenance. The job now needs to run on a web press (Press C) that isn't included in the current color setup. You now need to use a different color setup.
- Select all PDF pages in the Pages pane.
- Right-click any selected page and choose: Refine > XXRefineGroup > XXCFRefineTemplate
- In the Start Process dialog box, click the Edit Process Template button.
- Open the ColorConvert section and locate the Enable ColorFlow option.
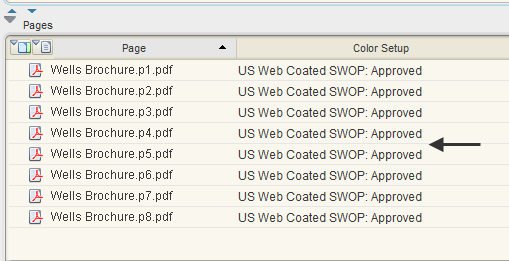
- In the Color Setup list, choose a different color setup. In this example, the color setup selected is called US Web Coated SWOP. Click OK.

Note: If you don't have another color setup available in your system, use these procedures as a guide to access your own different color setups once they are accessible. - In the Start Process dialog box, click OK. This rerefines the PDF pages using the newly identified color setup.
Note: A process template Start Process dialog box gives you the option to edit the process template before running it. When you edit a process template in this way, any changes to the process template are temporary and are discarded once the process is complete. - In the Pages pane, view the new color setup displayed.
- In the History view, make note of the details associated with the new color setup US Web Coated SWOP.


