You have received an input file that requires trapping throughout. Instead of individually trapping each item, you want to trap all elements when the file is refined into PDF pages. Trap width standards are specific to your shop and need to be implemented as part of the trapping process.
 Create a new job
- If it is not already open, start Prinergy Workshop.
- In Job Finder, right-click your main group, and choose New Job.
- Type the job name
XX_Trap_PDF (where <XX> represents your initials). - Click Create.
- Minimize the Job Manager window.
 Copy an input file to the job folder and add input files to the job
- From your workstation, locate:
Prinergy Activity Practice Files / Act_06_Auto Trapping / Input File - Restore Job Manager.
- Open the
Input File folder. - Drag the
Print Buyers Guide.pdf to the Job Manager's Input Files area. - In the Add Input Files dialog box that appears, under Options, click Select and select the 1stRef-Normz refine process template.
- Click OK.
Your file is copied to the UserDefinedFolders folder. - In the Start Process dialog box, click OK to start the Refine process.
Important: During the refine process, a warning icon is displayed in the Processes pane. This icon warns that low-resolution contone images have been detected. For the purposes of this guide, all images have been intentionally saved at a lower resolution to avoid longer processing times. Ignore this warning message. - Minimize the Job Manager window.
 Proof non-trapped PDF pages
- In the Pages pane, right-click
Print Buyers Guide.p3.pdf and choose the process template: Loose Page Output > Virtual Proof > Virtual Proof.LoosePage. - In the Start Process dialog box, click OK.
- In the Pages pane, select
Print Buyers Guide.p3.pdf. - Select File > Open VPS files. This automatically starts the Prinergy VPS software and opens the imposition for proofing purposes.
Note: Selecting File > Open VPS files is an alternative to using the right-click menu. - Using the Zoom tool, magnify the lower right corner of the page.
- If the Separations box isn't displayed, from the Windows menu, choose Separation Palette.
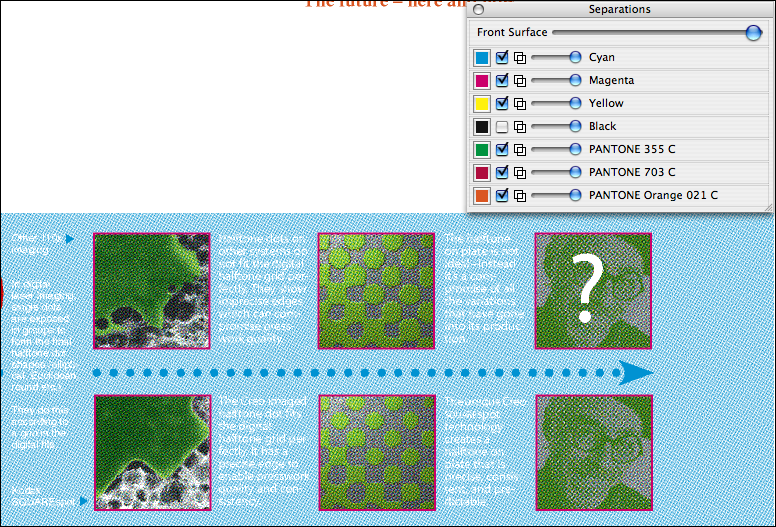
- Turn the black separation on and off. Make note of the width and size of the magenta boxes and the size of the blue dots and arrows.

Before Trapping - Close Prinergy VPS software.
- Return to Job Manager.
 Refine PDF pages again to set trap information
- In the Pages pane, select all PDF pages.
- Right-click any selected PDF page, and choose the process template: Refine > Refine > 1stRef-Normz Trap.
- In the Start Process dialog box, click the Edit Process Template button.
- Open the Trap section in the process template.
- Change the Trap Size: Width/Height setting to 0.5 pt. (.175 mm).
- Click OK.
Note: The setting of 0.5 pt. (.175 mm) is being used only for demonstration purposes. This will provide a trap line that is easily viewed. For your own purposes, set the trap value as defined by your shop standards. - In the Start Process dialog box, click OK.
Note: Editing this process template is temporary. When you modify a process template in this way, any changes to the process template are discarded when the process is complete. The changes do not affect the original process template and are not saved with the job. You cannot redo the same process without making the same changes to the process template again.
 Proof trapped PDF pages using Prinergy VPS
- In the Pages pane, right-click
Print Buyers Guide.p3.pdf and choose the process template: Loose Page Output > Virtual Proof > Virtual Proof.LoosePage. - In the Start Process dialog box, click OK.
- In the Pages pane, right-click
Print Buyers Guide.p3.pdf and choose Open VPS files. - Using the Zoom tool, magnify the bottom right corner of the page.
- From the Windows menu, choose Separation Palette.
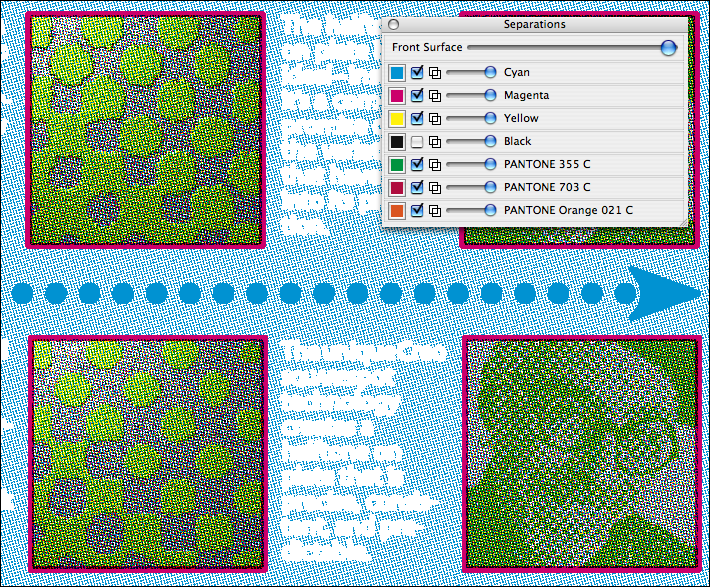
- Move the transparency slider for the black separation to view trapped objects.
Note the change in width and size of the magenta boxes, blue dots and arrows. This reflects the trap value of 0.5 pt (.175 mm) set in the refine process template.

- Close Prinergy VPS software at the completion of the proof cycle.
 Proof trapped PDF pages using PDF Trap Viewer
- Restore Job Manager.
- In the Pages pane, double click
Print Buyers Guide.p3.pdf to start Adobe Acrobat. - In Acrobat, click the Kodak PDF Trap Viewer button on the toolbar to start PDF Trap Viewer.
Notes:- In Acrobat 8 or 9, you can also access PDF Trap Viewer by selecting Advanced > Kodak Tools > Kodak PDF Trap Viewer.
- In Acrobat X, select View > Tools > Plug-In Kodak Tools and then select the Kodak PDF Trap Viewer icon from the Plug-In Kodak Tools section of the Tools panel on the right.
- Use the Zoom tool to magnify the bottom right corner of the page.
- Select the Highlight traps tool located on the left panel of the Trap Viewer window.

- Select the Hide traps tool located on the left panel of the Trap Viewer window. Toggle between the two tools to view the trap applied to the page.

- Close Adobe Acrobat. Don't save.
- Close XX_Trap_PDF Job Manager.

