NOTE: This feature has been removed in Prinergy 9.0 and is no longer supported. Leaving the content in place, for customers on older versions.
At the last minute, you need to edit a refined PDF page. To save time, you want to use the Prinergy PDF File Editor in Workshop to edit the refined PDF page. The PDF page requires a text, object, and image edit.
Prinergy PDF File Editor allows you to use Adobe Illustrator software or Adobe Photoshop software to edit refined PDF pages, and then import the edited pages back into Prinergy. PDF File Editor is a licensed feature and requires Adobe Illustrator or Adobe Photoshop CS3 or later (either Windows or Macintosh).
 PDF File Editor includes
Prinergy server components that convert a Prinergy PDF file into an Illustrator file containing "Kodak Protected Art" objects, and import the changes back into the job after the conversion. This includes:
- The ability to view the properties of a Kodak protected art element without first converting the element to a native Illustrator object
- A plug-in for Illustrator that lets you selectively convert Kodak Protected Art objects into native Illustrator objects
- A javascript component for Illustrator that submits the changed file back into Prinergy
- The ability to automatically recognize changes in geometry and colorants.
- A contextual menu in Workshop that lets you open refined PDF pages in Illustrator, cancel an editing session, and resolve conflicting edits. A visible column shows which operator has the PDF file open for editing.
 PDF File Editor benefits
- Only the objects that need to be changed are converted to Illustrator native format, reducing the risk of an error during the conversion process.
- When text changes are made, only the fonts that are changed are loaded into the system, rather than requiring all the fonts in the document.
- Most image types are extracted into the Photoshop .psd format and stored as external links to make image editing easy.
- The Undo command is available if there are problems converting objects to Illustrator native format.
 PDF File Editor limitations
At present, not all object types can be converted to Illustrator native format, including:
- Duotone images. These images are saved as external links in the PDF file.
- DeviceN colored fills, strokes, gradients, and text.
- Gradients that are not radial or linear.
Notes:
- The color space for art converted to native format must be CMYK. Special color spaces are converted to CMYK on conversion.
- Transparent elements cannot be individually selected for conversion to native art. Entire groups of elements must be converted together.
 Add and refine an input file
- Open XX_Bypass if it is not already open.
- Right-click the Input Files pane and choose Add Input Files.
- In the Add Input Files dialog box, click the Job Folder button and locate:
UserDefinedFolders/Input Files/ Label_Waterbottle.pdf. - Click the Add Selected button to add the file to the Files to Add list.
- In the Options section of the Add Input Files dialog box, select the Process Selected Files Using Process Template check box.. If the Choose Process Template dialog box does not open, click the Select button.
- In the Choose Process Template dialog box, locate the process template: Refine > Refine > 1stRef-Normz
- In the Add Input Files dialog box, click OK.
- In the Start Process dialog box, click the Edit Process Template button.
- Open the Optimize section in the refine process template.
- Select the Prepare PDF for Edit checkbox.
This option pre-converts the input file during the refine process, instead of having to convert it on-demand later in Workshop. Use this option if the edit is large and consists of multiple pages. Pre-converting saves time. - Click OK.
- In the Start Process dialog box, click OK.
 Open and edit the PDF page
In this task, you will open and edit a refined PDF page using Adobe CS3, CS4, or CS5 software or newer. When you open a PDF page for editing, the PDF page is converted into an Illustrator document that handles all page elements as Kodak Protected Art.
- In the Pages pane, right-click
Label_Waterbottle.p1.pdf and select:
PDF Editing > Open PDF For Editing.
The PDF page automatically opens in Illustrator. - Press Ctrl 0 to Fit in Window.
 Edit the text in a PDF page
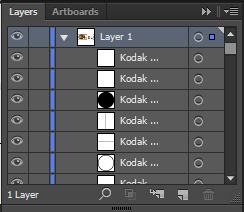
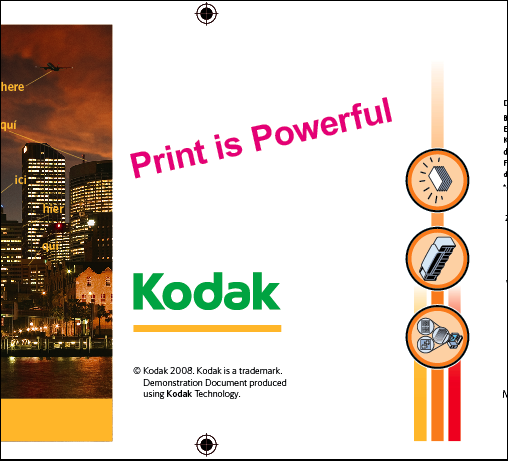
- Using the Arrow tool, select the text Print is powerful. View the Layers palette (F7) to verify that all PDF elements have been protected from any unintentional changes.
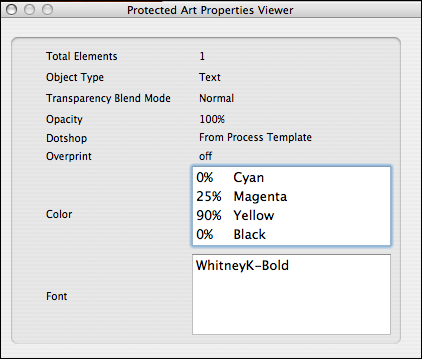
- With the Print is powerful text selected, choose:
Window > Kodak > Protected Art Properties.
The Protected Art Properties Viewer verifies which object (image or text) you have selected, and provides details of the object.
- Close the Protected Art Properties Viewer.
- With the Print is powerful text still selected, from the Filter menu in Illustrator, choose:
Kodak > Convert to Native.
This verifies that fonts required for the text element in the Kodak Protected Art will be loaded onto the system, allowing for full edit capabilities of the text object.
Note: If the font used in the input file isn't available on your system, a warning message will appear to inform you that a faux font will replace the unknown font. For the purpose of this activity, don't install the missing font. The procedure steps below outline changing the font to a default system font in Illustrator. Click OK in the warning message dialog box. - With Print is powerful selected:
- Change the font to Arial Bold.
- Change the color of the text.
- Change the "p" in "power" to a capital "P".
- Remove the period.
- Rotate the text.
 Edit an object in a PDF page
- Using the Arrow tool in Illustrator, select all letters in Kodak (vector art).
- From the Filter menu in Illustrator, select:
Kodak > Convert to Native - Change the color of the vector art.
- From the File menu, select Save.
 Edit an image in a PDF page
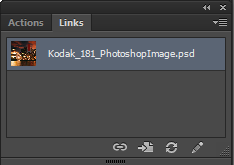
- Using the Arrow tool, select the image. From the Window menu in Illustrator, select Links.
In the Links window, select the Edit Original command (Pencil icon) or from the Edit menu, select Edit Original. This starts Photoshop CS3 or later.
Note: If Photoshop doesn't open, go to the Prinergy server / Jobs / XX_Bypass / System / IllustratorDocumentWorking folder. Inside, locate and right-click the .psd file. Choose Get Info. In the Open with section, select Adobe Photoshop and click Change All. - Using Photoshop, make an edit to the image. From the File menu, select Save. Close Photoshop.
- Return to the Illustrator window. You will receive a message that reads:
Some files are missing or modified in the Link panel. Would you like to update them now? - Click Yes.
The original image is replaced with the edited image.
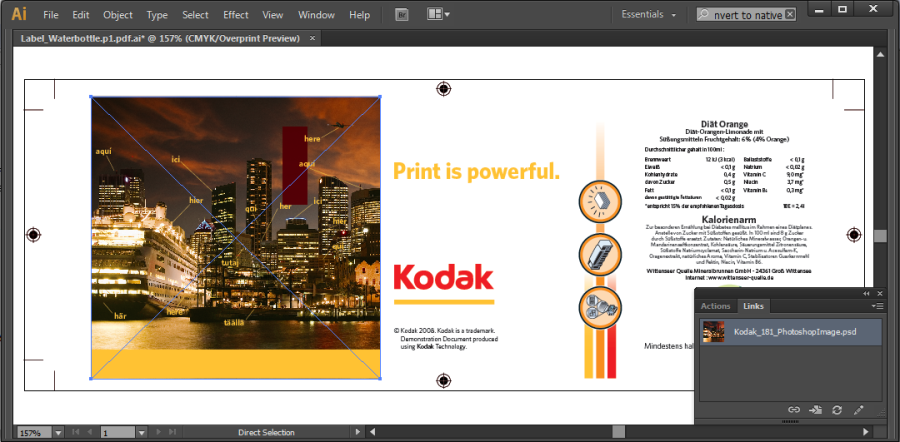
- Once the edits have been made to the Kodak Protected Art, submit the PDF page back to Prinergy.
- In Illustrator, select:
File > Scripts > Kodak > Submit PDF To Prinergy - Click Yes.
The Kodak Protected Art returns to Prinergy using an import hot folder. At this time, the protected art is recorded in the database and any colors or geometry changes are updated.
To identify that a PDF page is currently being edited, Workshop displays the name of the editor in the Open For Edit By column in the Pages pane, and displays a pencil icon next to the name of the PDF page.

Once the PDF page has been fully imported back into Job Manager, the editor name and pencil icon disappear.
 Proof the edited PDF page using Prinergy VPS
In this task, you will use Prinergy VPS software to proof the edited PDF page.
- In the Pages pane, right-click
Label_Waterbottle.p1.pdf and select:
Loose Page Output > Virtual Proof > Virtual Proof.LoosePage - In the Start Process dialog box, click OK.
- In the Pages pane, right-click
Label_Waterbottle.p1.pdf and select Open VPS files. This automatically starts the Prinergy VPS software and opens the PDF page for proofing purposes. - From the Window menu in Prinergy VPS, choose the Navigation and Separations Palette. Proof the entire page. At completion, quit Prinergy VPS.
 Destroy the Prinergy job
Destroying a job or pre-job permanently deletes all files and information about the job or pre-job. Only destroy a job if you are sure you will never need the job again. This action creates additional storage space on your Prinergy server. Only destroy a job if you have previously archived the job, or know you will never need to use the job again.
- Close XX_Bypass Job Manager.
- In Job Finder, right-click your XX_Bypass (located in your XXMain Group) and choose Destroy Entire Job.
- In the Destroy Job dialog box, enter your administrator name and password (supplied by your instructor, service representative, or your own system administrator).
- Click Destroy.


