You are supplied a layered PDF file from your customer. You want to create four separate versions based on the supplied PDF file. As part of this job, you need to combine nine separate layers into five layers, and then define a version plan that uses the five layers to create the four separate versions.
Note: If you didn't complete Scenario 1, complete Tasks 1 and 2 (of Scenario 1), before completing the following. Tasks 1 and 2 (of Scenario 1) contain preparatory steps required for both scenarios in this activity.
 Create an LPV job
- If it is not already open, start Prinergy Workshop.
- In Job Finder, right-click your main group, and choose New Job.
- Type the job name
XX_LPV_B (where <XX> represents your initials). - In the Options section of the dialog box, select Job Attributes.
- In the Set Job Attributes dialog box, locate the Regional Versioning section.
- Select the Layered PDF Versioning (LPV) Job option. Click OK.
- In the Create New Job dialog box, click Create.
- In Job Manager, select the Pages pane.
- From the View menu, choose Visible columns.
- Verify that the following columns are selected:
Versioned Page Status
Page Colors - Minimize the Job Manager window.
 Copy an input file and imposition plan to the job folder
- From your workstation, locate:
Prinergy Activity Practice Files / Act_31_LPV - Copy the
Job B Input File and Job B Imposition folders. - Restore Job Manager.
- Right-click the XX_LPV_B job folder icon in the lower left corner of Job Manager. Select Open Job Folder in File Browser.
- In the
XX_LPV_B folder, open UserDefinedFolders. - Paste the
Job B Input File and Job B Imposition folders into UserDefinedFolders. - Close the job folder.
 Add and refine the input file
- Right-click the Input Files pane and choose Add Input Files.
- In the Add Input Files dialog box, click the Job Folder button and locate:
UserDefinedFolders/Job B Input File/LayeredSoapLabel.pdf. - Click the Add Selected button to add the file to the Files to Add list.
- In the Options section of the Add Input Files dialog box, select the Process Selected Files Using Process Template check box. and use the process template: Refine > Refine > 1stRef-Normz.
- In the Add Input Files dialog box, click OK.
- In the Start Process dialog box, click the Edit Process Template button.
- Open the Normalize section. In the PDF Level Handling list, confirm that the PDF Level Handling is set to Leave as is, and click OK.
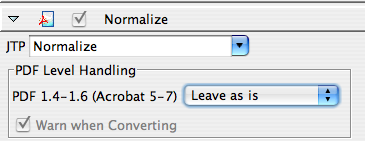
The transparent attributes have now been successfully maintained. - In the Start Process dialog box, click the PDF Layer Selection button.
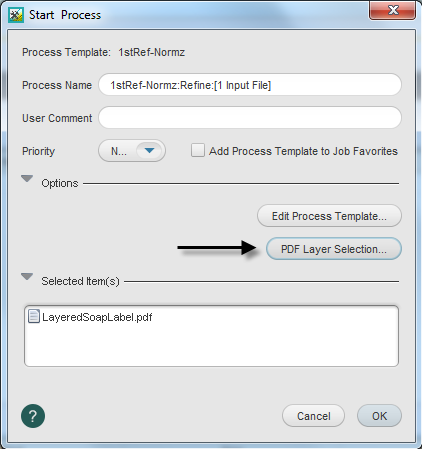
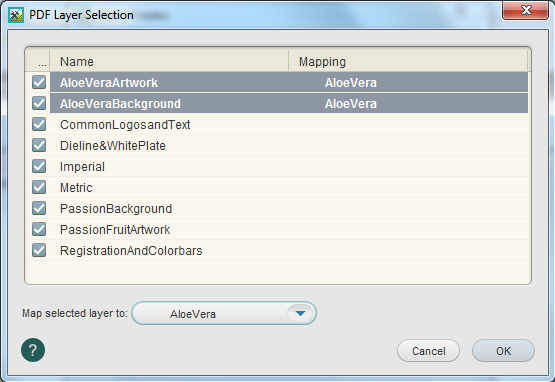
Note: The following three steps illustrate how to map a layered PDF file that consists of nine layers into a more manageable PDF file that contains five layers. - The following steps map two separate layers into one layer that uses a customized name:
- Holding the Shift key, select AloeVeraArtwork and AloeVeraBackground
- From the Map selected layer to list, select Other.
- In the Input dialog box, type the name AloeVera and click OK.
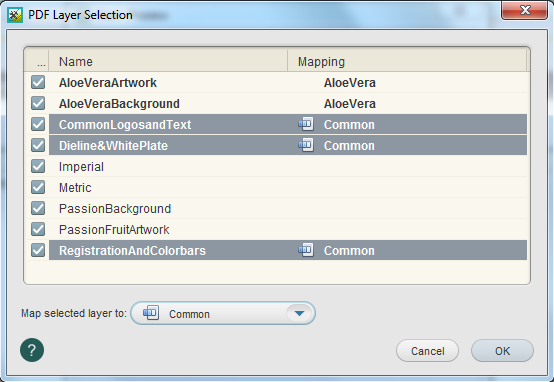
- The following steps map three separate layers into one layer that is identified as the Common layer:
- Holding the Ctrl key, select CommonLogosandText, Dieline&WhitePlate, and RegistrationAndColorbars.
- From the Map selected layer to list, select Common.
- The following steps map two separate layers into one layer that uses a customized name:
- Holding the Shift key, select PassionBackground and PassionFruitArtwork.
- From the Map selected layer to list, select Other.
- In the Input dialog box, type the name
PassionFruit and click OK.
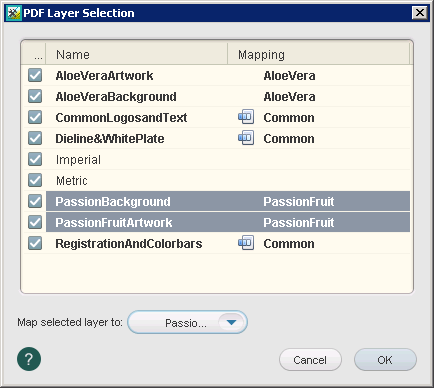
- Click OK in the PDF Layer Selection dialog box.
- In the Start Process dialog box, Click OK.
Important: The mapping of the input file's layers to the version plan's layers is retained so that each new input file that is added to the job can be automatically mapped to the job layers using the latest mapping data. A PDF layer mapping profile is saved in the job's folder and can be applied to other jobs. - From the Input Files pane, open the LayeredSoapLabel.pdf in Adobe Acrobat.
Note: In Adobe Acrobat, select the Layers tab. View the layers built as part of the input file. Make note that the customer supplied PDF file contains nine layers. - From the Pages pane, open the refined LayeredSoapLabel.p1.pdf in Adobe Acrobat.
Note: In Adobe Acrobat, select the Layers tab. Make note that the refined PDF file now contains five layers. This is a result of mapping the selected layers prior to the refine process. - Right-click the Input Files pane and choose Add Input Files.
- In the Add Input Files dialog box, click the Job Folder button and locate:
UserDefinedFolders/Job B Input File/LayeredSoapLabel_MAP.pdf. - Click the Add Selected button to add the file to the Files to Add list.
- In the Options section of the Add Input Files dialog box, select the Process Selected Files Using Process Template check box. and use the process template: Refine > Refine > 1stRef-Normz.
- In the Start Process dialog box, click the PDF Layer Selection button.
Note that the layers in the new file are already mapped. The previous layer mapping has been retained.

- Click OK in the PDF Layer Selection dialog box.
- In the Start Process dialog box, Click OK.
Important: The new input file that you added has been automatically mapped to the job layers using the latest mapping data. Note that the refined PDF file now contains five layers. This is a result of retaining the layer mapping information.
 Define the version plan layer structure
In this task, you will define how the five layers of this versioned job (Common, AloeVera, PassionFruit, Imperial, and Metric), work together to create four separate versions.
- Select the Version Plan view.
Make note of the automatic creation of layers and the identification of colors to extract for each layer. When you use layered input files, layers of the job are automatically created. This is different compared to using the Version Plan Quick Builder with non-layered input files. - From the Versioning menu, choose Add Change Layer.
- Repeat the same step as above to create a second change layer.
- From the Versioning menu, choose Add Version.
- Repeat the same steps as above to create three more versions.
- Click each version name and rename as follows:
New Version 1 = PassionFruitMetricNew Version 2 = PassionFruitImperialNew Version 3 = AloeVeraMetricNew Version 4 = AloeVeraImperial

Using the list selections in the three layer columns, make the following selections for each version:
Version | Base layer | Change layer 1 | Change layer 2 |
|---|
PassionFruitMetric | Common | PassionFruit | Metric |
PassionFruitImperial | Common | PassionFruit | Imperial |
AloeVeraMetric | Common | AloeVera | Metric |
AloeVeraImperial | Common | AloeVera | Imperial |

 Link refined PDF page to a versioned page
In this task, you will link the layered PDF page to five separate layers. Based on the version plan, each layer only uses certain parts of the layered PDF page. For example, the AloeVeraImperial version uses only the common base layer, the AloeVera layer, and the Imperial layer associated to the layered PDF page.
- Select the Versioned Pages view.
- From the Versioning menu, choose Add Versioned Pages.
- In the Add Versioned Pages dialog box, add a page Range of 1. Click OK.
- Right-click the
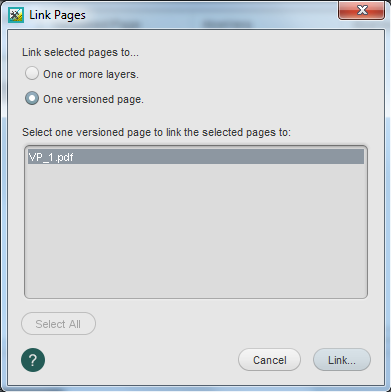
LayeredSoapLabel.p1.pdf in the Page column, and choose Link. - In the Link Pages dialog box:
- Select One versioned page
- Select
VP_1.pdf - Click the Link button
- In the Link to Versioned Page dialog box, verify that all layers have been linked to
LayeredSoapLabel.p1.pdf.
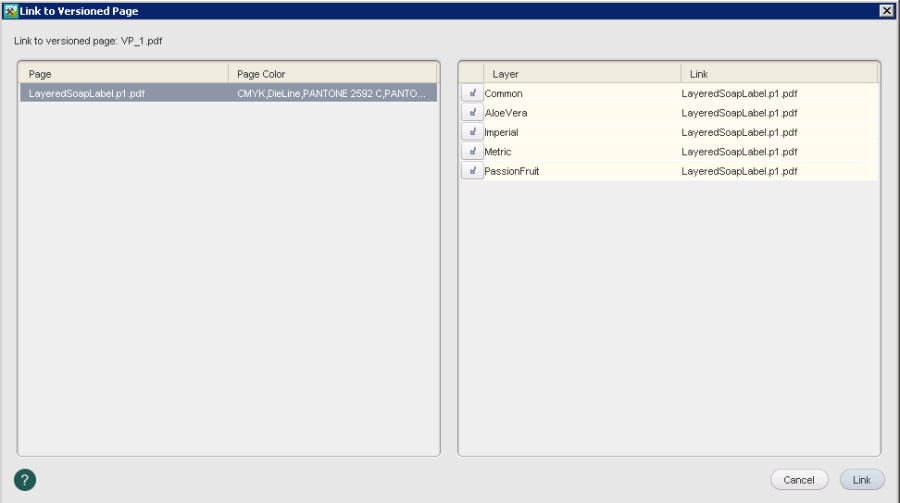
- Click Link.
 Generate a versioned page
In this task, the generate process combines all layered information to generate a finalized versioned page consisting of the four defined versions.
- In the Versioned Pages view, select the versioned page
VP_1.pdf. - From the Process menu, choose the process template: Generate > Generate > Generate .
- In the Start Process dialog box, click the Edit Process Template button.
- Open the Generate Versioned Pages pane.
- In the Version Layer Options section, clear the Force Overprint option.
Note: The Force Overprint option is used when an object on a change layer creates a knockout in the base layer, and where the knockout is not the same on each version. This check box sets all change objects to overprint, where change objects are objects on pages that are linked to layers other than the base layer. For more information, see the Layered PDF Versioning for Prinergy User Guide. - Click OK.
- In the Start Process dialog box, Click OK.
 Impose the versioned page
In this task, you will impose the versioned page to a four-up step and repeat imposition plan.
- Select the Pages view.
- From the File menu, choose Import Imposition.
- In the Import Imposition dialog box, click the Job Folder button and locate:
UserDefinedFolders / Job B Imposition / 4UpStep&Repeat.jt. - Click Import.
- In the Start Process dialog box, click OK.
- In the Pages pane, right-click
VP_1.pdf and choose Assign Page to Position. - In the Assign Page to Page Set Position dialog box, select the Range option.
- In the Range window enter: (1-4). Click OK.
To assign a single page to multiple page positions, enclose the list of page positions in parentheses.
 Proof the versioned page using Prinergy VPS
- Select the Separations view.
- View the separations that make up Signature 1—A Front 1.
- Right-click Signature 1 (18 Separations) and choose the process template: Imposition Output > Virtual Proof > Virtual Proof.Imposed.600.
- In the Start Process dialog box, ensure the Output All Versions option is selected, and click OK.
- Right-click Signature 1 and select Open VPS files.
- From the Window menu in Prinergy VPS, choose the Separations Palette to view each versioned layer.
Note: View each version to identify the differences and similarities. With only the Common layer selected, turn the two gold spot colors on and off to view the metric and imperial information. - Quit Prinergy VPS software.
- Close XX_LPV_B Job Manager.
- Destroy XX_LPV_B.


