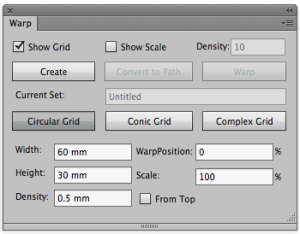
In the Warp dialog box, set the parameters for the grid:
| Show Grid | Select this check box to make the grids visible. Clear the check box to hide the grids. |
| Show Scale/ Density | Select the Show Scale check box and, in the Density box, type an appropriate number for the density scale. |
| From Top | The default start position of distortion is from the bottom. To change the distortion start position to the top, select this check box. |
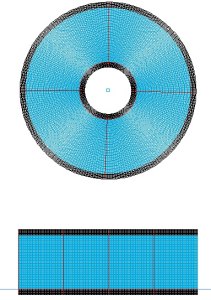
| Create | Clicking this button creates a source grid and destination grid according to these parameters. |
| Convert to Path | In order to check the destination grid you have created against the manufacturing specification for the packaging product, click this button to convert the destination grid to path, which can be printed. |
| Warp | Clicking this button distorts the object based on the position of the selected artwork when placed on top of the source grid. |
| Current Set | If you have saved the current Warp Grid settings parameters as a parameters set, the name of the Current Set will appear here. |
| Width | Set the width of the source grid area. |
| Height | Set the height of the source grid area |
| Density | Set the width and height of a single cell from the source grid. |
| WarpPosition | Set the position of warp. |
| Scale | Set the scale of the circular grid (destination grid). |

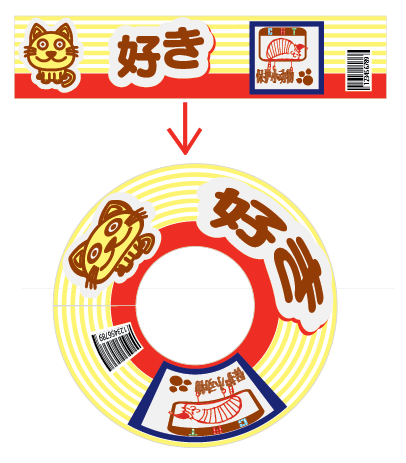
Only graphics positioned in the live area of the source grid will be moved to the destination grid. Any graphics outside the source grid will be clipped out of the destination grid. The following image shows the artwork positioned over the source grid.

The Warp button is active only if your artwork is selected. When you click Warp, your artwork will be warped to fit the destination grid.
