Create a job
- If it is not already open, start Prinergy Workshop.
- In Job Finder, right-click your main group, and choose New Job.
- In the Create New Job dialog box, select the server name and volume.
- Type the job name
XX_Spot_Color(where XX represents your initials). - Click Create.
- Minimize the Job Manager window.
Copy an input file to the job folder and add input files to the job
- From your workstation, locate:
Prinergy Activity Practice Files / Act_46_Spot_Color / Input File - Restore Job Manager.
- Open the
Input Filefolder. - Drag the
Wells Brochure.psto the Job Manager's Input Files area. - In the Add Input Files dialog box that appears, under Options, clear the Process Selected Files Using Process Template check box.
- Click OK.
Your file is copied to theUserDefinedFoldersfolder. - Minimize the Job Manager window.
Refine the input file using the preflight profile
- In the Input Files pane, right-click XXXXXX , and choose the process template: Refine > Refine > 1stRef-Normz
- In the Start Process dialog box, click the Edit Process Template button.
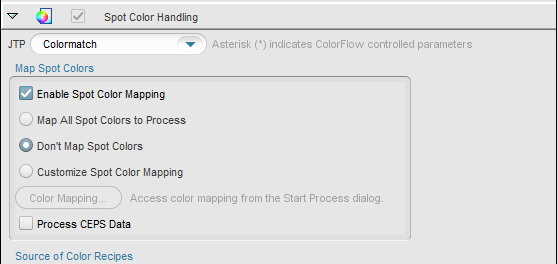
- Expand the Spot Color Handling section.
- In the Map Spot Colors area, select the Enable Spot Color Mapping check box.
- Select the Don't Map Spot Colors option.
- lick OK and then click OK again.
- In the Pages area, select all the pages and right-click them.
- From the Menu that appears, select Refine > Refine > 2ndRef-MapColors.
- Click Color Mapping.
- Make sure that the the Special Toner’s Spot is not converted to process colors during the Refine process.
- lick OK and then click OK again.
Submit a job with spot color to a digital press
In the Pages area, select all the pages of your job.
Right-click the selected pages and from the menu that appears, select Send to Digital.
From the list of digital devices that appears, select the required device.
In the Digital Job Ticket Editor that appears, click the Substrate tab.
- Select the required substrate and then in the Output Profile list, select the device or paper profile that was specifically set up for the printing condition of the device you are printing to.
- Click the Special Toner tab.
- In the Special Toner list, select the required special toner.
- Click Submit.