Why you should complete this lesson
The lesson provides practical experience using Prinergy Workshop to submit a content file to a digital press. Tasks covered in this lesson focus on using Workshop to manage customized prepress functions prior to submitting the document to a digital press. For the purpose of this lesson, submissions will be made to a managed HP SmartStream Production Pro simulator.
This lesson demonstrates a manual submission process that your workflow environment may not use. Some tasks covered, however, could be beneficial to you based on managing input file errors or complicated file structures.
This lesson provides guidance using Workshop, and is meant to be flexible to fit your environment and learning needs. It isn't necessary to complete the procedure steps in this lesson. If preferred, use the procedure steps as a guide to better understand the software and how it will operate with your own system.
Merging two input files
You need to merge two input files (cover and body) into a single document that will be submitted to an HP digital press. Both files need to be manually assigned to a page set in Workshop. Once PDF pages are assigned and submitted to the target press, the document will be planned, submitted, and removed following successful output.
If you didn't complete Lesson 5, consult the Lesson Preparations section in that lesson for information about accessing Prinergy Digital Print Practice Files.
Note: This lesson describes how to submit job files to an installed device. Determine if you want to actually submit the job to your press. If so, pay special attention to printing options outlined, as they may not match options realistic to your own environment.
Important: To complete this lesson, a digital press and digital front end simulator must be installed and configured in Prinergy. Based on naming preferences, names used in this lesson won't be consistent with names used in your own environment.
The following procedures describe how to complete this lesson.
- Submit input files to Digital Submit
- View documents in Digital Direct
- Refine input files in Workshop
- Create a page set
- Assign PDF pages to page set
- Submit page set to a digital press
- Submit and remove document
- Destroy a Prinergy job
Submit input files to Digital Submit
In this task, you will submit two independent input files to Digital Submit.
- From your workstation, locate:
Prinergy Digital Print Practice Files > Workshop - Open the
Workshopfolder, and drag the input filesEmpl_cover.pdfandEmpl_manual.pdfto an HP digital press.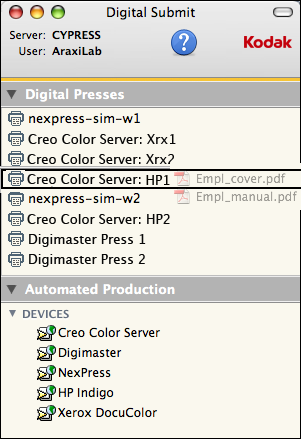
- In the New Job Submission dialog box, name the job
XX_Workshop Job(where <XX> is your initials). - Identify the JDF template to use.
- Select a quantity of 1.
- Click Submit.
View documents in Digital Direct
In this task, you will view both documents in Digital Direct to verify that they were successfully submitted as part of the Prinergy job.
- Open Digital Direct and locate documents:
- XX_Workshop Job (Empl_cover.pdf)
- XX_Workshop Job (Empl_manual.pdf).
- In Digital Direct, select both:
- XX_Workshop Job (Empl_cover.pdf)
- XX_Workshop Job (Empl_manual.pdf).
- Right-click one of the selected documents and choose Delete Document. Because both pdf files will be merged into one, it isn't necessary to maintain the two separate files in Digital Direct.
Refine input files in Workshop
In this task, you will open your job in Workshop and refine both input files to generate loose PDF pages. The loose PDF pages will be assigned to a Page Set.
- In Job Finder, locate and open your job XX_Workshop Job.

- In the Input Files pane, select Empl_cover.pdf and Empl_manual.pdf. Right-click a selected file and choose: Refine > Refine > 1stRef-Normz.
- In the Start Process dialog box, click OK.
Create a page set
This task you will create a page set that will contain all loose PDF pages (cover and body), assigned in the correct order.
- From the File menu, choose Add Page Set.
- In the Add Page Set dialog box, enter the following:
- New Page Set Name:
XX_PageSet(where <XX> is your initials). - Page Start:
1 - Page Count:
56(total number of all PDF pages)
- New Page Set Name:
- Click Add. View the addition of an empty page set in the Page Sets pane.
Assign PDF pages to page set
- In the Pages pane, select PDF pages Empl_manual.p1.pdf to Empl_manual.p52.pdf.
- Right-click any selected PDF page and choose Assign Page to Position.
- In the Assign Pages to Page Set Position dialog box, select the Range button.
- In the Range box enter
3-54. Click OK.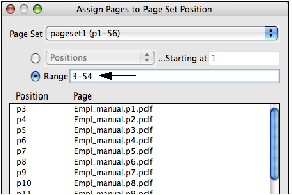
- In the Pages pane, select PDF pages Empl_cover.p1.pdf to Empl_cover.p4.pdf.
- Right-click any selected PDF page and choose Assign Page to Position.
- In the Assign Pages to Page Set Position dialog box, select the Range button.
- In the Range window enter
1-2, 55-56. Click OK. This assigns the front cover to pages 1 and 2, and the back cover to pages 55 and 56.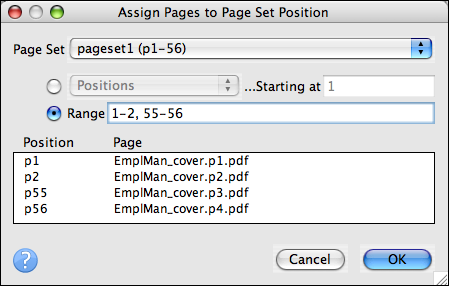
Submit page set to a digital press
In this activity, you will learn how to submit an 8-page booklet to a managed press.
Important: You can send refined pages or input files directly to the digital press. If an imposition is sent to the digital press, you must first refine the pages.
Submit loose PDF pages to a digital press
- In the Pages area, select all the pages of your job.
- Right-click the selected pages and from the menu that appears, select Send to Digital.
- From the list of digital devices that appears, select the required device.
In the Submit To Digital Print dialog box that appears, click Choose to select digital template and in the JDF Amount Overs box, type 9 and click Submit.
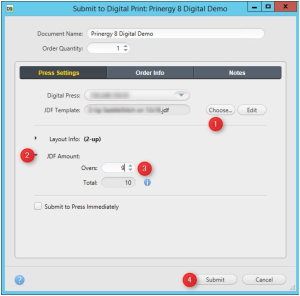
The document is submitted to the digital device.
Note: To track the status of your job on the digital device from the Tools menu, select Track, and in the Devices list, select your digital device.
Send an imposed job to a digital device
- On the Signature tab, select all the pages and right-click.
- In the menu that appears, select Send to Digital.
- In the list that appears, select the required device.
The Submit To Digital Print dialog box appears.
- Click Choose to select a JDF template and then in the JDF Amount Overs box, type
9, and click Submit.
Submit and remove document
In this task you will submit and monitor the document that will print to press, then remove the document from the Digital Direct system.
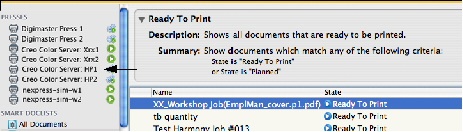
- Start Digital Direct.
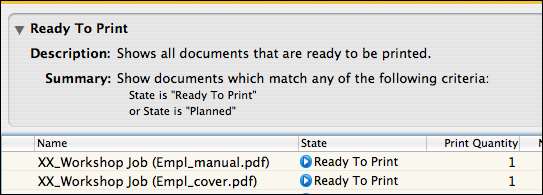
- In the default Ready To Print area, right-click your document XX_Workshop Job and select Plan for Press.
- From the Presses list, select the target press. In this example, the target press is HP SmartStream Production Pro simulator.
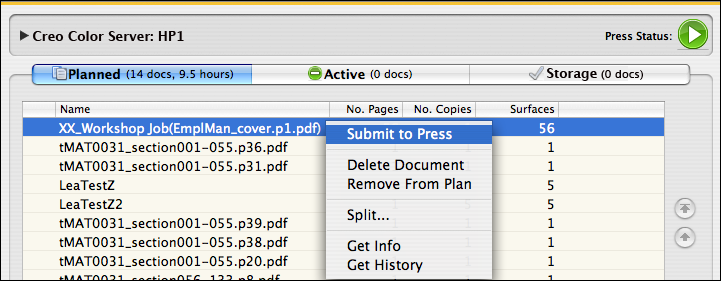
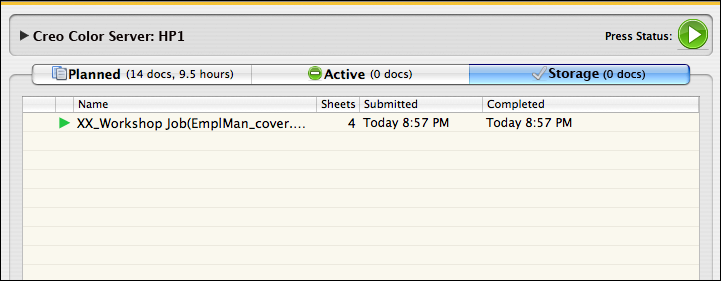
- In the Planned tab, right-click the document XX_Workshop Job and choose Submit to Press.
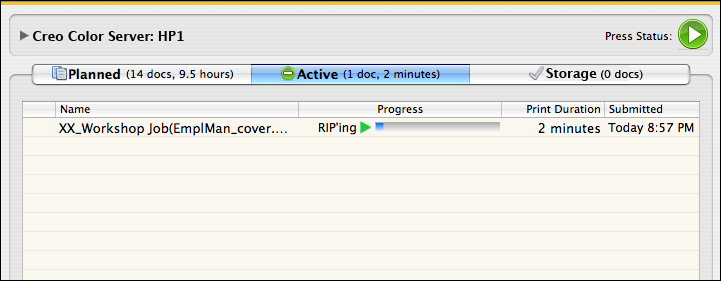
- In the Active tab, monitor the RIPing and printing of the document.
- In the Storage tab, check the status of the printed document.
Document status can also be viewed in Dashboard.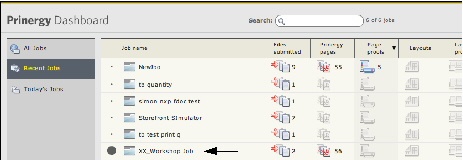
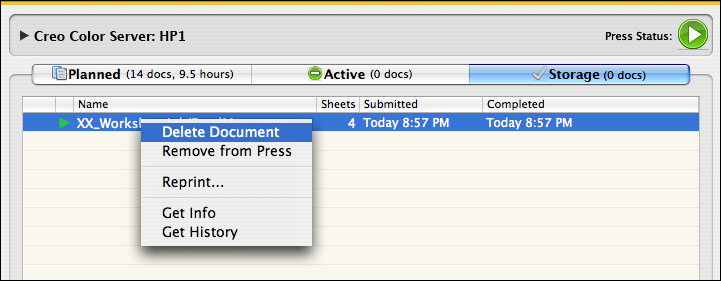
- From the Storage tab, right-click your document XX_Workshop Job and choose Delete Document.
Destroy Prinergy job
In this task, you will destroy the Prinergy job created as part of the submission process using Digital Submit.
- In Job Finder, locate your XX_Workshop Job.
- Right-click your job and choose Destroy Entire Job.
- Enter a user name and password. Click the Destroy button.
Using Prinergy for Digital Print summary
Prinergy for Digital Print Overview
Prinergy for Digital Print and the digital press front ends use a managed connection for job ticket submission and tracking. Prinergy uses Digital Direct to send job files to a digital press.
Prinergy for Digital Print Submission Processes
Submissions to a digital press can be accomplished in three ways:
- Using a digital press in Digital Submit
- Using an RBA rule in Digital Submit
- Using Prinergy Workshop
Submission Process Using Digital Submit and Digital Direct
- Input files are dragged from a stored location to a digital press or RBA rule in Digital Submit.
- If submitting to a digital press, the Prinergy job name, print quantities, and print instructions (JDF template and print queue) are identified.
- If submitting to an RBA rule, the Prinergy job name, and print quantities are identified. Print instructions are defined in the RBA rule.
- Once submitted, a Prinergy job is created and the input file and print instructions appear in Digital Direct as a document.
- In Digital Direct, the document is sorted, prioritized, scheduled, and submitted to a digital press.
- In Digital Direct, one of two things can happen:
- The digital press operator controls the priorities, scheduling, and submission of the document to a digital press
- The criteria defined in the RBA rule sends the document directly to a digital press