| Sv translation | |||||||||||||||||||||||||||||
|---|---|---|---|---|---|---|---|---|---|---|---|---|---|---|---|---|---|---|---|---|---|---|---|---|---|---|---|---|---|
| |||||||||||||||||||||||||||||
What is the Prinergy Document Screen Manager?The Prinergy Document Screen Manager is a tool you can use to define screen information such as ink type, dot shape, angle, screen ruling, and printing method for each color in specific objects in an Illustrator file. When you use the Prinergy Tools Output PDF... function from Adobe Illustrator, screen information is saved in the file and can be applied as Document Screening at the time of output in Prinergy. Printing Method is an optional tag which can be used to encode Advanced Flexcel NX Tags to be used in TIFF Assembler Plus to automatically apply advanced Flexcel NX screening. (Advanced Flexcel NX Tags are covered in detail in Miraclon TIFF Assembler Plus documentation.) |
Color | Object/Document Screen Angle | Prinergy Screen Angle |
|---|---|---|
| C | 75 | 15 |
| M | 15 | 75 |
| Y | 90 | 0 |
| K | 45 | 45 |
Prinergy Document Screen Manager workflow
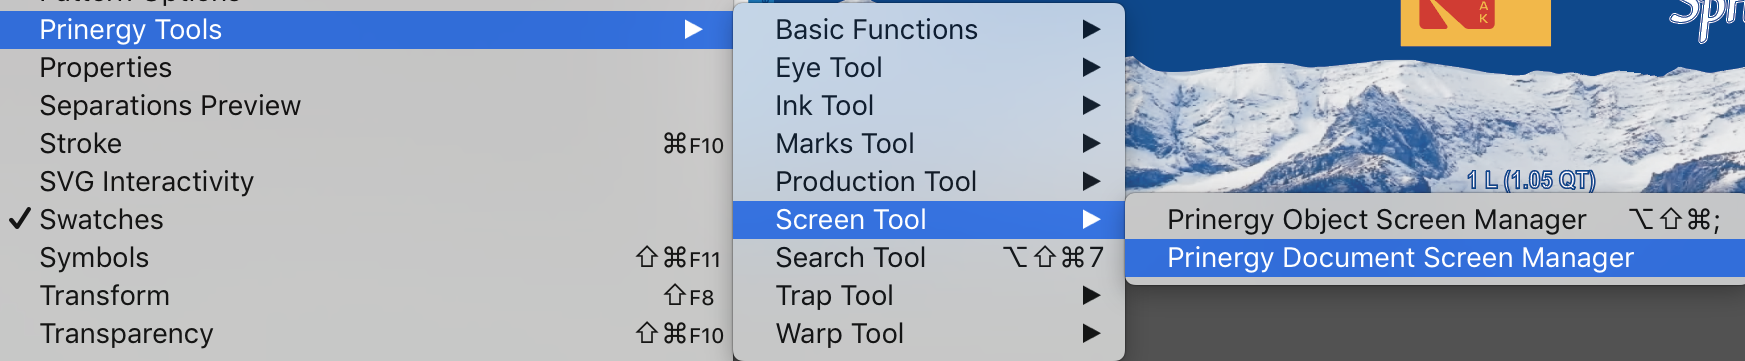
- Launch Adobe Illustrator.
- From the Windows menu, select Prinergy Tools > Screen Tool > Prinergy Document Screen Manager.
The Prinergy Document Screen Manager dialog box appears.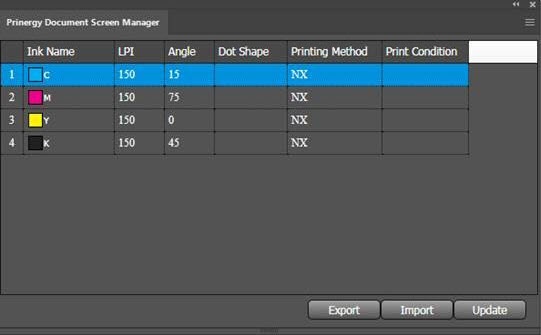
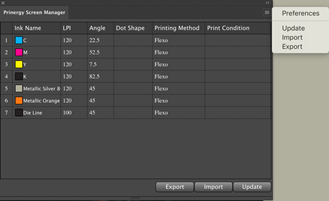
- To set up the default screen parameters, from the side menu, select Preferences and set up the default parameters.

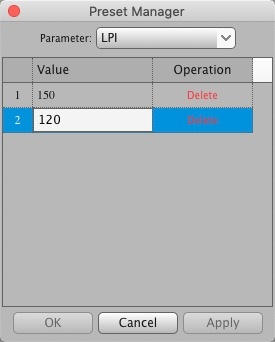
- If desired, predefine the settings used in the Document Screen Manager user interface by selecting Preset Manager from the side menu, and creating settings for the various parameters.
The Preset Manager is also used for deleting parameters that are no longer required.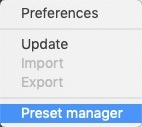
- Open the Adobe Illustrator or PDF file in which you want to set screen parameters.
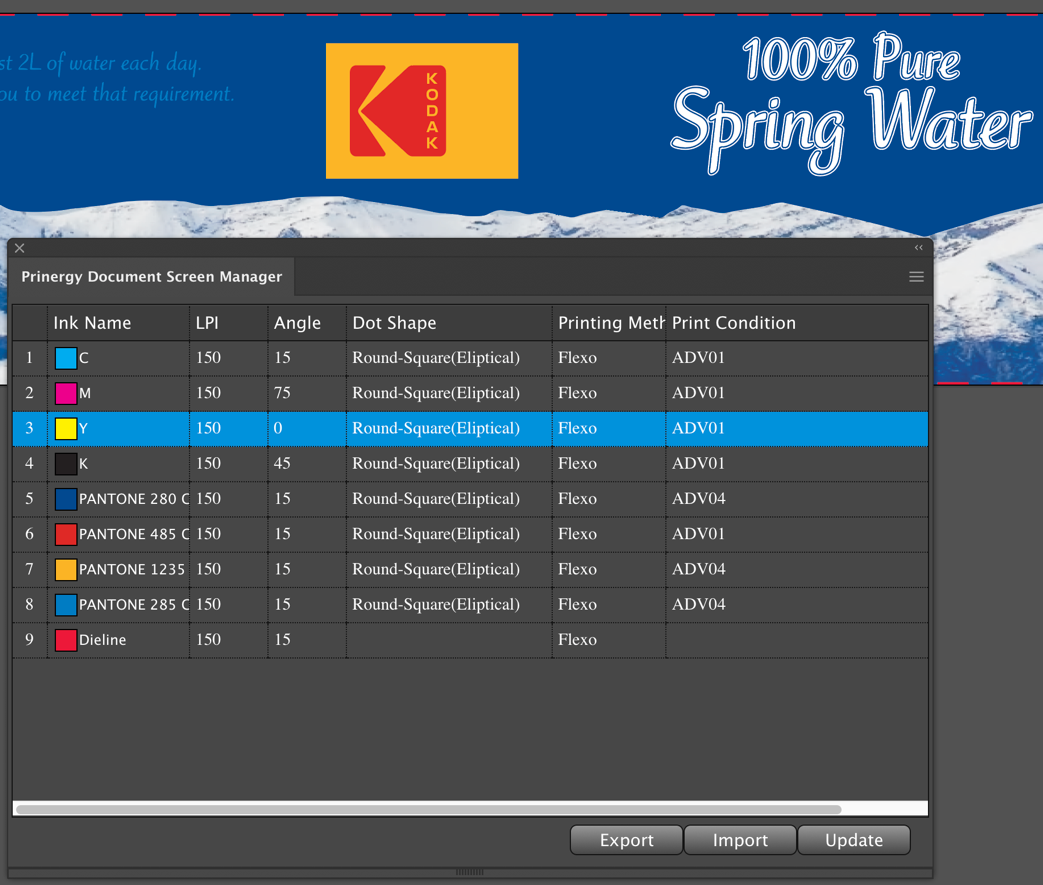
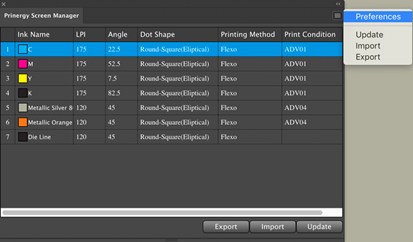
- To read current information about the inks used in the document, click Update.
The list of inks will update.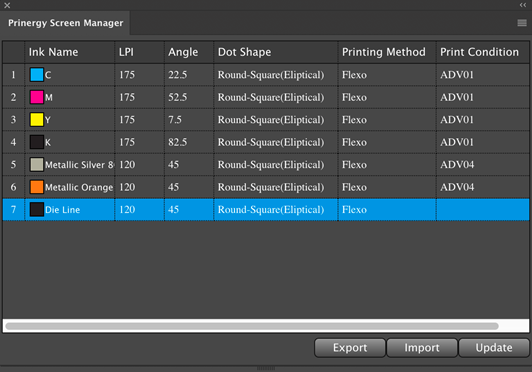
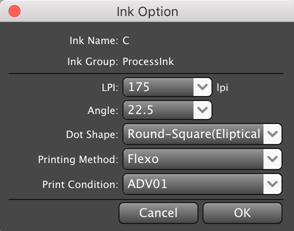
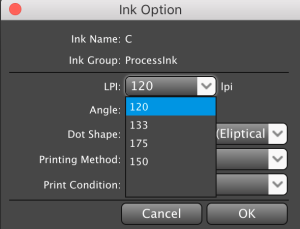
To edit the screen parameters for a separation, double-click the ink to display the Ink Option dialog box.
In the Ink Option dialog box, you can select from the list or your can enter new parameters, which will then become available as a choice in the drop-down menus.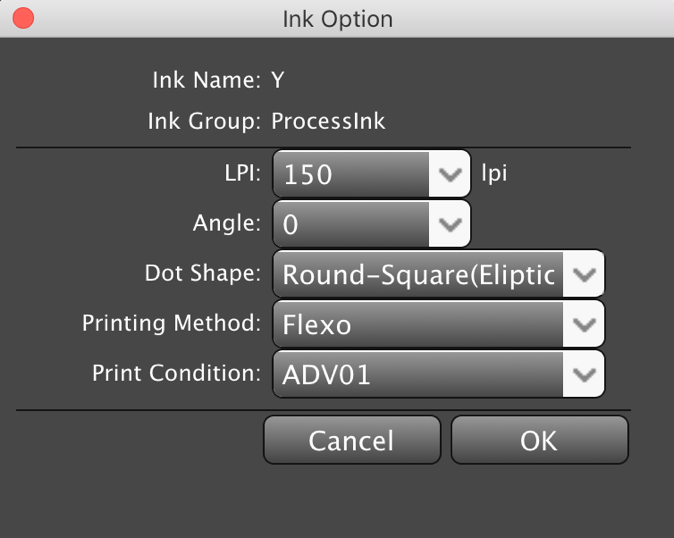
Ink Name The selected ink. This parameter cannot be edited. Ink Group The ink type. For example: process ink or spot color ink. LPI Select the dot ruling for the selected ink. Angle Select a dot angle for the selected ink. Dot Shape Select a dot shape for the selected ink, or input your own parameter. Printing Method Select a printing method for the selected ink, or input your own parameter. Print Condition Provide print condition information. - When you have completed your edits, click OK and save the parameter ticket as an
.spffile. - From the side menu, click Export and specify the path for saving the parameters.
Note: You can load saved parameters to other documents by clicking Import from the side menu.
- You must use Output it to PDF... from Basic Functions in order to embed screening information in the PDF. If you use the native Illustrator "Save As..." to output as PDF, Prinergy Tools document screening will not be embedded in the resulting PDF.
Use of the XmpMapping.csv file with Prinergy Tools Document Screening.
Document Screening can also be used to automatically apply Prinergy Advanced Screening such as Maxtone CX, Maxtone FX and Maxtone SX. This functionality works together with an XmpMapping.csv file found on a Prinergy Server at C:\Prinergy\CreoAraxi\data\XMPTags. This configuration file allows you to apply document screening that requires additional parameters that cannot be specified by standard document screening tags. Standard document screening only allows users to specify Line Frequency, Angle and Dot Shape, and only a limited number of standard Adobe dot shapes are allowed. The XmpMapping.csv file allows you to create a DotShape name that will be used as a key to supply the other parameters required by advanced screening, such as highlight size.
A sample line in the XmpMapping.csv file that could be used to specify Maxtone SX screening is:
SXR3X3,Maxtone SX,Maxtone SX CMYK 15-45-0-75,Round1,3x3
You would specify the name SXR3X3 as the Dot Shape, and this would apply the actual Prinergy dot shape name (Round1) and specify a Maxtone SX stochastic highlight size of 3x3 pixels. Whenever changes are made to an XmpMapping file on a Prinergy system, you must restart all Prinergy JTPs in Prinergy Administrator, to allow the changes take effect.
Reading Esko screen information from an Illustrator File
Open the document that contains Esko's screen information, and click Update. The Esko screen information will be read in to the Document Screen Manager window. If you save this document again, Esko's screen information will not be overwritten, and the original specified screen information will be saved.
| Sv translation | ||||||||||||||
|---|---|---|---|---|---|---|---|---|---|---|---|---|---|---|
| ||||||||||||||
Was ist Prinergy Document Screen Manager? Der Prinergy Document Screen Manager ist ein Werkzeug, das Sie verwenden können, um Rasterinformationen wie Druckfarbentyp, Punktform, Winkel, Rasterfeinheit und Druckmethode für jede Farbe festzulegen. Wenn Sie eine PDF von Adobe Illustrator ausgeben, werden die Rasterinformationen in der PDF gespeichert. Workflow von Prinergy Document Screen Manager
Lesen der Rasterinformationen von Esko aus dem DokumentÖffnen Sie das Dokument, das die Rasterinformationen von Esko enthält, und klicken Sie auf Aktualisieren. Die Esko-Rasterinformationen werden gelesen und im Fenster „Prinergy Document Screen Manager“ angezeigt. Wenn Sie dieses Dokument erneut speichern, werden die Rasterinformationen von Esko nicht überschrieben. Die angegebenen Rasterinformationen werden gespeichert. |

| Sv translation | ||||||||||||||
|---|---|---|---|---|---|---|---|---|---|---|---|---|---|---|
| ||||||||||||||
Qu'est-ce que le gestionnaire d'écran document Prinergy ? Le gestionnaire d'écran document Prinergy est un outil que vous pouvez utiliser pour définir les informations à l'écran telles que le type d'encre, la forme des points, l'angle, la linéature de trame et la méthode d'impression de chaque couleur. Lorsque vous sortez un PDF d'Adobe Illustrator, les informations à l'écran seront enregistrées au format PDF. Système Gestionnaire d'écran document Prinergy
Lecture des informations à l'écran d'Esko à partir du documentOuvrez le document contenant les informations à l'écran d'Esko, puis cliquez sur Mettre à jour. Vous pourrez lire les informations à l'écran d'Esko à partir de la fenêtre Gestionnaire d'écran document Prinergy. Si vous enregistrez à nouveau ce document, les informations à l'écran d'Esko ne seront pas remplacées. Les informations de l'écran spécifié seront enregistrées. |
| Sv translation | ||||||||||||||
|---|---|---|---|---|---|---|---|---|---|---|---|---|---|---|
| ||||||||||||||
¿Qué es el Administrador de trama de documento de Prinergy? El Administrador de trama de documento de Prinergy es una herramienta que puede utilizar para definir la información de trama, como el tipo de tinta, la forma del punto, el ángulo, las normas de trama y el método de impresión para cada color. Cuando genera de PDF desde Adobe Illustrator, la información de trama se guarda dentro del PDF. Flujo de trabajo del Administrador de trama de documento de Prinergy
Lectura de la información de trama de Esko desde el documentoAbra el documento que contiene la información de trama de Esko y haga clic en Actualizar. La información de trama de Esko se leerá en la ventana Administrador de trama de documento de Prinergy. Si guarda este documento de nuevo, la información de trama de Esko se sobrescribirá. Se guardará la información de trama especificada. |
| Sv translation | ||||||||||||||
|---|---|---|---|---|---|---|---|---|---|---|---|---|---|---|
| ||||||||||||||
什么是印能捷文档加网管理器?您可以使用印能捷文档加网管理器工具定义每种颜色的加网信息,如油墨类型、网点形状、角度、加网线数和印刷方法。从 Adobe Illustrator 输出 PDF 时,加网信息将保存在 PDF 中。 印能捷文档加网管理器工作流程
从文档中读取 Esko 加网信息打开包含 Esko 加网信息的文档,然后单击更新。Esko 加网信息将被读取到印能捷文档加网管理器窗口。如果再次保存此文档,Esko 加网信息将不会被覆盖。将保存指定的加网信息。 |