Page tree

Versions Compared

Key

  • This line was added.
  • This line was removed.
  • Formatting was changed.
Comment: Published by Scroll Versions from space PANTWK and version Pandora_Training_Working_8.4
Sv translation
languageen
  1. In the Marks palette, open the Labels folder and select LBL_Die Station Number.pdf.
  2. Perform one of the following actions:
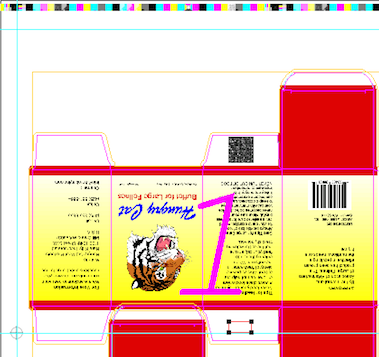
    • Drag the mark to the flap of one piece of placed artwork.
    • Click the Add selected mark to job icon  located in the Marks palette toolbar.
      The mark appears in the center of the visible portion of the layout. You can then move it to the flap of one of the placed artwork files.
  3. With the mark still selected, right-click it, select Rotate 180 degree, and then position the mark accurately on Die 1, opposite the flap with the QR code.
    The mark appears blank on the layout until you bind it to a die station. 
  4. From the View menu, select Hide Artwork.
  5. Hold down the shift key and click a line in the die station on which you've placed the mark.
  6. Perform one of the following actions:
    • From the Object menu, select Apply to All.
    • command-click (right-click) and select Apply to All.
      The mark binds to all die stations, and the station numbers appear in bold. 
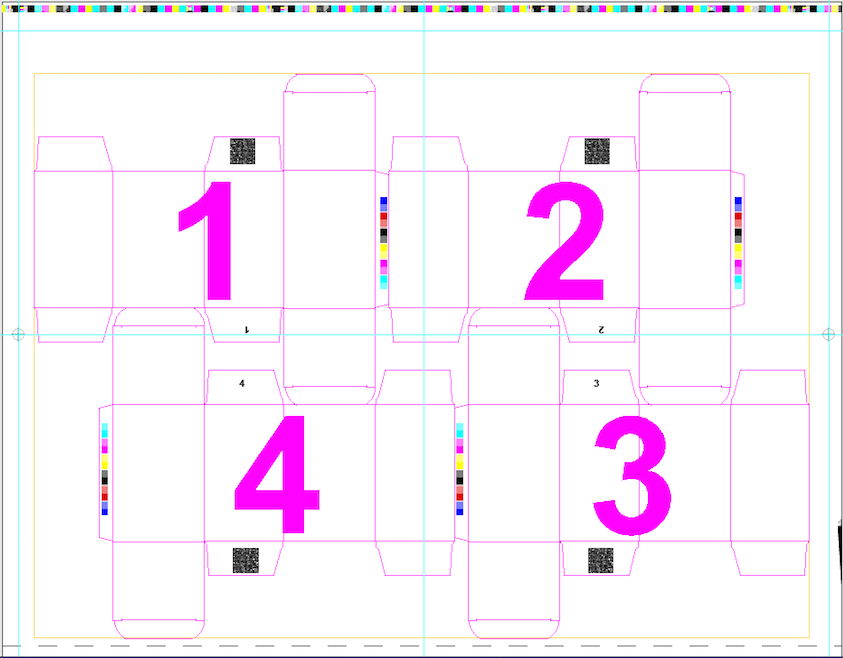
  7. From the View menu, select Show Artwork.
Sv translation
languagefr
  1. Dans la palette Repères, ouvrez le dossier Labels et sélectionnez LBL_Die Station Number.pdf.
  2. Effectuez l'une des opérations suivantes :
    • Faites glisser le repère sur le rabat d’une partie de l’illustration placée.
    • Cliquez sur l'icône Ajouter le repère sélectionné au travail  située dans la barre d'outils de la palette Repères.
      Le repère s’affiche au centre de la partie visible de la mise en page. Vous pouvez donc le déplacer dans le rabat d’un des fichiers d’illustration placés.
  3. Sélectionnez le repère tout en cliquant avec le bouton droit de la souris, puis choisissez Faire pivoter à 180 degrés. Placez ensuite le repère de manière précise sur la découpe 1, en face du rabat portant le code QR.
    Le repère apparaît vide sur la mise en page tant qu'il n'est pas associé à un poste de découpe. 
  4. Dans le menu Affichage, sélectionnez Masquer la maquette.
  5. Maintenez la touche Maj. enfoncée et cliquez sur une ligne dans le poste de découpe sur lequel vous avez placé le repère.
  6. Effectuez l'une des opérations suivantes :
    • À partir du menu Objet, sélectionnez Appliquer à tous.
    • Appuyez sur la touche Commande (faites un clic droit) et choisissez Appliquer à tous.
      Le repère s'associe à tous les postes de découpe et les numéros de postes s'affichent en gras. 
  7. Dans le menu Affichage, sélectionnez Afficher la maquette.