| Sv translation | ||||||||||
|---|---|---|---|---|---|---|---|---|---|---|
| ||||||||||
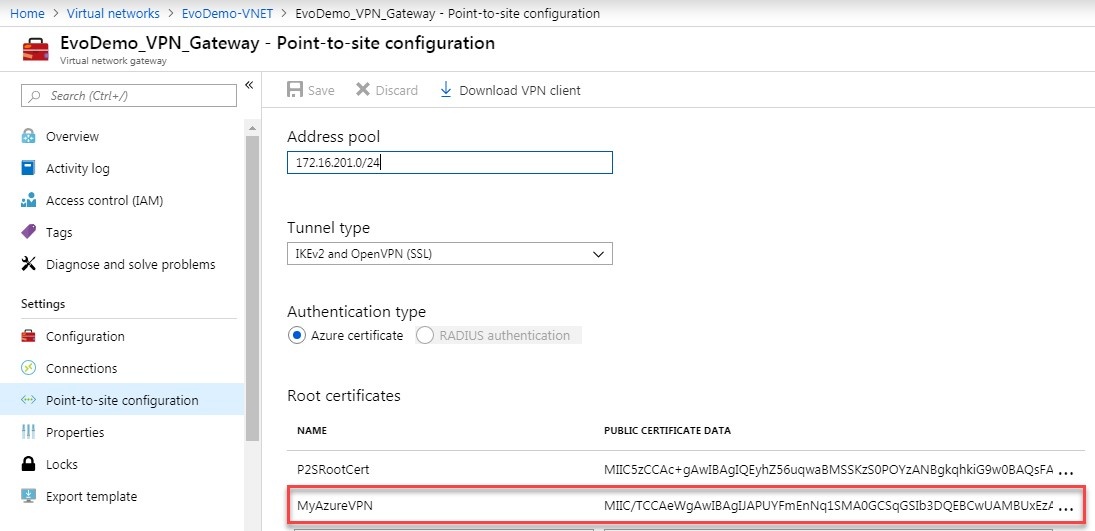
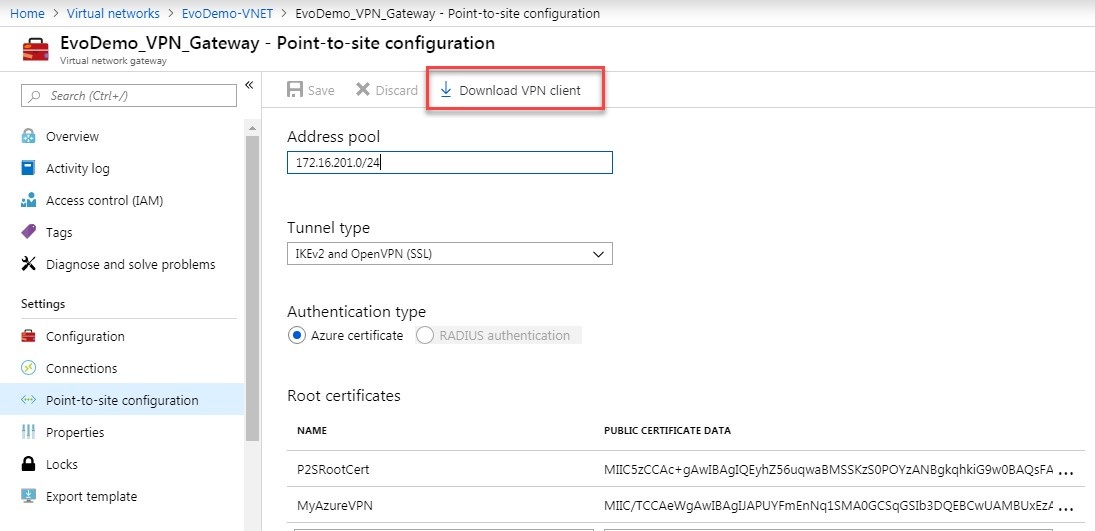
OverviewThis document outlines how to configure a point-to-site connection from a client computer that needs to interact with Prinergy running in an Azure VM. Instructions are provided for both Windows and Mac clients. PrerequisitesPoint-to-site gateway configured with:
Installation & Configuration
Using Kodak Workshop and other workflow software from the clientImportant Note: Prinergy server Private IP address must be inserted in hosts file on each client (Windows or Mac) connected through Workshop
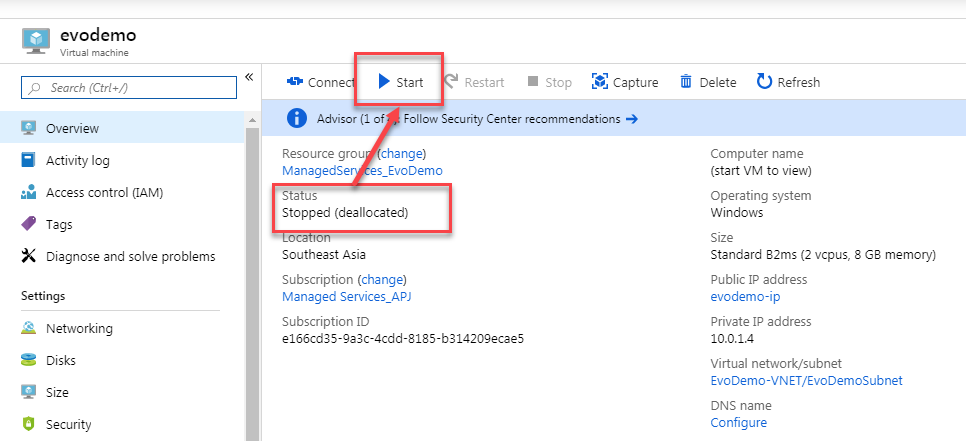
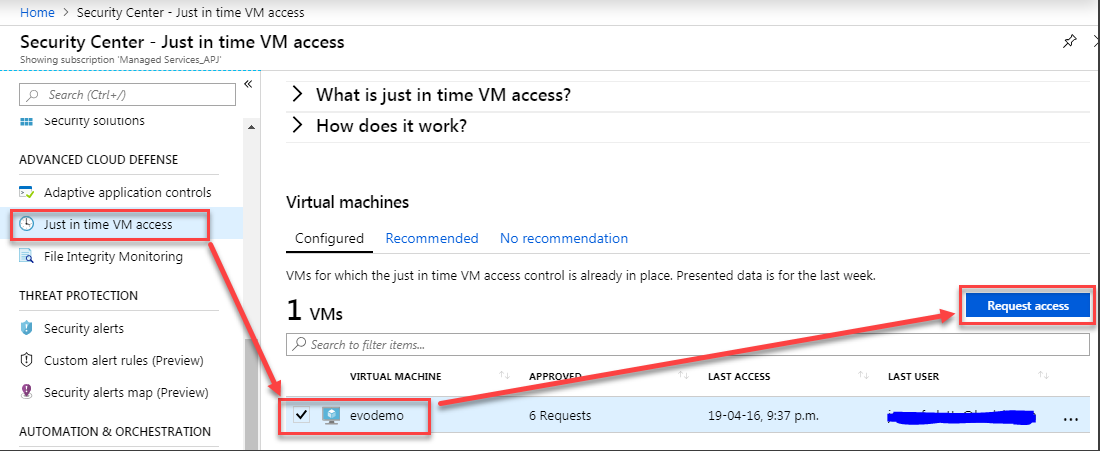
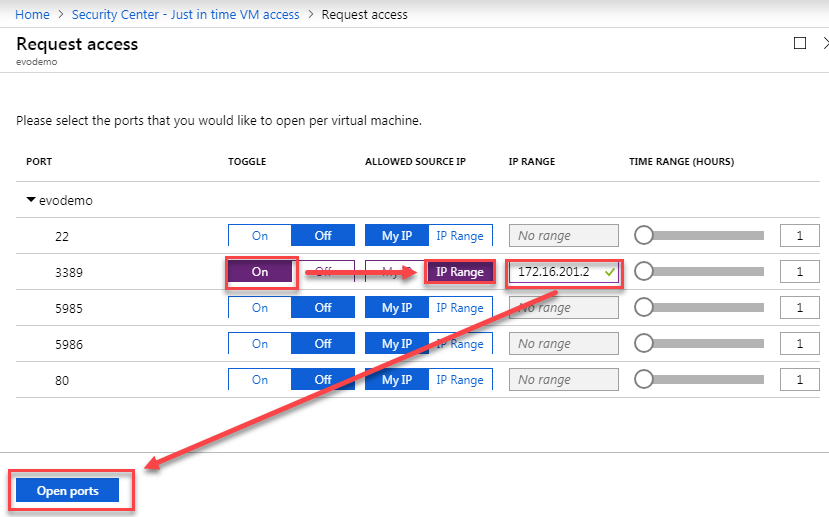
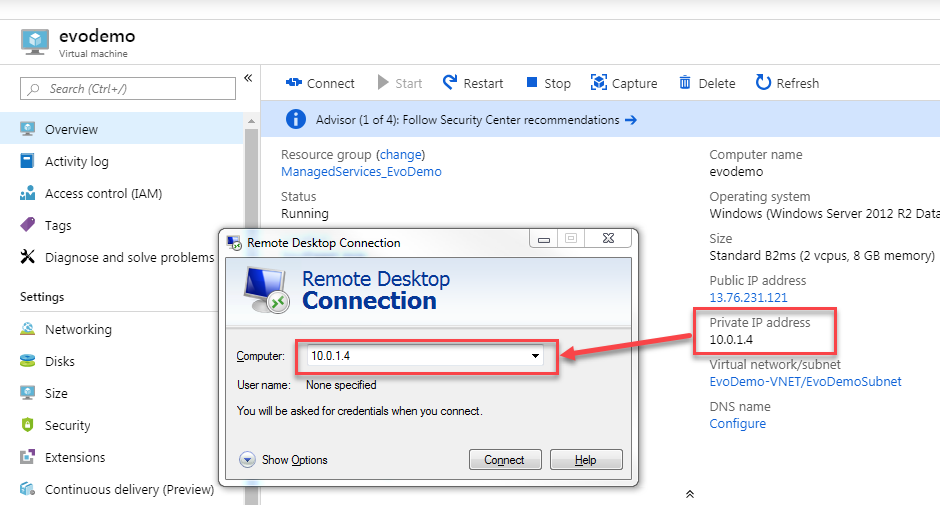
RDC to an Azure VM from the client
|
| Sv translation | ||||||||||
|---|---|---|---|---|---|---|---|---|---|---|
| ||||||||||
ÜbersichtIn diesem Dokument wird beschrieben, wie Sie eine Point-to-Site-Verbindung von einem Client-Computer konfigurieren, der mit Prinergy interagieren muss, das auf einer Azure-VM ausgeführt wird. Anweisungen werden sowohl für Windows- als auch für Mac-Clients bereitgestellt. VorbedingungenPoint-to-Site-Gateway konfiguriert mit:
Installation und Konfiguration
Kodak Workshop und andere Workflow-Software vom Client aus verwenden
RDC auf eine Azure-VM vom Client
|
| Sv translation | ||||||||||
|---|---|---|---|---|---|---|---|---|---|---|
| ||||||||||
Descripción generalEn este documento se describe cómo configurar una conexión de punto a sitio desde un equipo cliente que necesita interactuar con Prinergy ejecutado en una máquina virtual de Azure. Se proporcionan instrucciones para clientes Windows y Mac. Requisitos previosPuerta de enlace de punto a sitio configurada con:
Instalación y configuración
Uso de Kodak Workshop y otro software de flujo de trabajo del cliente
RDC a una máquina virtual de Azure desde el cliente
|
| Sv translation | ||||||||||
|---|---|---|---|---|---|---|---|---|---|---|
| ||||||||||
PrésentationCe document explique comment configurer une connexion point à site à partir d'un ordinateur client qui doit interagir avec Prinergy s'exécutant dans une machine virtuelle (VM) Azure. Des instructions sont fournies pour les clients Windows et Mac. Conditions préalablesPasserelle point à site configurée avec :
Installation et configuration
Utilisation de Kodak Workshop et d'autres logiciels de workflow depuis le client
Connexion Bureau à distance (RDC) vers une VM Azure à partir du client
|
| Sv translation | ||||||||||
|---|---|---|---|---|---|---|---|---|---|---|
| ||||||||||
PanoramicaIn questo documento viene descritto come configurare una connessione da punto a sito da un computer client che deve interagire con Prinergy in esecuzione su una VM di Azure. Le istruzioni sono fornite sia per i client Windows che per i client Mac. Requisiti preliminariGateway da punto a sito configurato con:
Installazione e configurazione
Utilizzo di Kodak Workshop e di altri software per il flusso di lavoro dal client
Da RDC a una VM di Azure dal client
|
| Sv translation | ||||||||||
|---|---|---|---|---|---|---|---|---|---|---|
| ||||||||||
概要このドキュメントでは、Azure VM で実行されている Prinergy とやり取りする必要があるクライアント コンピュータからのポイント対サイト接続の構成方法について説明します。 ここでは、Windows クライアントと Mac クライアントの両方について手順を提供します。 要件次で構成されたポイント対サイト ゲートウェイ:
インストールおよび構成
クライアントから Kodak Workshop およびその他のワークフロー ソフトウェアを使用する
クライアントから Azure VM への RDC
|
| Sv translation | ||||||||||
|---|---|---|---|---|---|---|---|---|---|---|
| ||||||||||
Visão geralEste documento descreve como configurar uma conexão ponto a site a partir de um computador cliente que precisa interagir com o Prinergy em execução em uma máquina virtual com o Azure. As instruções são fornecidas para clientes Windows e Mac. Pré-requisitosGateway ponto a site configurado com:
Instalação e configuração
Uso do Kodak Workshop e outros softwares de fluxo de trabalho do cliente
RDC para uma máquina virtual Azure a partir do cliente
|
| Sv translation | ||||||||||
|---|---|---|---|---|---|---|---|---|---|---|
| ||||||||||
概述本文档概述如何从需要与 Azure 虚拟机中运行的印能捷交互的客户端计算机配置点到站点连接。 提供了关于 Windows 和 Mac 客户端的说明。 先决条件点到站点网关配置有:
安装和配置
使用客户端中的 Kodak Workshop 和其他工作流程软件
从客户端 RDC 至 Azure 虚拟机
|
| Sv translation | ||||||||||
|---|---|---|---|---|---|---|---|---|---|---|
| ||||||||||
概觀本文件概述如何從用戶端電腦設定點對站連線,且該用戶端電腦還須跟執行於 Azure VM 之 Prinergy 互動。 為 Windows 和 Mac 用戶端提供指示。 先決條件點對站閘道使用下列項目進行設定:
安裝與設定
使用 Kodak Workshop 和其他來自用戶端的工作流程軟體
從用戶端遠端桌面連線至 Azure VM
|