...
| language | en |
|---|
Creating and storing a tile set for a specific media resource gives you the choice of sending output to the full media size, or to tiles that can be stripped together after imaging. Tiling breaks up the output so that it can be imaged onto a smaller media size than the stock for which a layout is designed.
- Determine the media dimensions and any punch requirements of the device that will image the tiles.
- Plan how the tiles can be stripped to fit the final media and stock, including the number of tiles needed, the grid arrangement, and any overlap dimensions.
- In the Media list, select the media for which you will create the tile set.
- Select Resources > New Tile Set.
- Specify the following details for the tile set:
- The tile media and device information, including the punch coordinates
- The tile grid's horizontal and vertical page count
- The tile orientation and overlap
- The distance from the trim edge of the stripped tiles to the sheet edge
The tile set appears in a sublist under the media resource in the Media list. - Start a job and build the layout, including any marks that are required for the final output.
- In the Media list, select and add the media's tile set to the layout.
- Select Resources > Add Tile Mark to Sheet, and choose the Mark Type that corresponds to the tile orientation.
- Print the tiles.
Tip: To suppress a message that appears when printing to a media that is smaller than the sheet, select the Skip device warning check box on the Output tab in the Preferences dialog box. - Select File > Print.
- In the Media list, select the tile set.
- Set up the other print options as needed, and click Print.
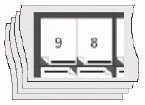
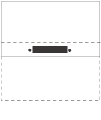
The printed tiles are imaged according to the tile set, and the tile marks appear in the overlapping area of adjacent tiles: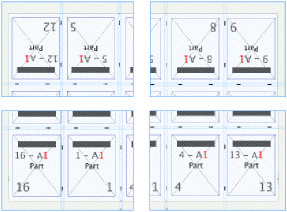
- Overlap the printed tile sheets using the tile alignment marks, based on matching numbers. For example, the tile marks on adjacent overlapping tiles might be x1y1 and x1y2.
- X indicates a vertical column position.
- Y indicates a horizontal row.
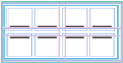
The colors on the paired marks are reversed, which helps you to determine whether adjacent tiles are positioned correctly.
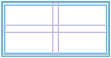
Adjacent tiles before stripping: | Tiling marks correctly aligned: |

The stripped tiles form a flat: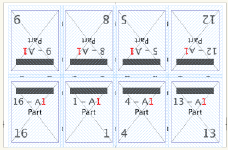
Note: Tile sets are saved only as a media resource; they are not saved with the job.
Next: If you used tiling for proofing, you can print the job again, sending the output to the media resource instead of the tile set
...
| language | es |
|---|
La creación y el almacenamiento de un conjunto de mosaico para un recurso de material específico ofrece la posibilidad de enviar la salida a un tamaño de material completo o a mosaicos, que se pueden unir tras la exposición.
Los mosaicos dividen la salida para que se pueda exponer en tamaños de material más pequeños que el stock para el que se ha preparado el diseño.
- Determine las dimensiones del material y los requisitos de perforación del dispositivo en el que se expondrán los mosaicos.
- Planifique cómo se montarán los mosaicos para que quepan en el material y el stock finales, incluido el número de mosaicos necesarios, la disposición en la cuadrícula y las dimensiones de las superposiciones.
- En la lista Material, seleccione el material para el que va a crear el conjunto de mosaicos.
- Seleccione Recursos > Nuevo conjunto de mosaico.
- Especifique los detalles siguientes para el conjunto de mosaicos:
- El material del mosaico y la información del dispositivo, incluidas las coordenadas de perforación
- El recuento de páginas horizontales y verticales de la cuadrícula del mosaico
- La orientación y la superposición del mosaico
- La distancia desde el borde de recorte de los mosaicos montados al borde de la hoja
El conjunto de mosaicos aparece en una lista secundaria del recurso de material en la lista Material.
- Inicie un trabajo y cree el diseño, incluidas las marcas necesarias para la salida final.
- En la lista Material, seleccione y agregue el conjunto de mosaicos del material al diseño.
- Seleccione Recursos > Agregar marca de mosaico a la hoja y seleccione el Tipo de marca que se corresponda con la orientación del mosaico.
- Imprima los mosaicos.
Consejo: Para omitir un mensaje que aparece al imprimir en un material más pequeño que la hoja, marque la casilla de verificación Omitir advertencia del dispositivo en la ficha Salida del cuadro de diálogo Preferencias.- Seleccione Archivo > Imprimir
- En la lista Material, seleccione el conjunto de mosaicos.
- Configure las demás opciones de impresión según sea necesario y haga clic en Imprimir.
Los mosaicos impresos se exponen según el conjunto de mosaicos, y las marcas de mosaico aparecen en el área superpuesta de los mosaicos adyacentes:
- Superponga las hojas de mosaicos impresas usando las marcas de alineación de mosaicos, según los números coincidentes.
Por ejemplo, las marcas de mosaico de mosaicos superpuestos adyacentes pueden ser x1y1 y x1y2.- X indica una posición en la columna vertical.
- Y indica una fila horizontal.
Los colores de las marcas emparejadas están invertidos, lo que le ayuda a determinar si los mosaicos adyacentes están o no correctamente colocados.
Mosaicos adyacentes antes de montarlos: | Marcas de mosaicos correctamente alineadas: |
Los mosaicos montados forman una placa:
Nota: Los conjuntos de mosaicos solo se pueden guardar como un recurso de material y no se guardan con el trabajo.
...
.