Page tree

Versions Compared

Key

  • This line was added.
  • This line was removed.
  • Formatting was changed.
Comment: Removed translated content for 'ja'
Sv translation
languageen

Use this 2-up layout of different sections to produce two stacks of identical books that require fewer plates and less makeready time, compared to 2-up layouts of identical sections. Come-and-go jobs are often printed on web presses and finished on 5-knife trimmers that can cut out two books at once. 
 

  1. In the Pages view, set up the product run list with the required number of PDF pages.
  2. If you are using the Press Runs view (without using the Assembly view):
    1. Use the Search tool to specify Come and Go in the Binding Style list.
      The Templates list is filtered to display only come-and-go templates.
    2. Right-click a template and select AutoSelect.
  3. If you are using the Assembly view, set up a product and part:
    1. Set up the part with the same number of pages as the run list.
    2. In the Binding Style list, select Come and Go.
    3. Select the number of pages for the Largest Section to automatically create the necessary number of sections.
    4. Select the Press Type (Sheetfed or Web).
      If you select Web, specify the number of webs.
    5. Set other part properties as needed.
    6. In the workspace, select all the sections.
      You can drag a marquee around the sections, or select one section, then press Command/Ctrl+A.
    7. In the Properties pane, select a suitable Fold Pattern.
    8. Set up other section properties as needed.
    9. Click Generate Press Runs.
      The imposition layouts are automatically generated, and the Press Runs List contains as many webs or sheetfed press runs as needed to accommodate the run-list pages.

      The printed signature from one sheet is flipped and stacked on the signature from the other sheet, resulting in two complete books that are still adjoined. One book is "coming" and the other is "going".
      The two books are then perfect-bound on a common edge, cut apart, and trimmed.
Sv translation
languageja

異なるセクションを 2-up レイアウトに配置するこの方法を使用して同一の冊子を 2 組作成すると、同一セクションを 2-up レイアウトに配置する場合に比べて、必要な版と準備時間を少なくすることができます。カム&ゴー ジョブは、通常、輪転印刷機で印刷され、仕上げには 2 つの冊子を一度に裁断できる 5 ナイフ トリマーが使用されます。
Image Removed

  1. ページ表示で、プロダクト ラン リストに必要な PDF ページ数を設定します。
  2. プレス ラン表示を使用している(アセンブリ表示を使用しない)場合:
    1. 検索ツールを使用して、綴じ型式リストからカム&ゴーを指定します。
      テンプレートリストがフィルタリングされ、カム&ゴー テンプレートのみが表示されます。
    2. テンプレートを右クリックして、自動選択を選択します。
  3. アセンブリ表示を使用している場合は、次の手順でプロダクトおよびパートを設定します。
    1. パートを、ラン リストと同じページ数に設定します。
    2. 綴じ型式リストからカム&ゴーを選択します。
    3. 必要なセクション数を自動的に作成するため、最大セクションにページ数を指定します。
    4. プレス タイプを選択します(枚葉または輪転)。
      輪転を選択した場合は、原反数を指定します。
    5. 必要に応じて、パートの他のプロパティを設定します。
    6. 作業領域で、すべてのセクションを選択します。
      セクションの周囲をマーキーで囲むことも、1 つのセクションを選択してから command/Ctrl + A キーですべて選択することもできます。
    7. プロパティウィンドウ枠で、適切な折りパターンを選択します。
    8. 必要に応じて、セクションの他のプロパティを設定します。
    9. プレス ランの生成をクリックします。

面付けレイアウトが自動的に生成され、プレス ラン リストには、ラン リスト ページに合わせて必要な数の輪転または枚葉のプレス ランが表示されます。
Image Removed
1 枚のシートから出力された折丁は、折って重ねられます。その結果、切り離される前の 2 つの冊子が完成します。 2 つの冊子は共通の背で平綴じされます。
その冊子を切り離して最終的に 2 冊作成します。

Sv translation
languagept

Use até 2 layouts de seções diferentes para produzir duas pilhas de livros idênticos que precisam de um número menor placas e menos tempo de preparação final, comparado até 2 layouts de seções idênticas. Os trabalhos de entrada e saída são frequentemente processados em impressoras de rolo e são acabados em guilhotinas de 5 facas que podem cortar dois livros ao mesmo tempo.

  1. Na exibição Páginas, configure a lista de execução do produto com o número pretendido de páginas em PDF.
  2. Se você estiver usando a exibição Execuções de impressão (sem usar a exibição Montagem):
    1. Use a ferramenta Pesquisar para especificar Entrada e saída na lista Estilo de encadernação.
      A lista Modelos é filtrada para exibir somente modelos de entrada e saída.
    2. Clique com o botão direito em um modelo e selecione AutoSelect.
  3. Se você estiver usando a exibição Montagem, configure um produto e peça:
    1. Configure a peça com o mesmo número de páginas como na lista de execução.
    2. Na lista Estilo de encadernação, selecione Entrada e saída.
    3. Selecione o número de páginas para a Maior seção para criar automaticamente o número necessário de seções.
    4. Selecione o Tipo de impressão (Com alimentação ou Rolo).
      Se você selecionar Rolo, especifique o número de folhas contínuas.
    5. Defina outras propriedades da peça, conforme necessário.
    6. Na área de trabalho, selecione todas as seções.
      Você pode arrastar um retângulo em torno das seções ou selecionar uma seção e, em seguida, pressionar Command/Ctrl+A.
    7. No painel Propriedades, selecione um Padrão de dobra adequado.
    8. Defina outras propriedades da seção, conforme necessário.
    9. Clique em Gerar execuções de impressão.
      Os layouts de imposição são gerados automaticamente e a Lista de execuções de impressão contém quantas execuções de impressão de rolos ou com alimentação forem necessárias para acomodar as páginas da lista de execução. 


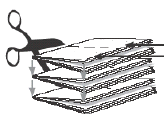
A assinatura impressa de uma folha é invertida e empilhada na assinatura da outra folha, resultando em dois livros completos que ainda estão unidos. Um dos livros é de "entrada" e o outro é de "saída".
Os dois livros têm, em seguida, a lombada colada em uma borda comum e são cortados e separados.

...