| Sv translation | ||
|---|---|---|
| ||
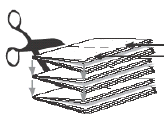
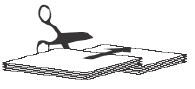
The binding style determines the sequence in which job pages flow through an imposition's template pages. You can set a general default binding style in the Preferences dialog box, optionally change the default for a specific product or part, and assign binding styles to individual product sections. Perfect BoundContent pages flow through the template pages in their run-list sequence. Saddle StitchedAn equal number of pages flow from the beginning and the end of the run list through the sections, starting by default with the largest section. Come and GoIn a come-and-go job, the entire run list flows twice through the same press runs, which are automatically divided into two press-run sections. The template pages are numbered so that the run list first flows through the first section in run-list sequence, and through the second section in reverse sequence. The resulting two identical books are perfect-bound together on a common edge, and then cut apart. Cut and StackThis binding style lays out an entire book on one multisheet press run with two (or more) template pages per sheet. The necessary number of sheets are automatically generated to accommodate the content, based on the number of pages in the imposition grid and the total number of run-list pages. Starting with the first sheet, the run list flows sequentially through the first template page (front and back) on all the sheets. It then starts again at the first sheet and flows through the next template page, and so on. Flat Work (no binding)Select this binding style for products that are not bound, such as posters, inserts, business cards, and leaflets. Mixed binding stylesIf a part's product sections use multiple binding styles, the Binding Style property is Mixed. |


| Sv translation | ||
|---|---|---|
| ||
Lo stile di rilegatura determina la sequenza in cui le pagine del processo vengono trasferite nelle pagine dei modelli di un'imposizione. È possibile impostare uno stile di rilegatura predefinito generale nella finestra di dialogo Preferenze oppure modificare l'impostazione predefinita di un prodotto o di una parte specifici e assegnare gli stili di rilegatura a singole sezioni del prodotto. Rilegatura a collaLe pagine dei contenuti vengono trasferite alle pagine dei modelli nelle sequenza indicata nell'elenco di esecuzione. Cucitura a sellaAlle sezioni viene trasferito un numero uguale di pagine, dall'inizio alla fine del ciclo di stampa. Per impostazione predefinita, il processo inizia dalla sezione più grande. Rilegatura a colla di due opuscoli da tagliareIn un processo Come and Go, l'intero elenco esecuzioni confluisce due volte negli stessi cicli di stampa, che vengono suddivisi automaticamente in due sezioni di cicli di stampa. Le pagine del modello vengono numerate affinché l'elenco esecuzioni confluisca innanzitutto nella prima sezione nella sequenza di cicli di stampa e nella seconda sezione in sequenza inversa. I due libri identici risultanti vengono rilegati a colla su un bordo comune, quindi ritagliati l'uno dall'altro. Taglia e impilaLo stile di rilegatura fornisce un layout a un intero libro su un ciclo di stampa a più fogli con due (o più) pagine di modello per foglio. Viene automaticamente generato il numero di fogli richiesto per contenere il contenuto, in base al numero di pagine della griglia dell'imposizione e il numero totale di pagine dell'elenco esecuzioni. L'elenco esecuzioni inizia con il primo foglio e passa in sequenza alla prima pagina modello (fronte e retro) su tutti i fogli. Quindi, inizia nuovamente dal primo foglio, passa alla pagina modello successiva e così via. Lavoro piatto (nessuna rilegatura)Selezionare questo stile di rilegatura per i prodotti non rilegati come i poster, gli inserti, i biglietti da visita e gli opuscoli. Stili di rilegatura mistiSe alcune parti delle sezioni del prodotto utilizzano più stili di rilegatura, impostare la proprietà Stile di rilegatura su Misto. | ||
| Sv translation | ||
| ||
綴じ型式に基づいて、ジョブ ページが面付けテンプレート ページに割り付けられる順序が決まります。環境設定ダイアログ ボックスで主に使用する綴じ型式をデフォルトとして設定し、特定のプロダクトやパートで必要に応じて変更することにより、プロダクト セクションごとに綴じ型式を指定することができます。 平綴じページは、ラン リストの順序でテンプレート ページに割り付けられます。 中綴じラン リストの最初と最後から同数のページがセクションに割り付けられます。デフォルトでは最大セクションから割り付けが開始されます。 カム&ゴーカム&ゴー ジョブでは、同じプレス ランにラン リスト全体が 2 回配置され、2 つのプレス ラン セクションに自動的に分割されます。まず、最初のセクションにラン リストの順序どおりにページが配置され、次に 2 番目のセクションに逆順でラン リストが配置されるように、テンプレート ページに番号が付けられます。平綴じの冊子 2 部が同時にできあがり、共通の背で綴じた後に切り離されます。 カット&スタックこの綴じ型式では、1 シートに 2 つ(またはそれ以上)のテンプレート ページを適用して、 1 つの冊子全体をマルチシート プレス ランにレイアウトし、1 冊に仕上げます。 必要なシート数は、面付けグリッド内のページ数およびラン リスト ページの総数に基づき、ページに合わせて自動的に生成されます。1 シート目から開始して、ラン リストがすべてのシートの 1 番目のテンプレート ページ(表面および裏面)に順序どおりに配置されます。次に 1 シート目に戻り、2 番目のテンプレート ページにラン リストが順序どおりに配置され、それが繰り返されます。 1 枚もの(綴じなし)ポスター、折り込みチラシ、名刺、ビラなど、綴じないプロダクトに使用します。 綴じ型式の混在プロダクト セクションの一部に複数の綴じ型式を混在させる場合は、綴じ型式プロパティを混在にします。 |
...