Page tree

Versions Compared

Key

  • This line was added.
  • This line was removed.
  • Formatting was changed.
Comment: Removed translated content for 'de'
Sv translation
languageen

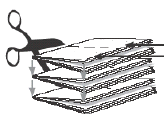
Use this 2-up layout of different sections to produce two stacks of identical books that require fewer plates and less makeready time, compared to 2-up layouts of identical sections. Come-and-go jobs are often printed on web presses and finished on 5-knife trimmers that can cut out two books at once. 
 

  1. In the Pages view, set up the product run list with the required number of PDF pages.
  2. If you are using the Press Runs view (without using the Assembly view):
    1. Use the Search tool to specify Come and Go in the Binding Style list.
      The Templates list is filtered to display only come-and-go templates.
    2. Right-click a template and select AutoSelect.
  3. If you are using the Assembly view, set up a product and part:
    1. Set up the part with the same number of pages as the run list.
    2. In the Binding Style list, select Come and Go.
    3. Select the number of pages for the Largest Section to automatically create the necessary number of sections.
    4. Select the Press Type (Sheetfed or Web).
      If you select Web, specify the number of webs.
    5. Set other part properties as needed.
    6. In the workspace, select all the sections.
      You can drag a marquee around the sections, or select one section, then press Command/Ctrl+A.
    7. In the Properties pane, select a suitable Fold Pattern.
    8. Set up other section properties as needed.
    9. Click Generate Press Runs.
      The imposition layouts are automatically generated, and the Press Runs List contains as many webs or sheetfed press runs as needed to accommodate the run-list pages.

      The printed signature from one sheet is flipped and stacked on the signature from the other sheet, resulting in two complete books that are still adjoined. One book is "coming" and the other is "going".
      The two books are then perfect-bound on a common edge, cut apart, and trimmed.
Sv translation
languagede

Mit diesem 2-up-Layout verschiedener Sektionen können Sie zwei Stapel identischer Bücher herstellen, für die im Vergleich zu 2-up-Layouts identischer Sektionen weniger Vorbereitungszeit und auch weniger Platten erforderlich sind. Jobs mit der Bindungsart „Kommen und Gehen" werden häufig auf Rollendruckmaschinen gedruckt und mit Schneidemaschinen mit 5 Messern verarbeitet, die zwei Bücher gleichzeitig schneiden können.
Image Removed

  1. Richten Sie in der Ansicht Seiten die Produktausführungsliste mit der gewünschten Anzahl an PDF-Seiten ein.
  2. Wenn Sie sich die Ansicht Druckdurchläufe (ohne die Ansicht Baugruppe) verwenden:
    1. Verwenden Sie die Suchfunktion, um Kommen und Gehen in der Liste Bindungsart anzugeben.
      Die Liste Vorlagen wird gefiltert, so dass sie nur Kommen-und-Gehen-Vorlagen anzeigt.
    2. Klicken Sie mit der rechten Maustaste auf eine Vorlage, und wählen Sie Automatische Auswahl.
  3. Wenn Sie die Ansicht Baugruppe verwenden, richten Sie ein Produkt und ein Teil ein:
    1. Richten Sie das Teil mit der gleichen Anzahl an Seiten wie die Ausführungsliste ein.
    2. Wählen Sie in der Liste Bindungsart die Option Kommen und Gehen aus.
    3. Wählen Sie die Anzahl an Seiten für die Größte Sektion aus, um die erforderliche Anzahl an Sektionen automatisch zu erstellen.
    4. Wählen Sie den Druckmaschinentyp (Bogeneinzug oder Bahn) aus.
      Wenn Sie Bahn auswählen, geben Sie die Anzahl der Bahnen an.
    5. Legen Sie die weiteren Teileeigenschaften nach Bedarf fest.
    6. Wählen Sie im Arbeitsbereich alle Sektionen aus.
      Sie können ein Auswahlrechteck um die Sektionen ziehen, oder Sie wählen eine Sektion aus und drücken dann die Tastenkombination Strg+A.
    7. Wählen Sie im Fensterbereich Eigenschaften ein geeignetes Falzmuster aus.
    8. Legen Sie die weiteren Sektionseigenschaften nach Bedarf fest.
    9. Klicken Sie auf Druckdurchläufe erstellen.
      Die Ausschieß-Layouts werden automatisch generiert, und die Liste Druckdurchläufe enthält so viele Bahnen- oder Bogendruckdurchläufe wie erforderlich, um die Seiten der Ausführungsliste zu verarbeiten. 

Image Removed
Der gedruckte Standbogen eines Blatts wird gewendet und auf dem Standbogen des anderen Blatts gestapelt, so dass zwei ganze Bücher entstehen, die aneinander angrenzen. Ein Buch „kommt" und das andere „geht".
Die beiden Bücher werden dann perfekt an einer gemeinsamen Kante gebunden, auseinander geschnitten und abgeschnitten.

Sv translation
languageit

È possibile utilizzare questo layout 2-up costituito da sezioni diverse per produrre due fascicoli di opuscoli diversi che richiedono meno lastre e meno tempo di preparazione rispetto ai layout 2-up di sezioni identiche. I processi come-and-go vengono spesso stampati su macchine da stampa a bobine e finiti con taglierine a 5 lame in grado di tagliare due opuscoli con una sola operazione.

  1. Nella visualizzazione Pagine, impostare l'elenco esecuzioni del prodotto con il numero di pagine PDF richiesto.
  2. Se si utilizza la visualizzazione Cicli di stampa (senza la visualizzazione Gruppo):
    1. Utilizzare lo strumento Cerca per impostare Come-and-Go nel'elenco Stile rilegatura.
      L'elenco Modelli è filtrato in modo che visualizzi solo i modelli come-and-go.
    2. Fare clic con il pulsante destro del mouse su un modello e selezionare Selezione automatica.
  3. Se si utilizza la visualizzazione Gruppo, è necessario impostare un prodotto e un componente:
    1. Impostare il componente con lo stesso numero di pagine dell'elenco esecuzioni.
    2. Nell'elenco Stile rilegatura, selezionare Come and Go.
    3. Selezionare il numero di pagine per la sezione più grande per creare automaticamente il numero di sezioni necessarie.
    4. Selezionare il tipo di macchina da stampa (Fogli singoli o Bobina).
      Se si seleziona Bobina, è necessario anche specificare il numero di bobine.
    5. Impostare le altre proprietà del componente desiderate.
    6. Selezionare tutte le sezioni nello spazio di lavoro.
      È possibile trascinare un riquadro attorno alle sezioni oppure selezionare una sezione e premere Comando/Ctrl+A.
    7. Nel riquadro Proprietà selezionare uno schema di piegatura adatto.
    8. Impostare le altre proprietà della sezione desiderate.
    9. Fare clic su Genera cicli di stampa.

Vengono automaticamente generati i layout dell'imposizione e l'Elenco dei cicli di stampa contiene tutti i cicli di stampa a bobine o fogli singoli necessari per contenere le pagine dell'elenco esecuzioni.

La segnatura stampata di un foglio viene capovolta e fascicolata sulla segnatura dell'altro foglio in modo da ottenere due opuscoli completi ancora uniti. Un opuscolo "viene" e l'altro "va".
I due opuscoli vengono quindi fascicolati con cucitura a colla lungo un bordo comune, tagliati e rifilati.

...