...
| language | en |
|---|
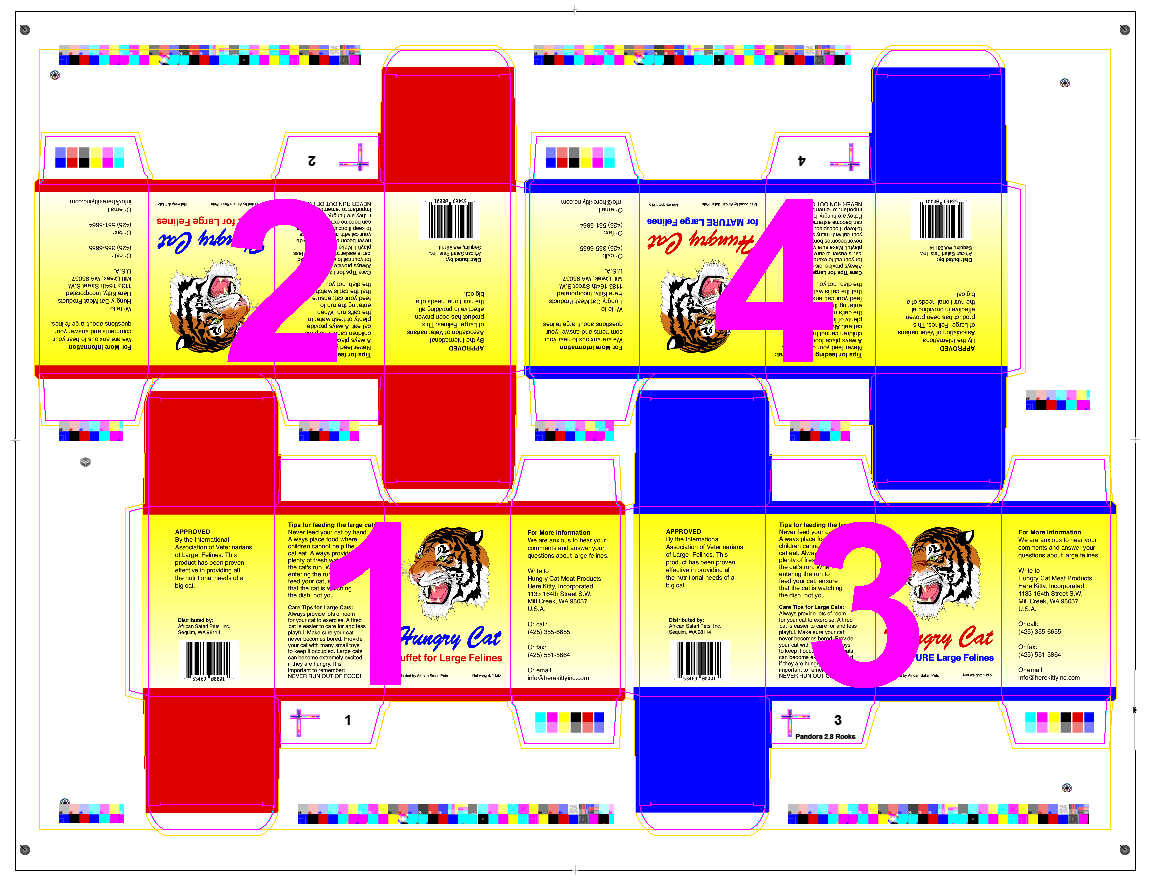
You can convert a color bar to a split color bar SmartMark that is automatically broken into multiple parts. The parts are positioned wherever there are gap areas in the die—at the top, middle, or bottom, nested between die stations—and anchored to one of the supplied gap options. Placement depends on the size of the die. The color bar swatches remain in sequence so that the ink key scanner works correctly. This flexibility in color bar placement aids in minimizing waste: you can use smaller substrate sizes, allowing for more cost-effective press runs.
Note: On two-sided layouts, split color bars are placed only on the front side.
- When you are ready to create the mark, open the Marks palette (Window menu > Show Marks Palette).
- In the Marks palette:
- Open one of your existing Color Bars or import a Color Bar that you plan to use.
- If it is not currently a SmartMark, click Convert to SmartMark. See Converting a simple mark to a SmartMark.
- To make the selected mark appear in the Placements box, in the SmartMark Settings dialog box, click New.
- With the placement you are editing highlighted, under Anchored To, select what is required from the supplied Gap options.
Note: Gap includes all of the individual Gap options (Top Gap, Center Gap, and Bottom Gap). - Select any additional settings you want to apply to the mark.
- Perform one of the following actions:
- To save it as a new Split Color Bar SmartMark, click Save As, browse to the location of the folder in which you want to save it, type a name for it in the Name box, and click Save.
- To replace the original mark with the newly-created Split Color Bar SmartMark (in its original location), click Save.
- On the Marks palette, click the option arrow and select Refresh.
The new Split Color Bar SmartMark is now available on the Marks palette.
...
| language | zh |
|---|
可将一个颜色条转换为自动分成多个部分的分割颜色条 SmartMark。可确定各部分的位置,只要刀版中有空隙区域即可,无论在顶部、中间、底部,还是嵌在刀版台之间,并锚定到所提供的其中一个空隙选项。放置位置取决于刀版的大小。颜色条样板按顺序留置,以便墨键扫描器正常工作。颜色条放置的这种灵活性可帮助最大程度地减少浪费:您可以使用较小的承印物尺寸,实现更经济高效的印刷运行。
注意:在双面版式上,分割颜色条仅放置在正面。
如果您不想创建您自己的分割颜色条,Kodak 提供 4 个示例标记,实现 6 色用法(请参见Color bars):
CB_SplitAllGaps.pdf(包括所有间距选项:顶部、中央和底部)CB_SplitTopGaps.pdfCB_SplitCenterGaps.pdfCB_SplitBottomGaps.pdf
...
- 打开一个您现有的颜色条,或导入您打算使用的颜色条。
- 如果它当前不是 SmartMark,请单击转换为 SmartMark。请参阅 Converting a simple mark to a SmartMark。
...
- 要另存为新的分割颜色条 SmartMark,请单击另存为,浏览到想要在其中保存的文件夹的位置,在名称框中键入名称,然后单击保存。
- 要用新创建的分割颜色条 SmartMark 替换原来的标记(在其原来位置),请单击保存。
...
If you do not want to create your own split color bars, Kodak supplies four sample marks for 6-color usage (see Color bars):
CB_SplitAllGaps.pdf(includes all of the individual gap options: Top, Center, and Bottom)CB_SplitTopGaps.pdfCB_SplitCenterGaps.pdfCB_SplitBottomGaps.pdf