| Sv translation | |||||||||||||||||||||||||||||||||
|---|---|---|---|---|---|---|---|---|---|---|---|---|---|---|---|---|---|---|---|---|---|---|---|---|---|---|---|---|---|---|---|---|---|
| |||||||||||||||||||||||||||||||||
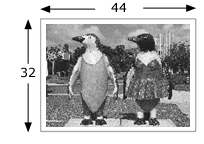
In this example you need two tiles. To create the tiles, Tiling output in Prinergy Evo. Anchor | | Bookmark582_topic1254__table_B021816D8F6 | Bookmark582_topic1254__table_B021816D8F6
| Bookmark582_topic1254__image_E0782A0B98D | Bookmark582_topic1254__image_E0782A0B98D | ||||||||||
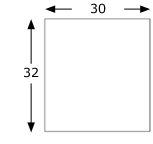
| Anchor | Bookmark582_topic1254__fig_C016BFF0B8054 | Bookmark582_topic1254__fig_C016BFF0B8054 | Tile 1 | Bookmark582_topic1254__image_31290AF67AE | Bookmark582_topic1254__image_31290AF67AE||||||||
|---|---|---|---|---|---|---|---|---|---|---|---|---|
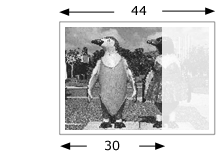
| Anchor | Bookmark582_topic1254__fig_EAC4927C26F14 | Bookmark582_topic1254__fig_EAC4927C26F14 | ||||||||||
| Tile 2 |

Using the same technique, you can also tile vertically to create a four-tile imposition.
| Sv translation | ||||||||||||||||||||||||||||||||||||||||||||||||||||||||||||||||||
|---|---|---|---|---|---|---|---|---|---|---|---|---|---|---|---|---|---|---|---|---|---|---|---|---|---|---|---|---|---|---|---|---|---|---|---|---|---|---|---|---|---|---|---|---|---|---|---|---|---|---|---|---|---|---|---|---|---|---|---|---|---|---|---|---|---|---|
| ||||||||||||||||||||||||||||||||||||||||||||||||||||||||||||||||||
Dans cet exemple, il vous faut deux morceaux : Pour créer les morceaux, reportez-vous à la section Morcellement de la sortie dans Prinergy Evo.
En utilisant la même technique, vous pouvez également morceler verticalement l'image et créer une imposition 4 poses. |
...