| Sv translation | ||
|---|---|---|
| ||
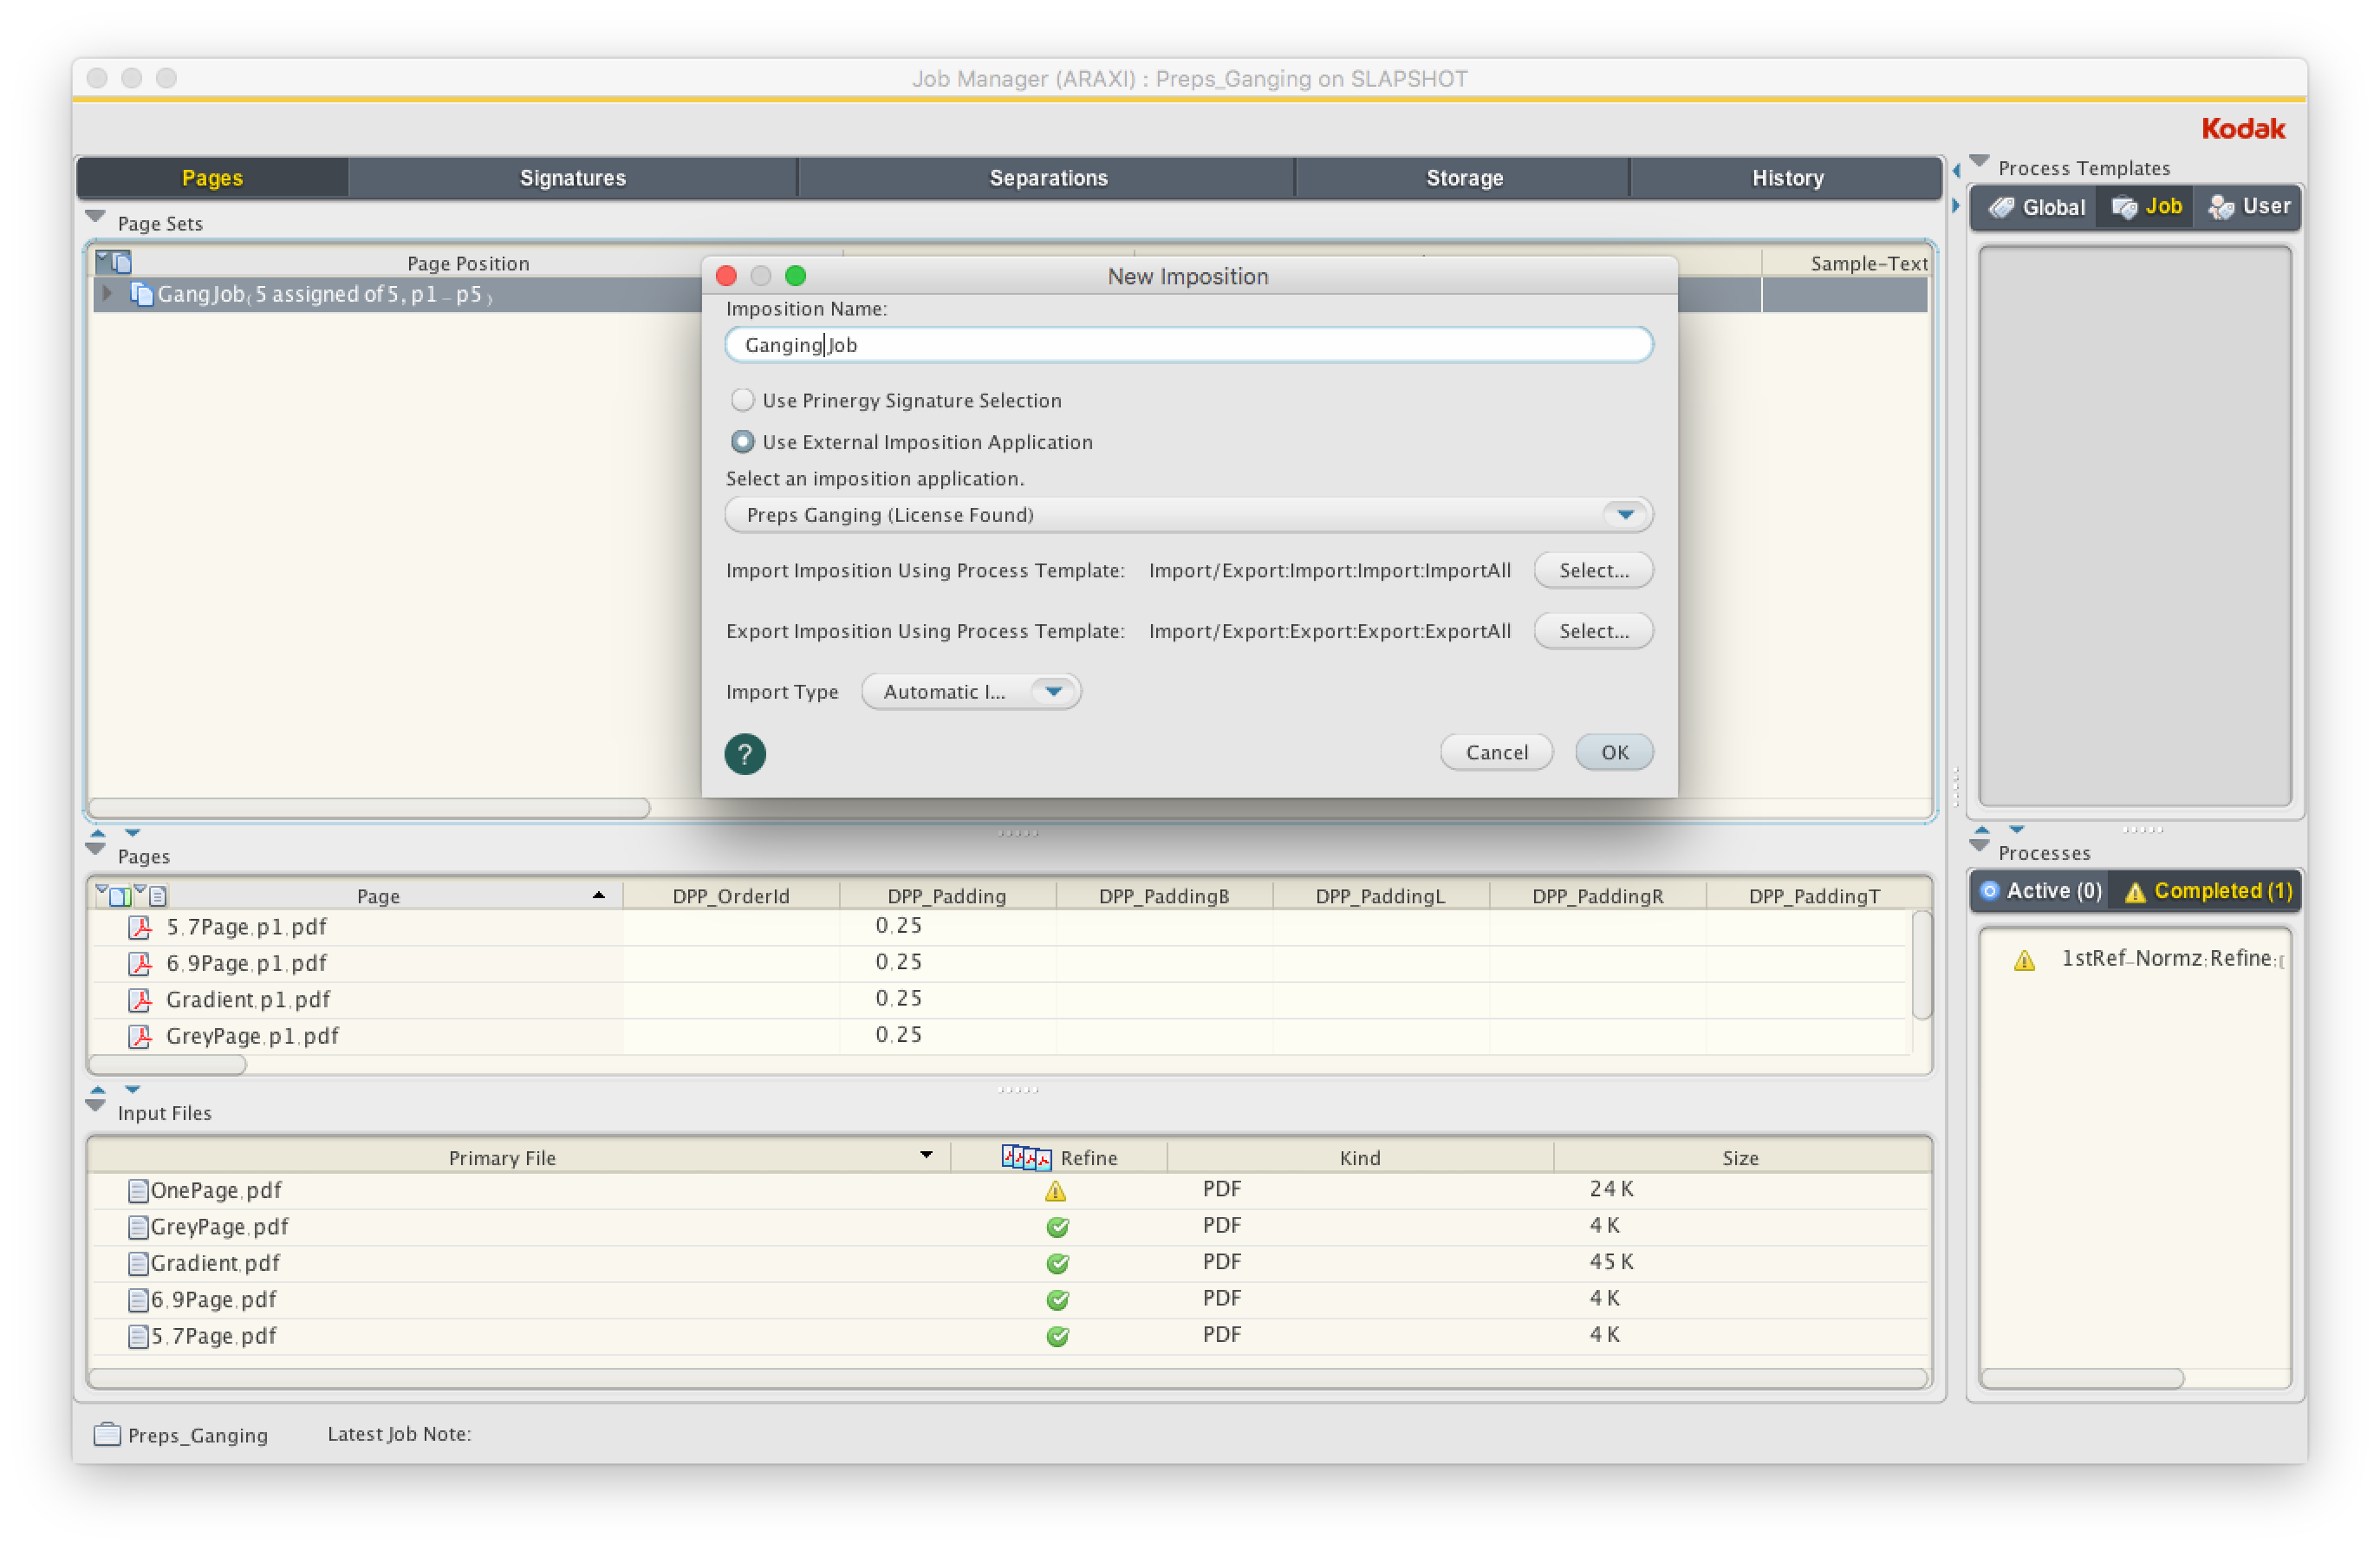
Create a layout using Preps Ganging integrated with Prinergy in order to have Prinergy automatically import the layout.
For a new imposition, Preps creates the imposition file (JDF) and marks files, and Prinergy automatically imports the imposition file and marks files. The imported Preps Ganging imposition files are saved in the |
| Sv translation | ||
|---|---|---|
| ||
Créez une mise en page à l'aide de Preps Ganging intégré avec Prinergy afin que Prinergy importe automatiquement la mise en page.
Les fichiers d'imposition de Preps Ganging importés sont enregistrés dans le dossier |
| Sv translation | ||
|---|---|---|
| ||
用与印能捷集成的 Preps Ganging 创建版式,从而使印能捷能够自动导入版式。
导入的 Preps Ganging 拼版文件保存在 |
| Sv translation | ||
|---|---|---|
| ||
Erstellen Sie mit der in Prinergy integrierten Preps Ganging-Software ein Layout, das automatisch von Prinergy importiert wird.
Die importierten Preps Ganging-Ausschießdateien werden im Ordner <Job-Ordner>\System\ImpositionPlans gespeichert. Der Preps-Job, die PJTF-/JDF- und die Markendateien werden im Ordner <Job-Ordner>\TransientLayouts\<Clientcomputername> gespeichert. |
| Sv translation | ||
|---|---|---|
| ||
Prinergy でレイアウトを自動インポートするために、Prinergy に統合された Preps Obari を使用してレイアウトを作成します。
インポートされた Preps Obari 面付けファイルは、 |
| Sv translation | ||
|---|---|---|
| ||
Es posible crear un diseño usando Preps Ganging integrado con Prinergy a fin de que Prinergy importe automáticamente el diseño.
Los archivos de imposición importados de Preps Ganging se guardan en la carpeta <carpeta de |
| Sv translation | ||
|---|---|---|
| ||
Create a layout using Preps Ganging integrated with Prinergy in order to have Prinergy automatically import the layout.
For a new imposition, Preps creates the imposition file (JDF) and marks files, and Prinergy automatically imports the imposition file and marks files. The imported Preps Ganging imposition files are saved in the |