| Anchor |
|---|
| Bookmark577_topic1254__table_55F2AA16CA8 |
|---|
| Bookmark577_topic1254__table_55F2AA16CA8 |
|---|
|
| Anchor |
|---|
| Bookmark577_topic1254__image_56B3C3604B9 |
|---|
| Bookmark577_topic1254__image_56B3C3604B9 |
|---|
|
| Anchor |
|---|
| Bookmark577_topic1254__fig_F96295D2A97E4 |
|---|
| Bookmark577_topic1254__fig_F96295D2A97E4 |
|---|
|
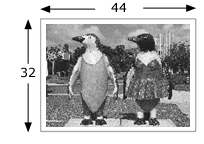 Image Added Image Added
dimensions de l'image | | Anchor |
|---|
| Bookmark577_topic1254__image_578CC87399F |
|---|
| Bookmark577_topic1254__image_578CC87399F |
|---|
|
| Anchor |
|---|
| Bookmark577_topic1254__fig_36D5894B8F274 |
|---|
| Bookmark577_topic1254__fig_36D5894B8F274 |
|---|
|
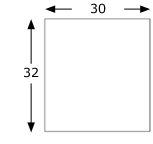 Image Added Image Added
dimensions de l'épreuve |
Dans cet exemple, il vous faut deux morceaux : Pour créer les morceaux, reportez-vous à la section Morcellement de la sortie dans Prinergy Evo. | Anchor |
|---|
| Bookmark577_topic1254__table_B021816D8F6 |
|---|
| Bookmark577_topic1254__table_B021816D8F6 |
|---|
|
| Anchor |
|---|
| Bookmark577_topic1254__image_E0782A0B98D |
|---|
| Bookmark577_topic1254__image_E0782A0B98D |
|---|
|
| Anchor |
|---|
| Bookmark577_topic1254__fig_C016BFF0B8054 |
|---|
| Bookmark577_topic1254__fig_C016BFF0B8054 |
|---|
|
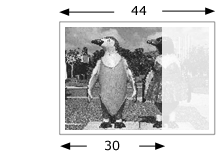 Image Added Image Added | Morceau 1
L'image est automatiquement tronquée à droite en raison de la taille du support d'épreuves (30 pouces). | | Anchor |
|---|
| Bookmark577_topic1254__image_31290AF67AE |
|---|
| Bookmark577_topic1254__image_31290AF67AE |
|---|
|
| Anchor |
|---|
| Bookmark577_topic1254__fig_EAC4927C26F14 |
|---|
| Bookmark577_topic1254__fig_EAC4927C26F14 |
|---|
|
 Image Added Image Added
L'image est décalée vers la gauche. | Morceau 2
Pour le modèle de processus Morceau 2, spécifiez un décalage approprié dans le champ Décaler horizontalement.
Dans cet exemple, la valeur -14 est spécifiée.
Le signe moins indique que l'image est décalée vers la gauche. L'image est donc décalée horizontalement vers la gauche de 14 pouces.
Les deux images seront juxtaposées de 16 pouces sur le système d'épreuves. |
En utilisant la même technique, vous pouvez également morceler verticalement l'image et créer une imposition 4 poses. |