No Translation available yet
You have Spanish selected as language but this page has not been translated yet. Translate the page or view the content in the default space language below.
Display default
SmartMarks can be anchored to the points that you specify on press sheets, pages, page bleeds, or media. You can set horizontal and vertical offsets to allow space between the mark image and component anchor points.
When adding most SmartMarks to a press-run layout, you choose the layout component to which you are adding the mark, and then you select two anchor points: on the rectangle that represents the mark image and the rectangle that represents the component.
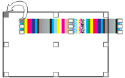
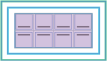
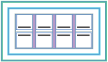
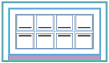
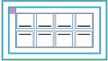
For example, selecting the upper-left anchor points: 
Results in this mark position:
Anchor-to component | Rectangle description |
Press sheet
 | Dimensions of the stock resource |
Media
 | Dimensions and position of the media resource
Note: To print marks that extend off the sheet when the media is smaller than the sheet, use a Press Sheet Size media resource that is configured with an extra margin. |
Page or page bleed
 | Trim or bleed dimensions of a template page or ganged page group
Note: A page-anchored mark is placed on all instances of the page and shifts to match any page orientation changes. |
Imposition or Imposition with bleeds
 | Farthest extents of the trim boxes or the bleed boxes of all pages in an imposition |
Gutter (horizontal, vertical)
 | Set of horizontal or vertical rectangles between trim boxes of the pages of an imposition and between the opposing edges of the imposition-with-bleeds rectangle |
Margin (top, bottom, left, right)
 | Rectangle between the corresponding edges of the imposition and press sheet, and between the opposing edges of the imposition |
Margin (top left, top right, bottom left, bottom right)
 | Rectangle between the corresponding corners and edges of the imposition and press sheet |